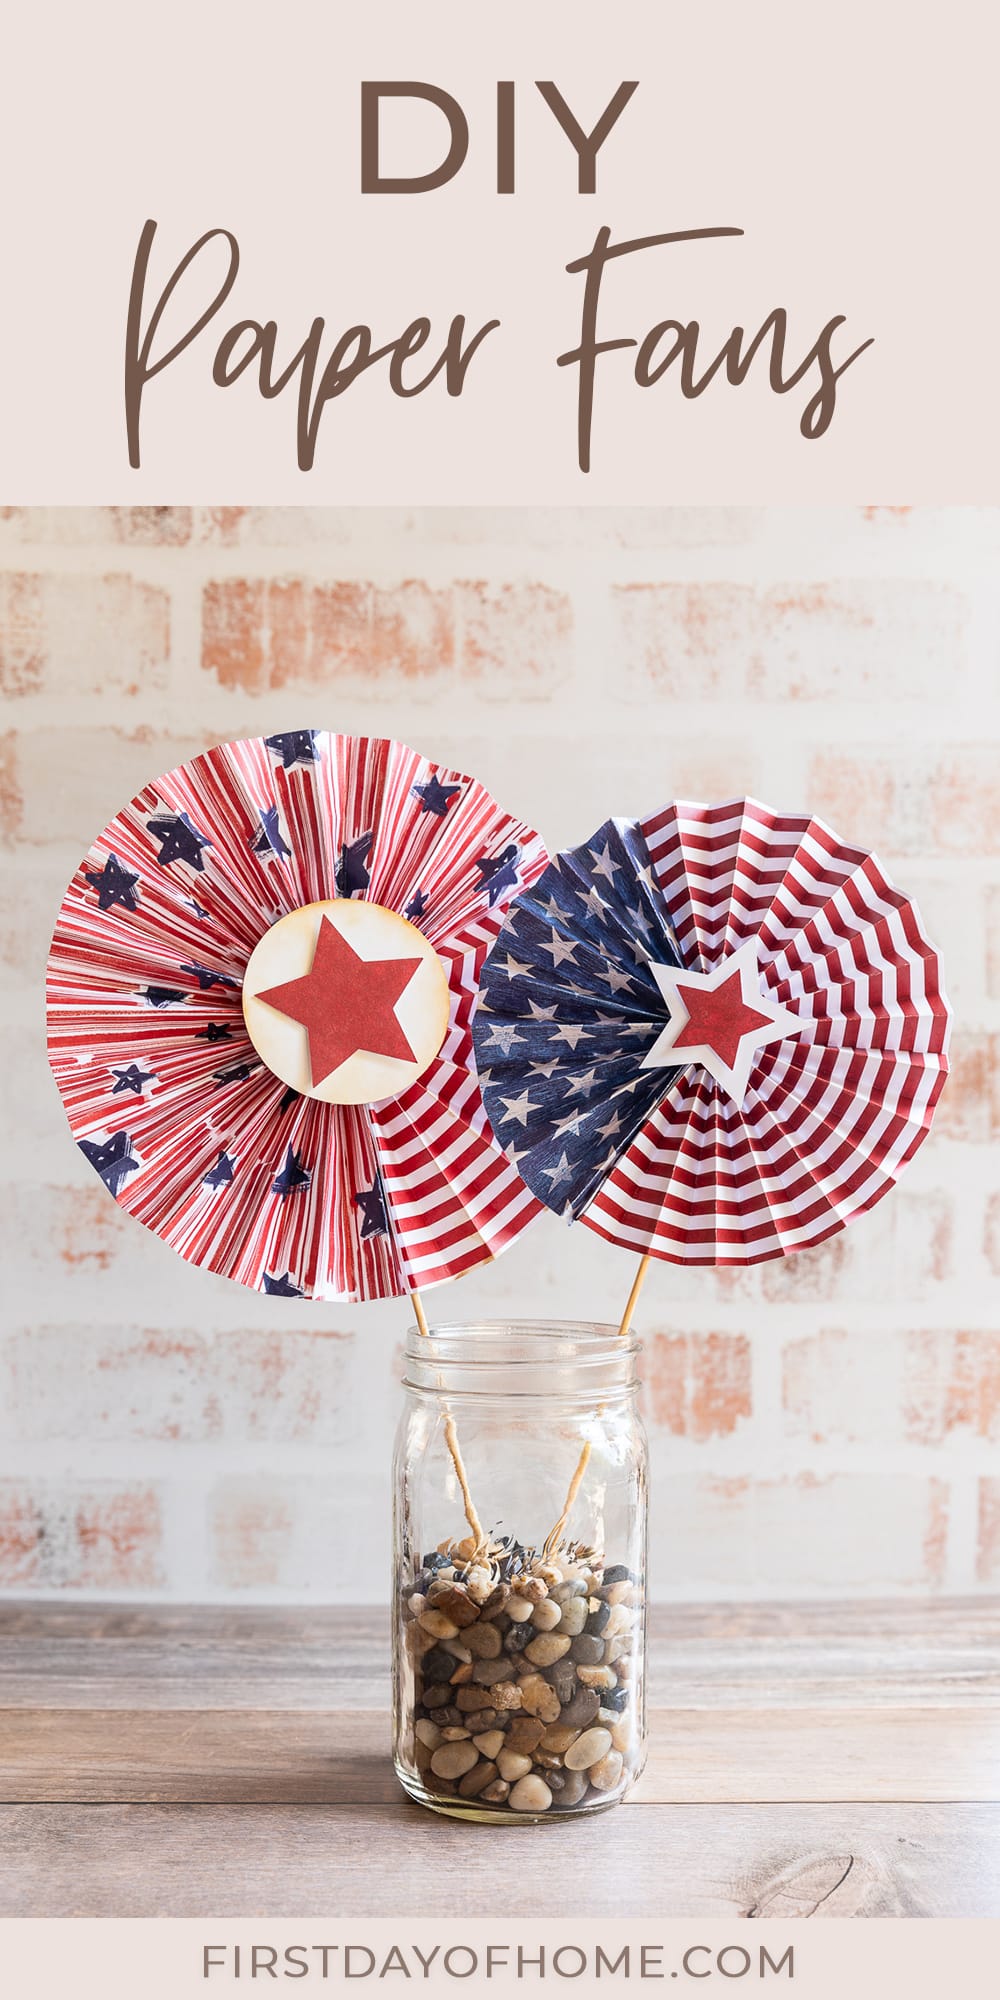
Easy DIY Paper Fans Tutorial
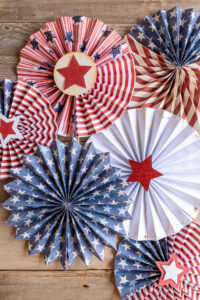
When I bought paper fans (on sale) from Pottery Barn a few years ago, I became obsessed with the idea of making my own. As it turns out, making beautiful, reusable paper fans is easier than you think! It’s the perfect craft for the whole family. I’ll show you how to make patriotic fans for the 4th of July, but you can repurpose these for any holiday or party.
This post contains affiliate links, and I will be compensated if you make a purchase after clicking on my links. For more information, please see my disclosures.
How to Make Paper Fans
I’ve always been a fan of DIY party decor. After creating these multicolor paper pom-poms, I became hooked on using paper crafts to decorate for parties.
The inspiration for these paper fans came from an earlier 4th of July decor post. I had purchased a fancy set of paper stars and fans on clearance to decorate my patio in red, white, and blue. It didn’t take long before I got the itch to create my own (as I often do). You’ll be pleasantly surprised how easy these are to make and customize.
Supplies
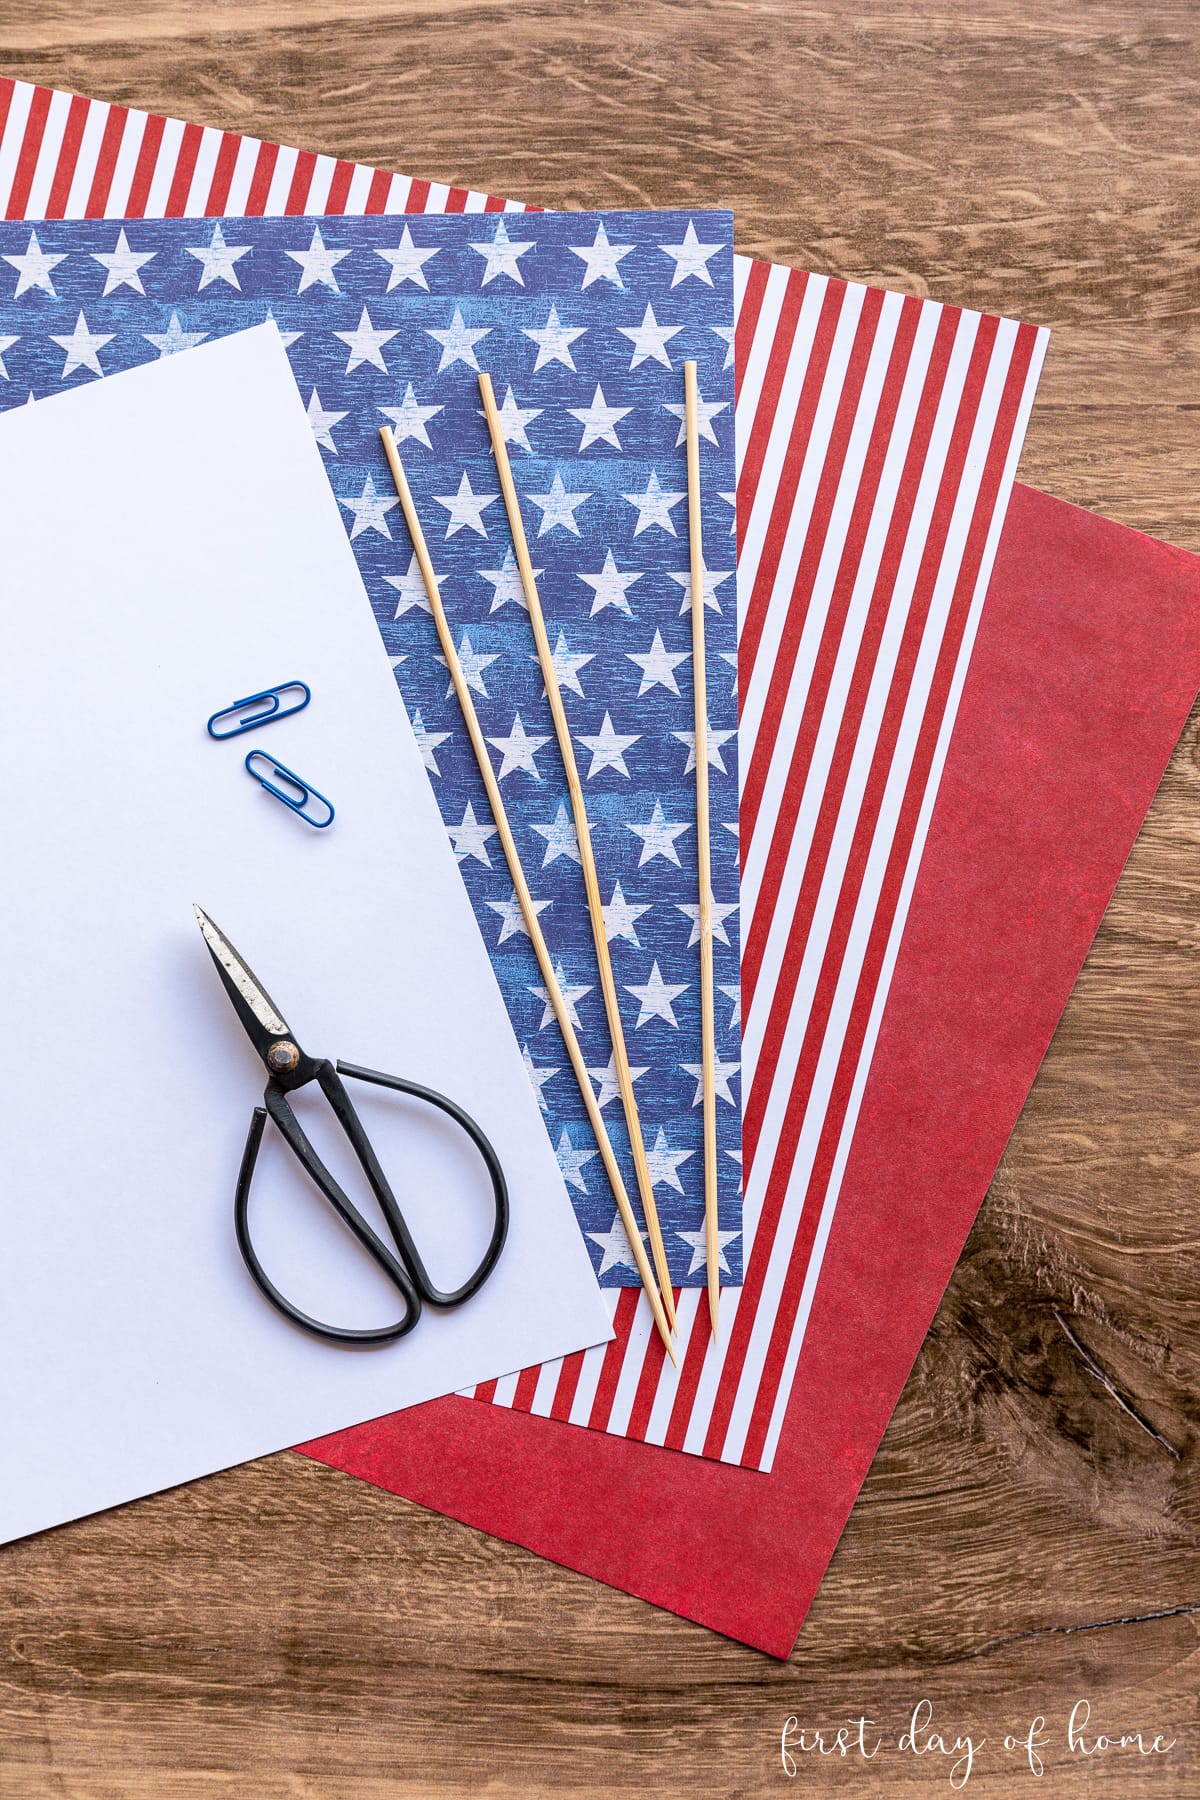
- Scrapbook paper (8.5 x 11 inches or 12 x 12)
- White cardstock
- Scissors or paper trimmer
- Wooden skewers, string, or popsicle sticks
- Hot glue or craft glue
- Paper clips
Step 1: Cut strips of paper into equal segments
Begin by cutting three strips of paper to measure 3.24 x 11 inches (small fan) or 4 x 11 inches (large fan). The width doesn’t matter so long as all of the strips of paper are of equal size.
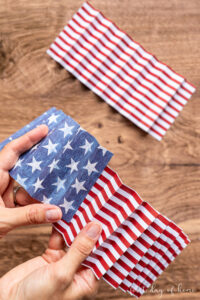
You can choose a single color for your paper fans or mix and match different patterns like I’m doing to celebrate the 4th of July.
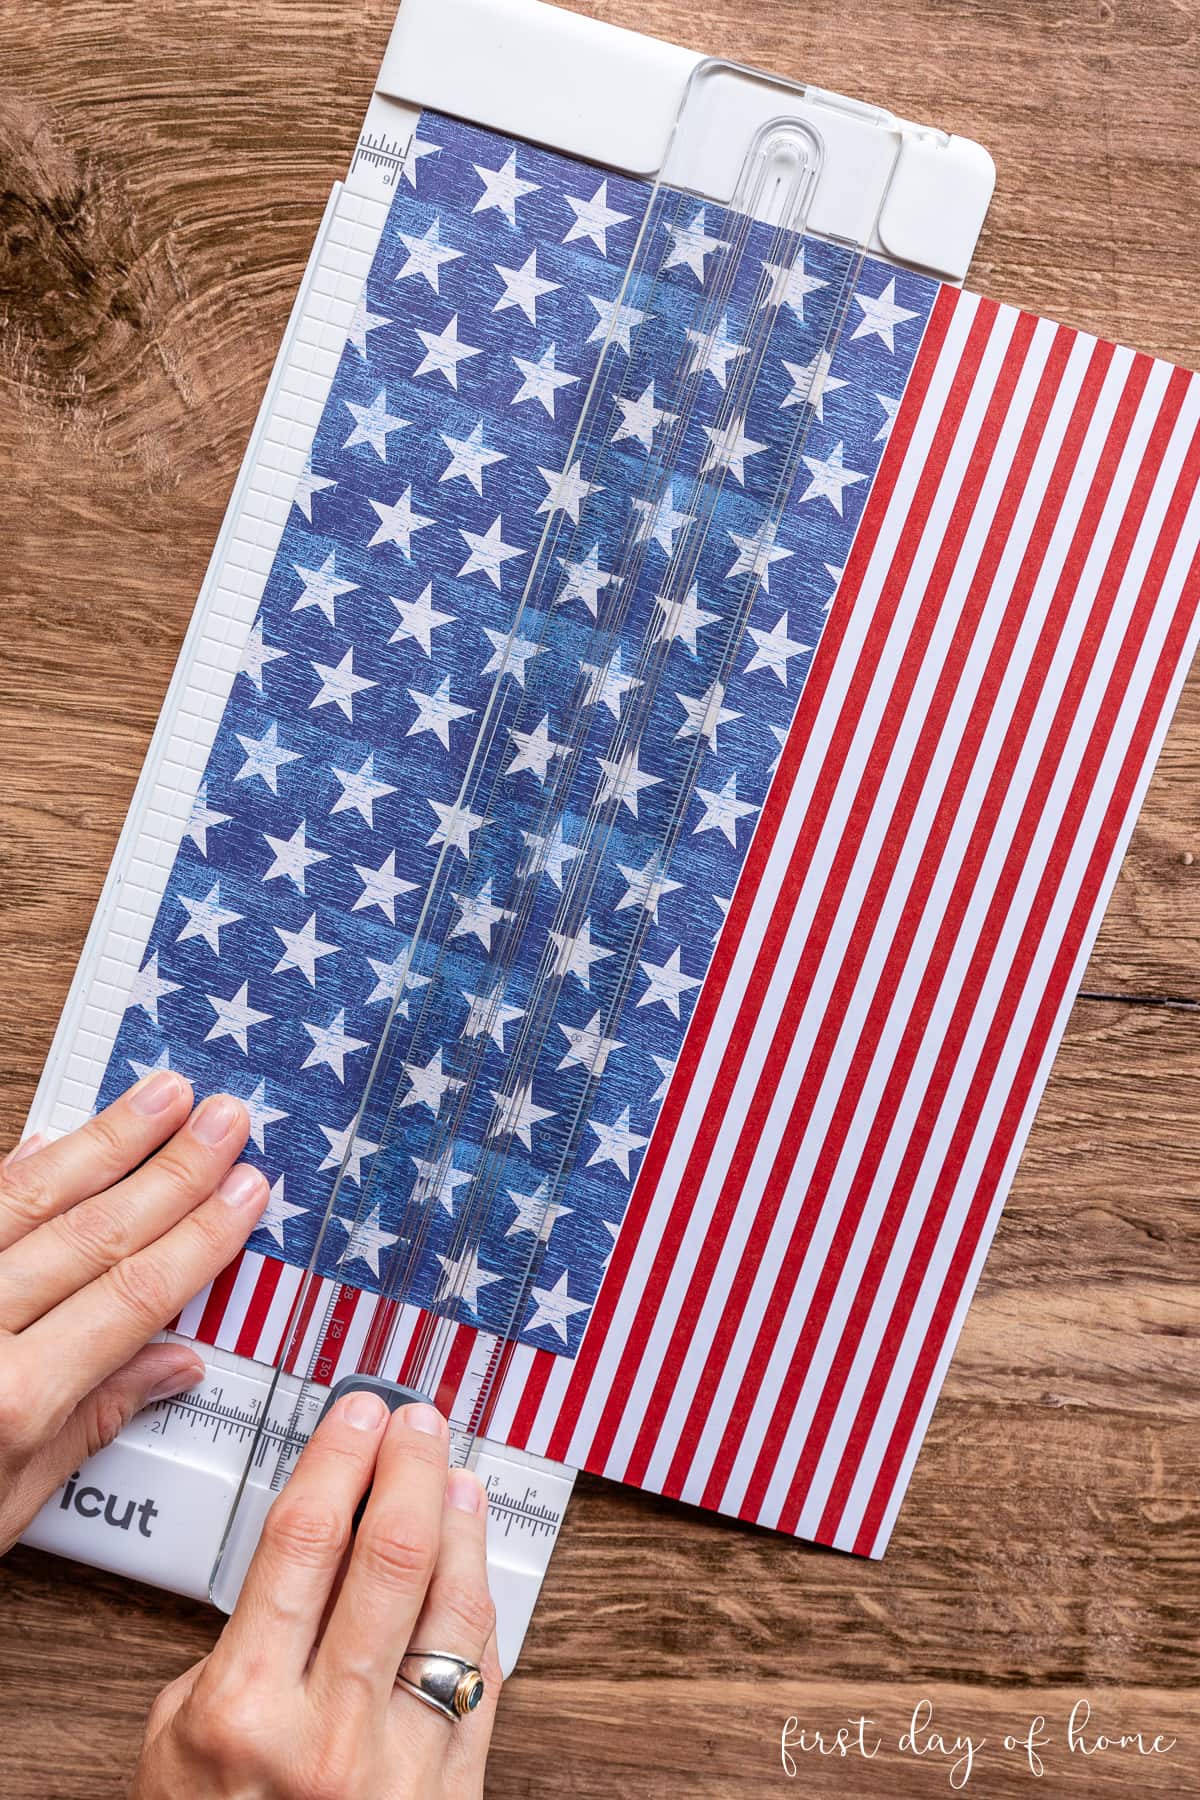
I like to use my paper trimmer to speed up this process, but you can also use household scissors.
Note: You can simplify your fan by using only one segment of paper and stapling the end after folding. This is a good approach if doing this craft with young children.
Step 2: Accordion-fold the strips of paper

To form the paper fans, start by folding the strips of paper in half repeatedly, as shown above. This ensures that the folded segments will look more uniform in size. Continue until each strip of paper is folded into segments about 3/4 inch wide (like an accordion).
If you prefer the fold the paper back and forth like an accordion, try to make sure the segments are as consistent as possible. Kids may find it easier to accordion-fold the paper. You can then trim off any excess when you are done.
Step 3: Glue the three strips of paper together

Once all three strips of paper are folded back and forth like an accordion, overlap the end pieces, tucking one end underneath the other, as shown above.
Then glue it in place with craft glue or hot glue. (You may need to re-fold one strip of paper in the opposite direction if the paper doesn’t overlap naturally.)
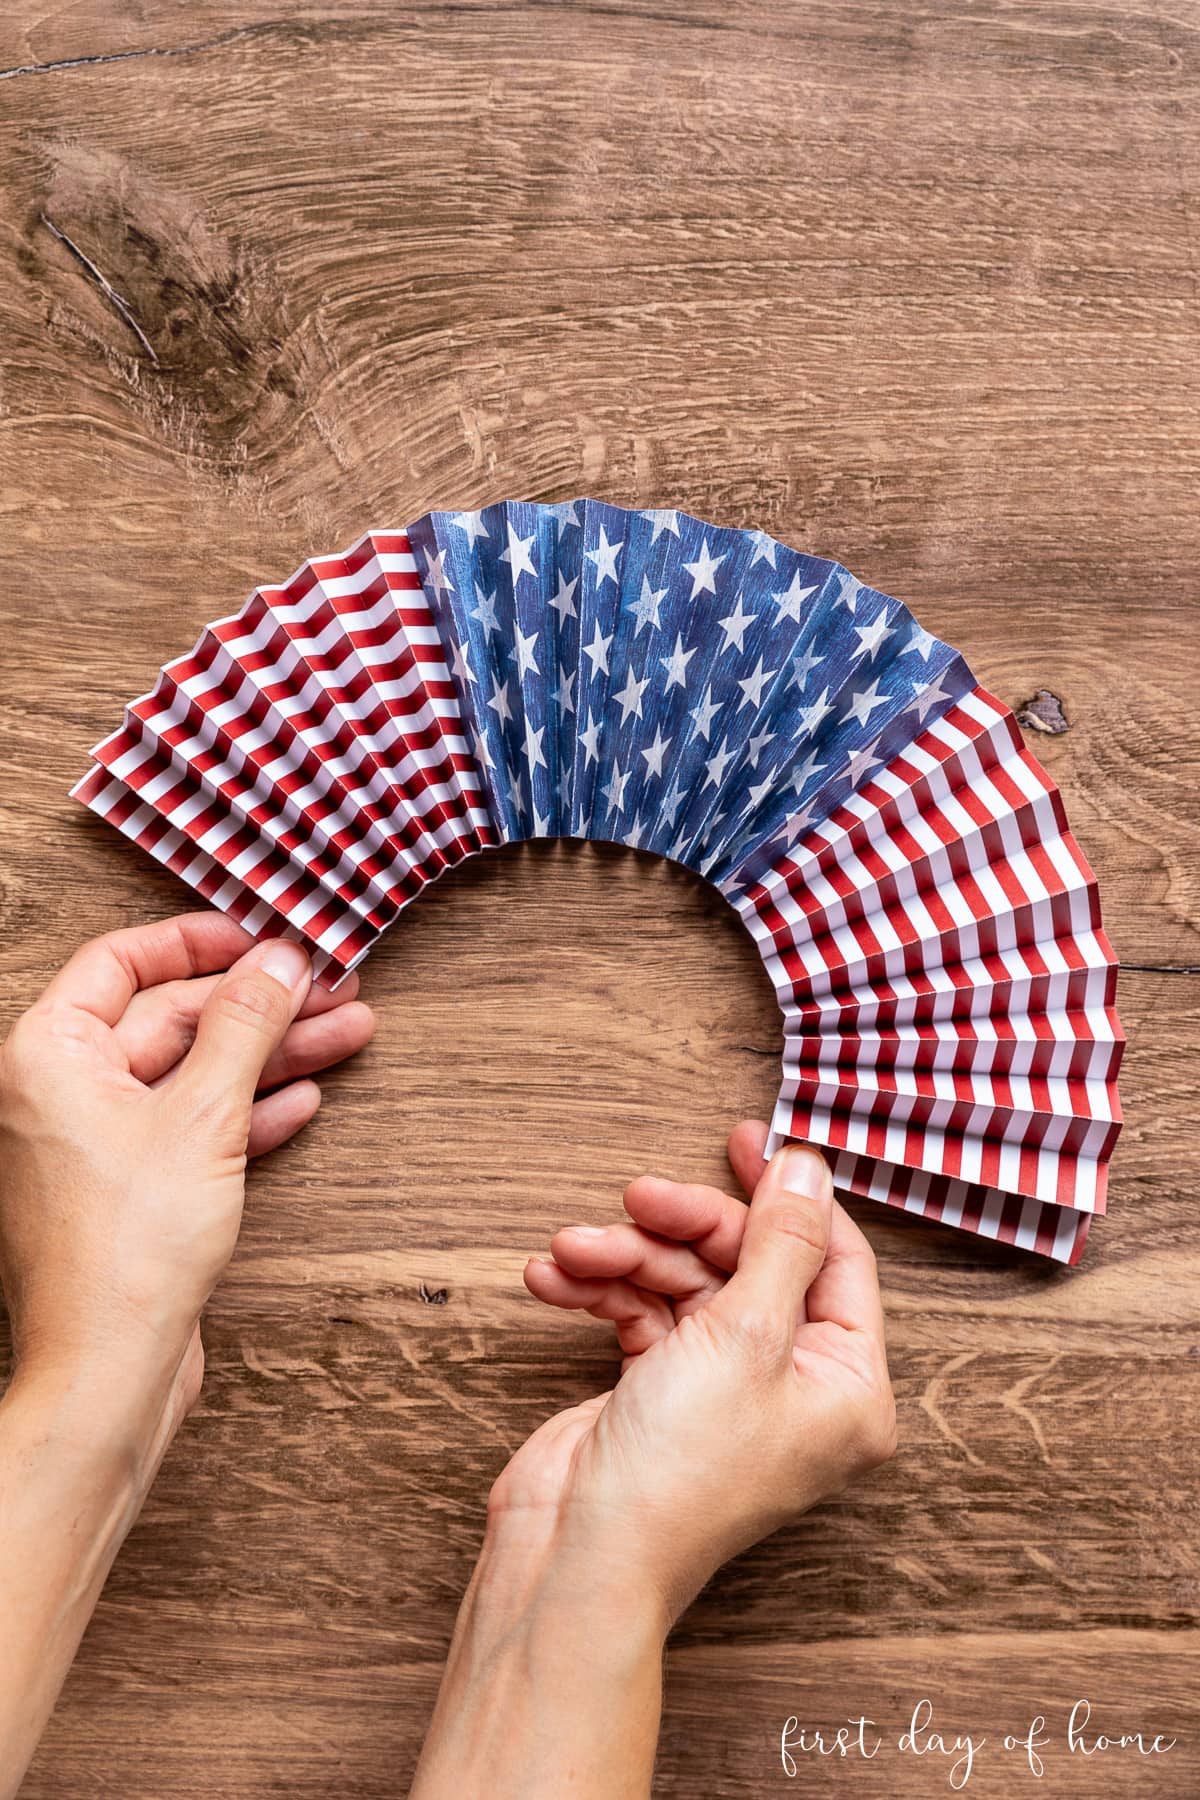
Once the three strips are glued together, it will look something like the photo above.
Step 4: Attach cardstock to one end of the paper fan

Cut a strip of cardstock just a bit smaller than the fan segments, and glue it tightly to one end of the paper fan like a clip. Be sure to press the entire bottom edge of the paper fan into the cardstock strip.
This will secure the fan pieces together and make this paper fan reusable. (You’ll see what I mean in a moment.)
I highly recommend this brand of glue sticks for a tighter bond. I use it with my cordless mini glue gun for paper crafts like this where I need small dabs of glue.
Step 5: Open the fan and secure it in back
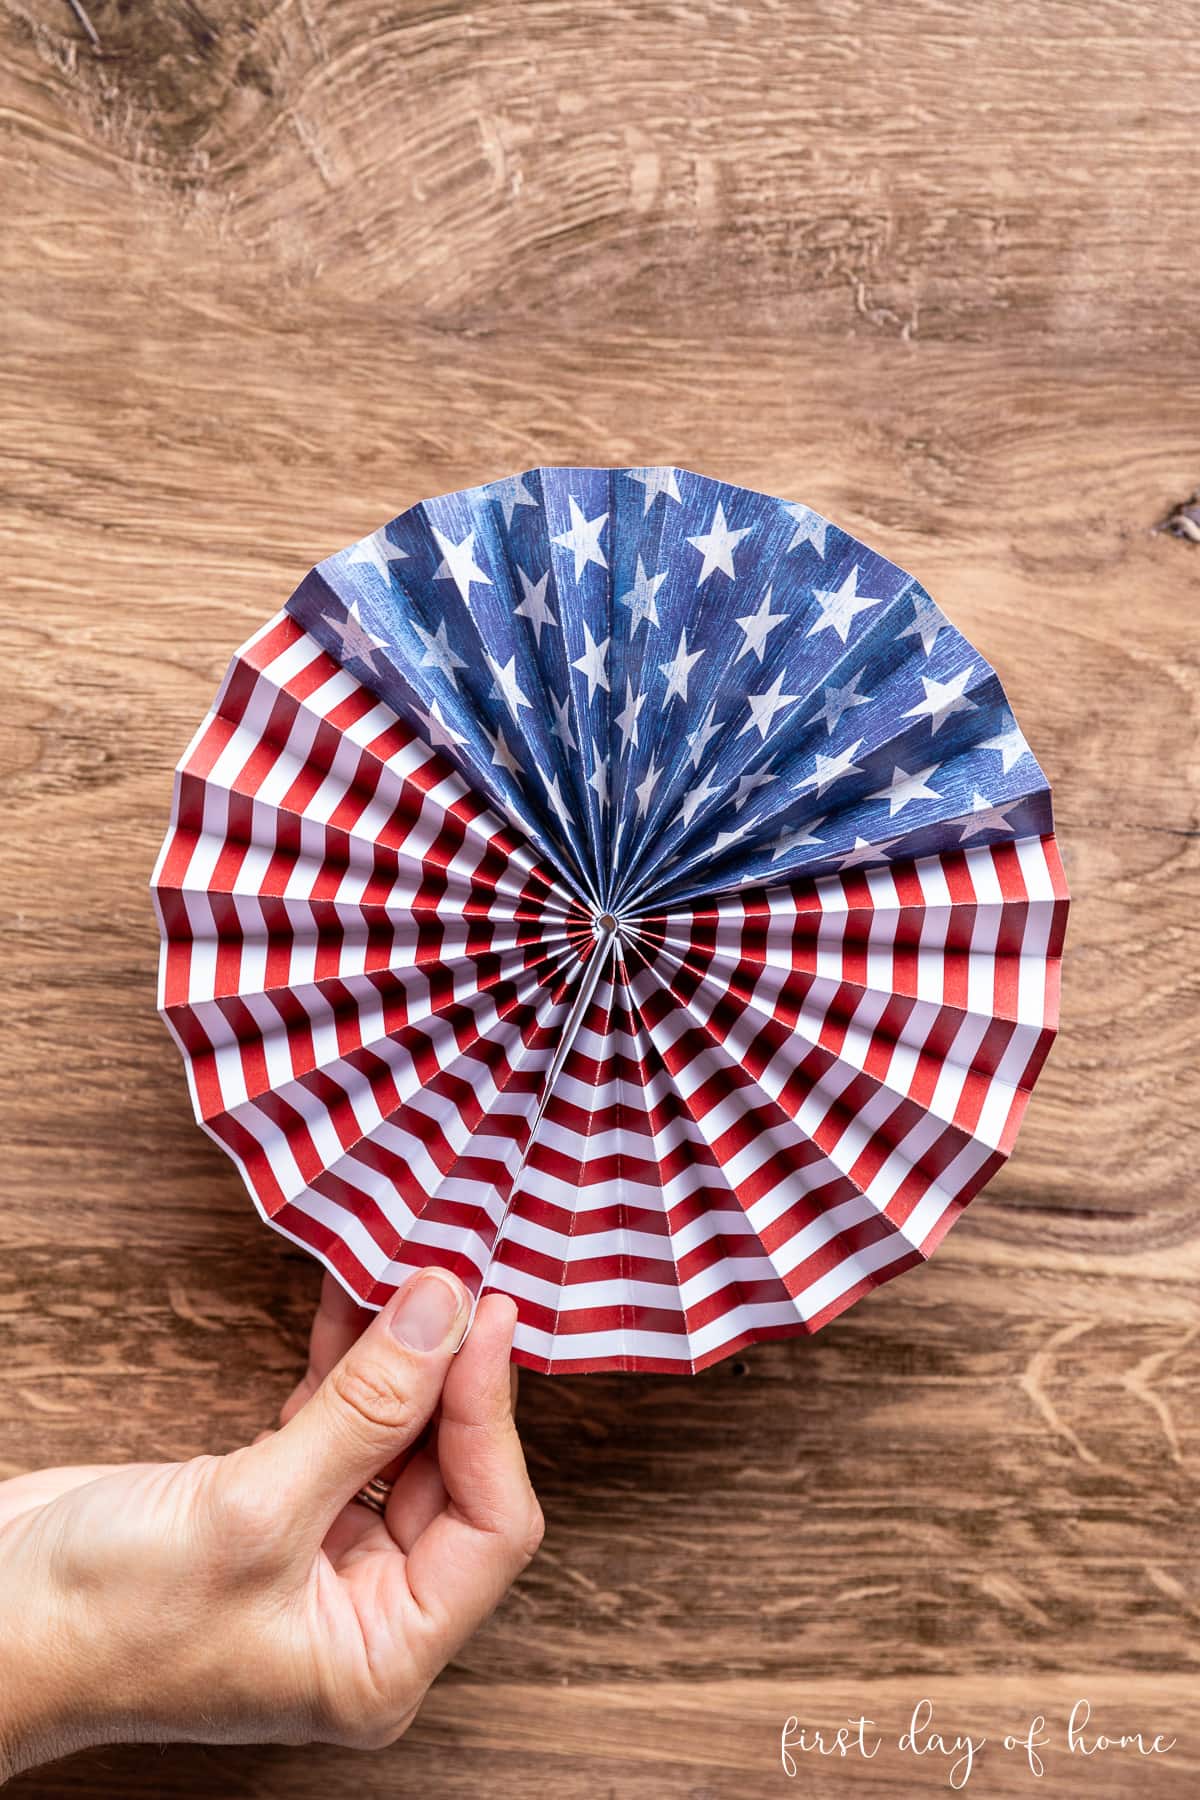
Once the glue has dried, you can open the paper fan for your big reveal. By adding the cardstock on the bottom, we’ve created a paper fan that you can open and close for easy storage.

Rather than gluing your fan closed, use paper clips so you can fold the fan up again for easy storage. Then you have a few options for displaying your DIY party decor.
Decorating with Paper Fans
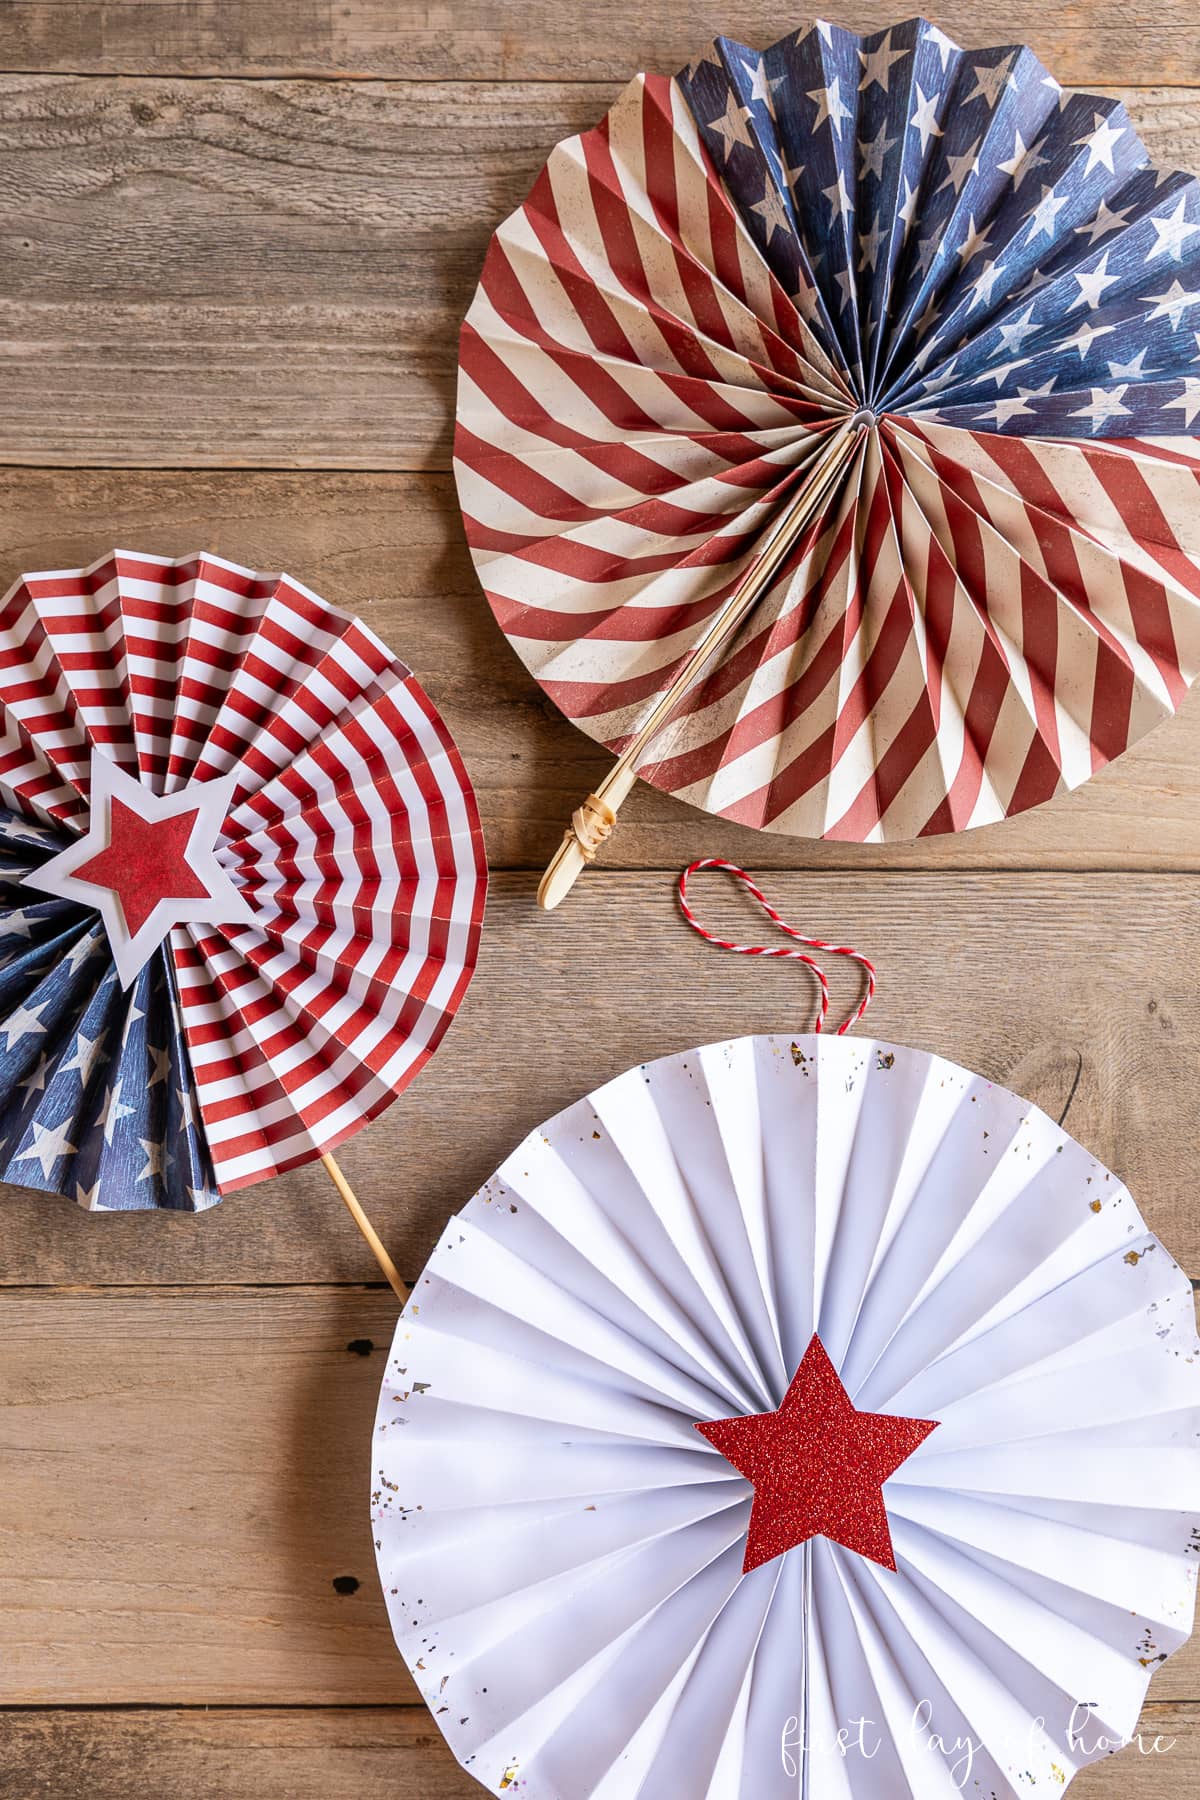
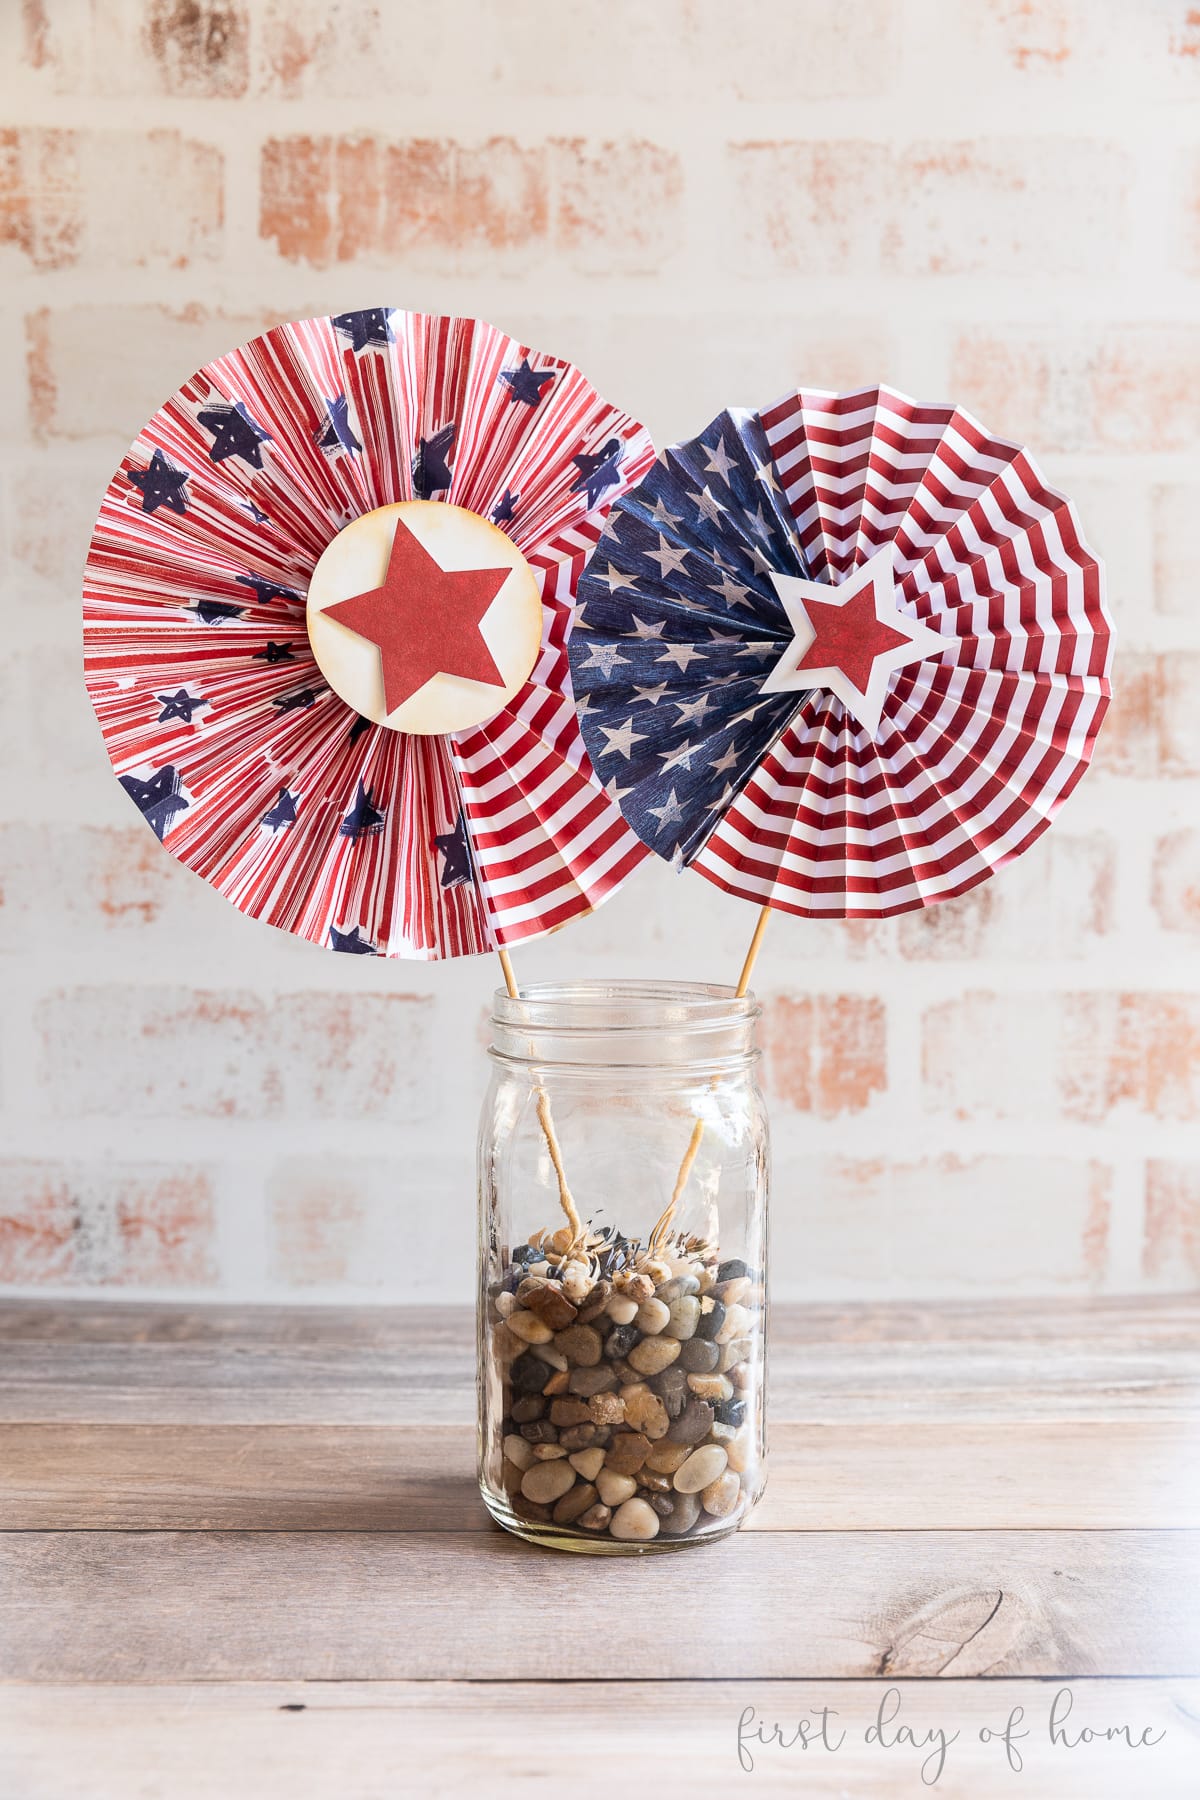
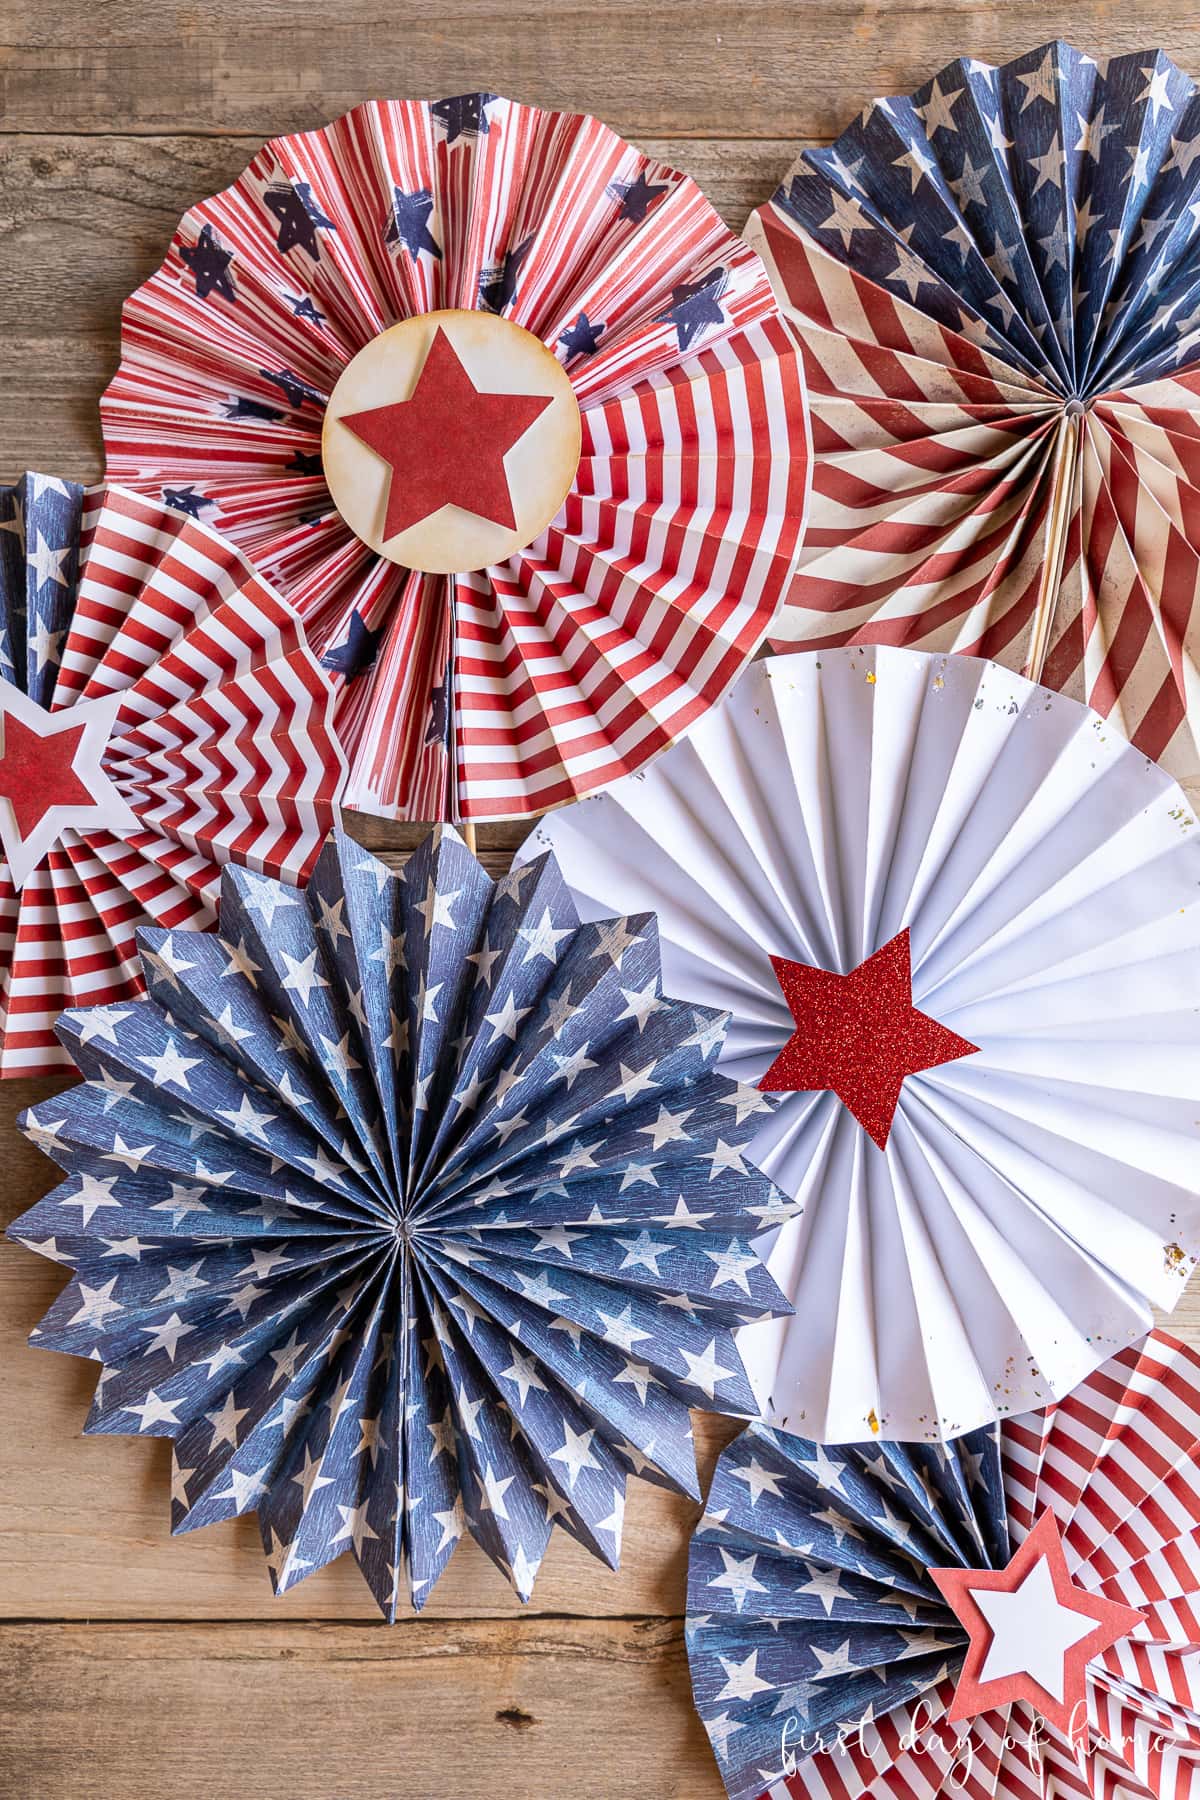
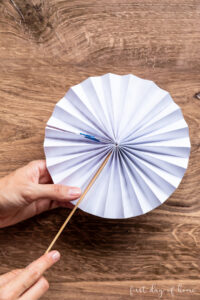
You can add wooden skewers, a string for hanging, or popsicle sticks to make a paper fan that can be used as…well…an actual fan! I also added some paper stars that I cut with my Cricut machine as well as some glitter paint around the edges.
By adding skewers to your paper fans, you can stick them in a planter as I did for an easy 4th of July centerpiece. Watch the whole thing come together in this Instagram reel.
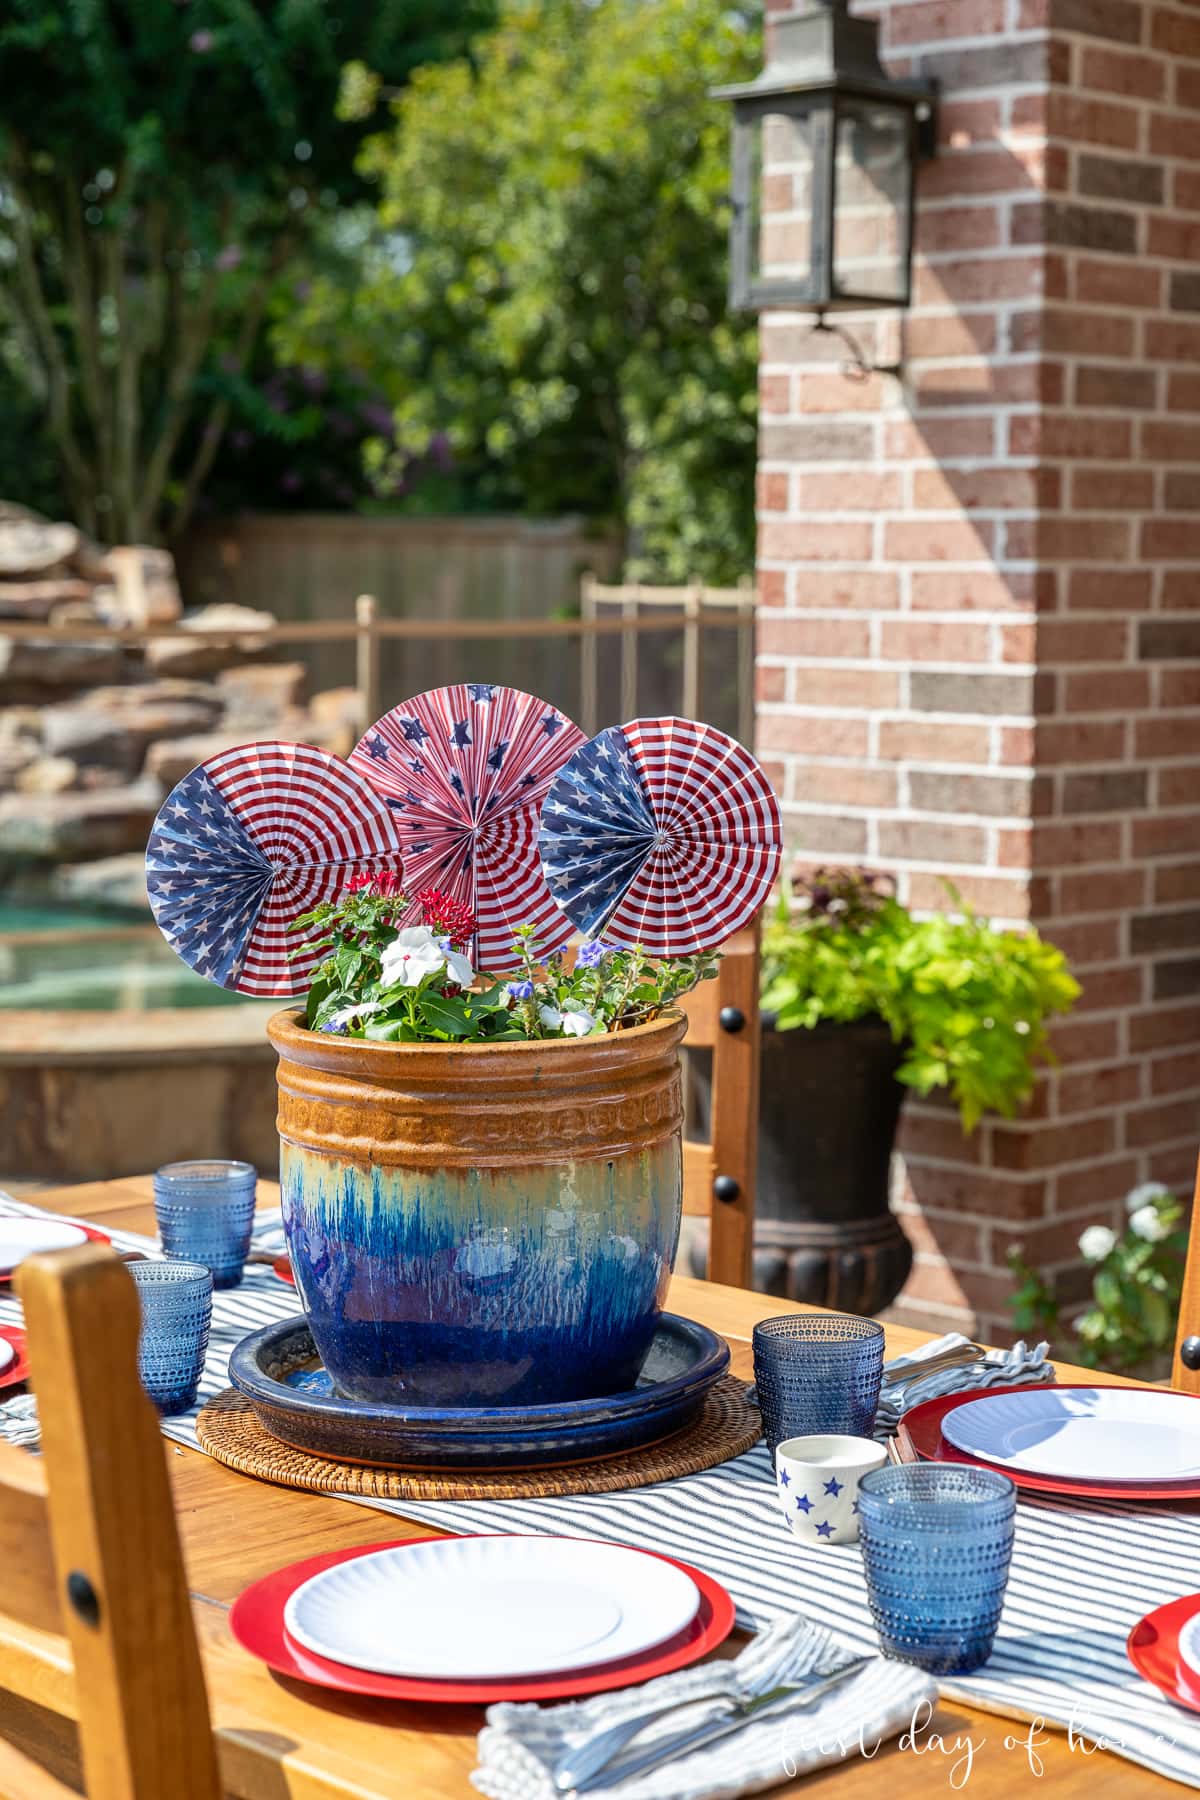
Add some vase filler and pop them in a mason jar as well for table decor. (Think of how cute these would be for a baby shower with soft pastel colors.)
Tip
For a vintage vibe, add some distressed ink around the edges of your paper fans or any embellishments like circles or stars.
There are no limits to what you can do with DIY party decor like this. I used a combination of paper flowers and fans similar to these in my mimosa bar for a bridal shower.
Use your imagination to add any embellishments you like. You can even play with the edges of your paper fans by cutting a slanted angle or rounded shape along the edge before unfolding them.
I want to see how you get creative with your paper fans, so be sure to tag me on Instagram (@firstdayofhome)!
Pin it for later!


How to Make Paper Fans
Equipment
- Scissors
- Paper trimmer optional in place of scissors
Supplies
- 2 pieces scrapbook paper (8.5 x 11 inches or 12 x 12)
- 1 piece white cardstock
- 1 wooden skewers, string, or popsicle sticks
- hot glue (or craft glue)
- paper clip
Instructions
- Cut scrapbook paper lengthwise to form three strips of equal width and length.

- Fold the strips of paper back and forth accordion style.
- Attach the strips of paper by overlapping the ends and securing with glue.
- Use a small strip of cardstock to glue one end of the folded strips together. Make sure you place enough glue to touch all ends of the fan.
- Open the fan and secure the ends of the fan together in the back with a paper clip.
- Glue a wooden skewer, popsicle stick, or piece of string in the back, if desired.
- Add extra details like circles or stars to the front of the fans, if desired.


Notes
You Might Also Like…