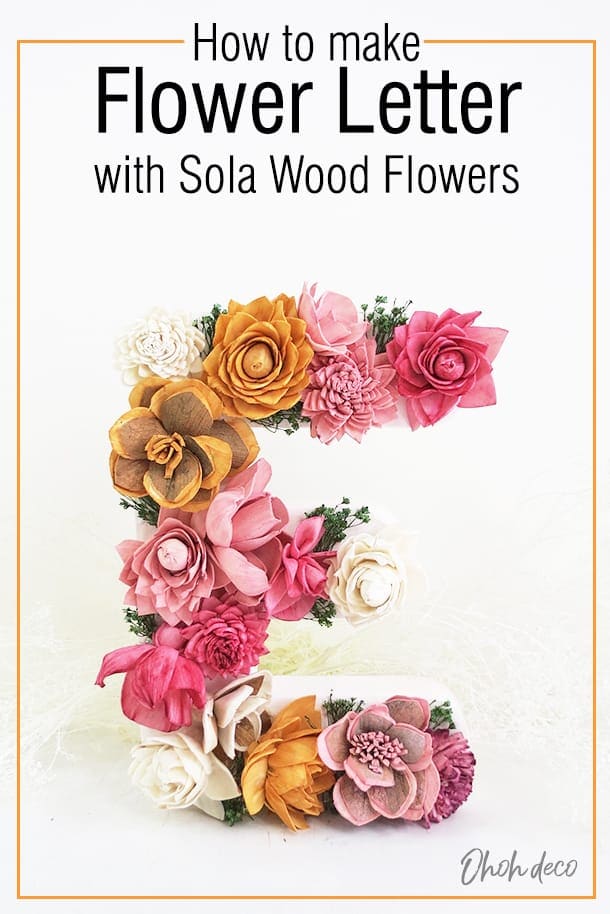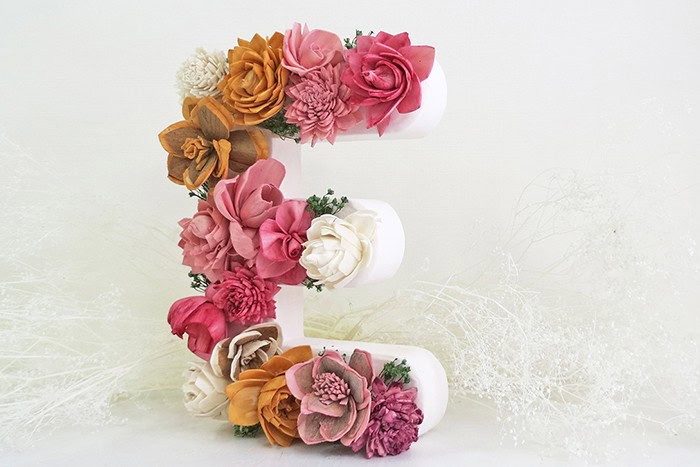

Flower letters are not only a visually stunning decor but also a thoughtful and sentimental way to show how much you care for someone. Whether you want to make one for a special occasion or you simply love flowers, this guide will teach you how to make a flower letter with Sola Wood Flowers effortlessly.
Flower letters are a popular gift choice for special occasions, such as weddings, anniversaries, and birthdays. But have you ever considered making your own flower letter? It may seem like a daunting task, but with Sola Wood Flowers, it’s easier than you think. In this article, we’ll guide you through the steps to make a beautiful flower letter that’ll leave your loved ones awestruck. So, put your creativity hat on and let’s get started!
[ This post probably contains affiliate links, our full disclosure policy is boring, but you can read it HERE ]
What are Sola Wood Flowers?
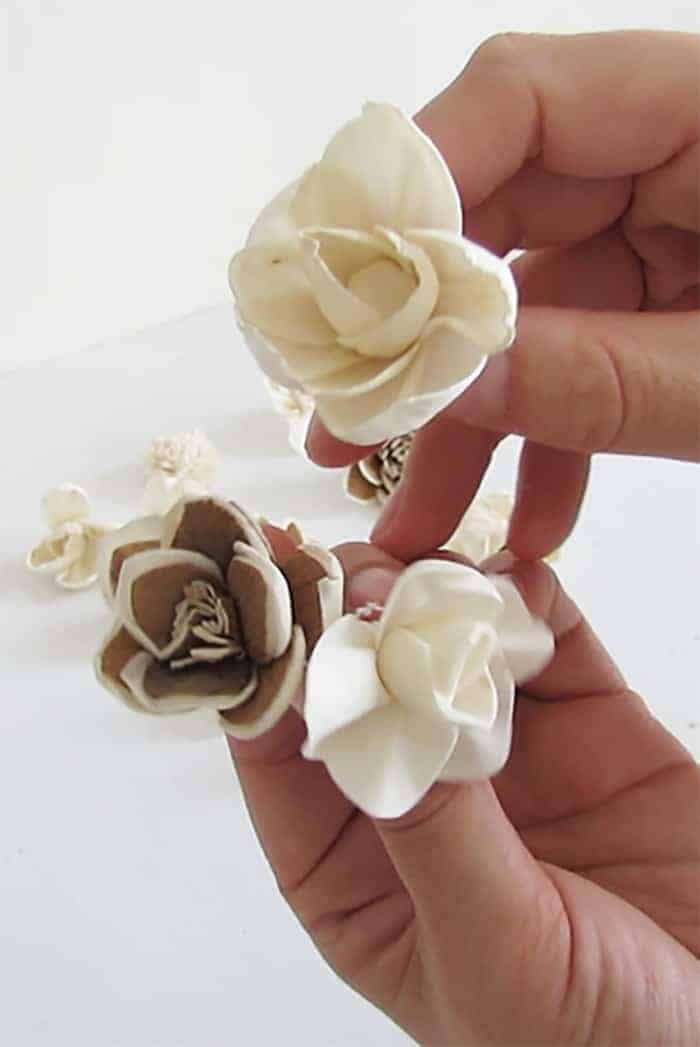
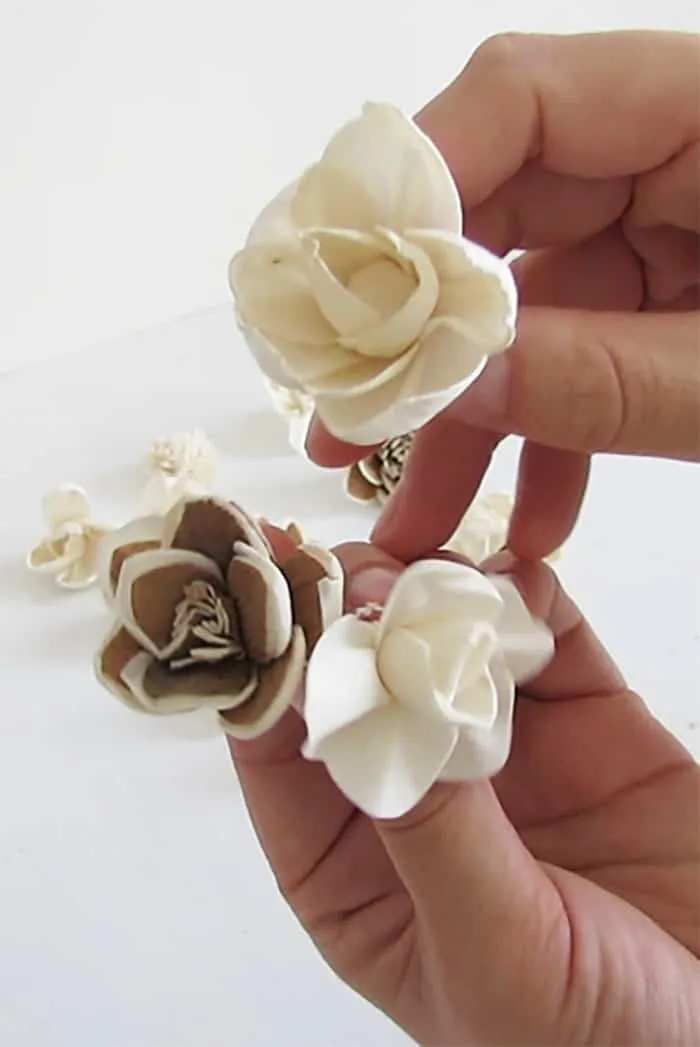
Sola Wood Flowers are made from the wood of a tapioca plant. They are eco-friendly and biodegradable, making them an excellent alternative to fresh or plastic flowers. Sola Wood Flowers are incredibly versatile and can be used to create a variety of floral arrangements, wedding bouquet, and crafting projects.
I received these flowers from, the Utah based company, Sola Wood Flowers. They have an amazing variety of flowers and dried greenery. You will surely find inspiration for your wedding decoration or your next DIY project.
It’s really nice to have a budget friendly alternative to the traditional flowers. They are lightweight and easy to work with, allowing you to create unique flower arrangements with ease. Now that you know a little about Sola Wood Flowers let’s move on to the fun part – how to dye them!
RELATED: DIY boho flower vase
RELATED: DIY Giant paper flowers
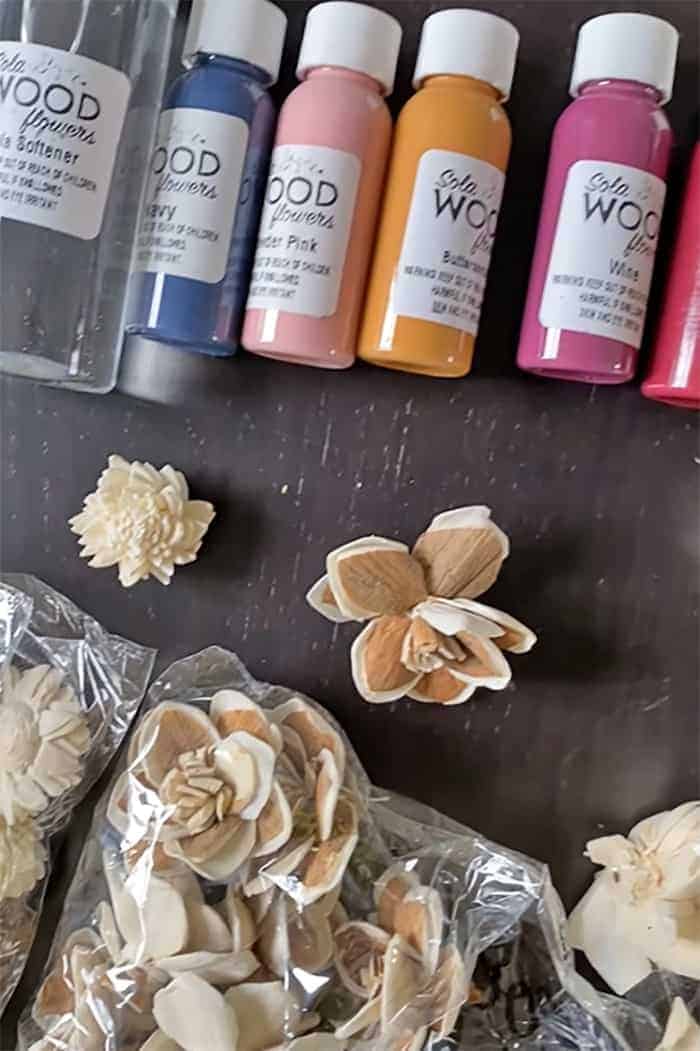
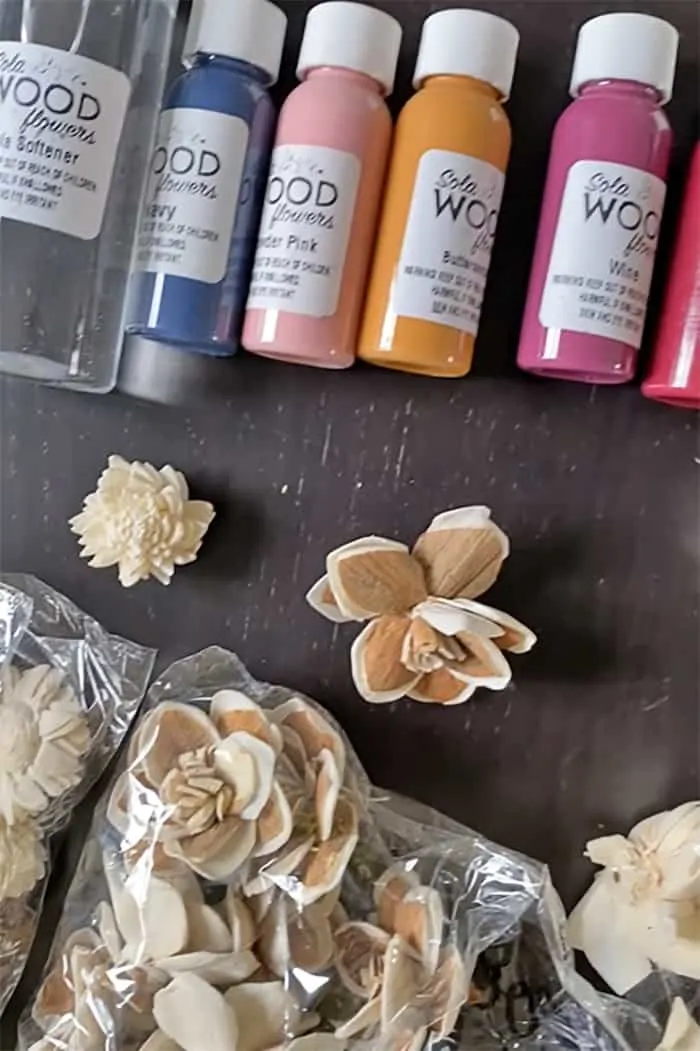
How to dye Sola Wood Flowers?
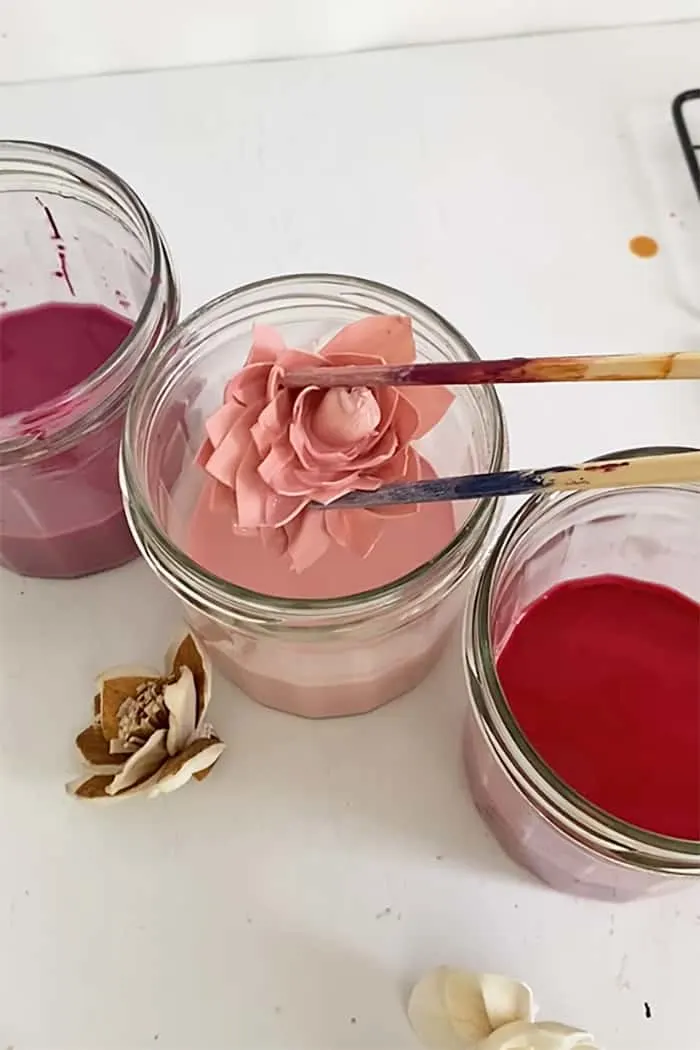
Dyeing Sola Wood Flowers is an easy way to add a pop of color to your floral arrangements. First, you will need to gather the necessary supplies. This includes a bowl, water, dye, fabric softener and a stirrer.
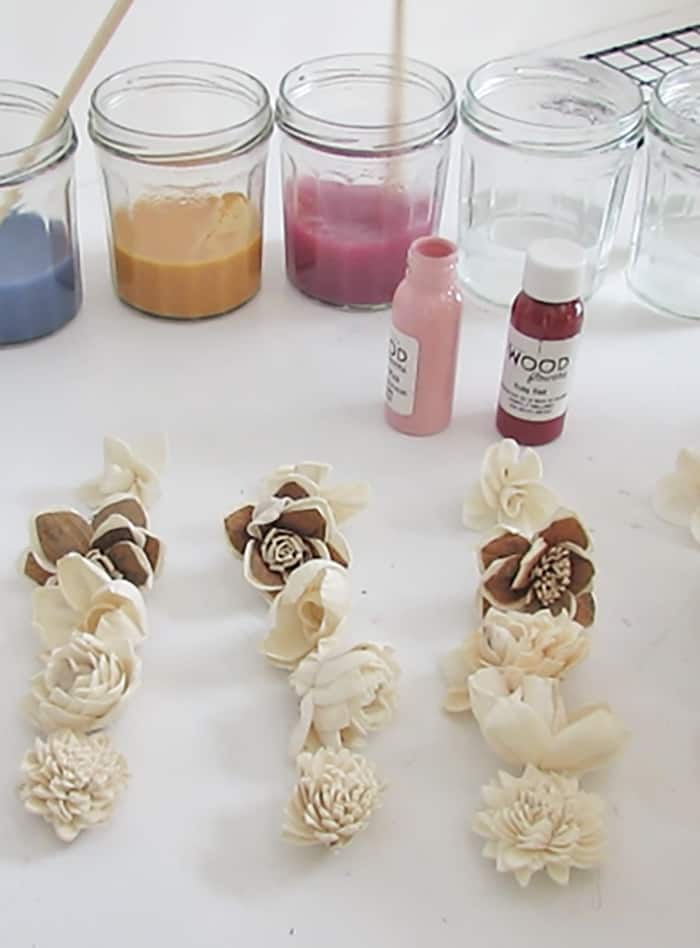
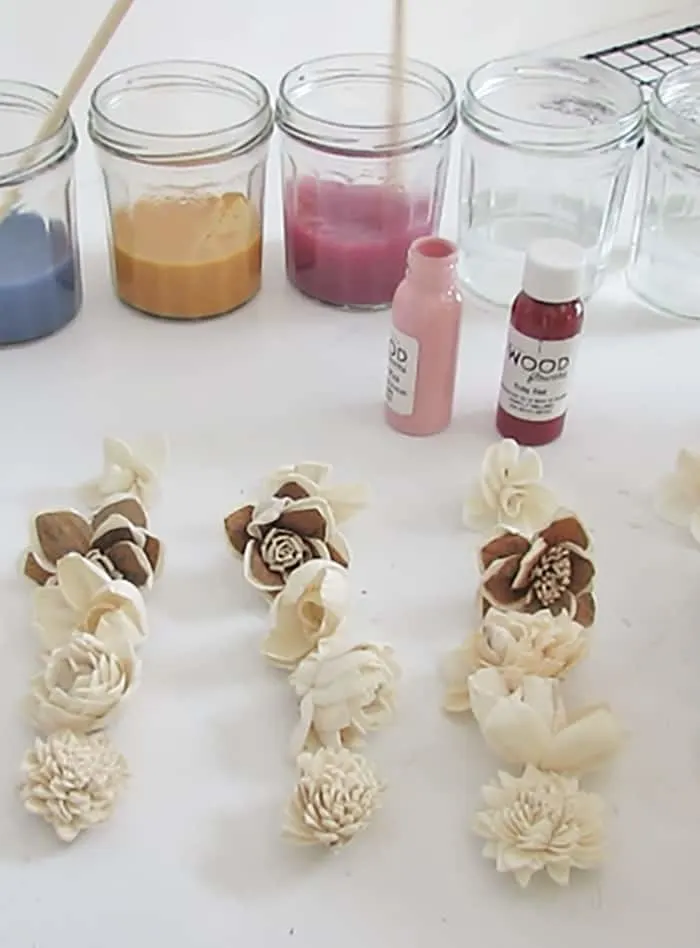
You need to pour lukewarm water into a container add some fabric softener and stir. Then add the dye and stir again until it is completely dissolved. Once the dye is mixed, you can add the Sola Wood Flowers to the bowl and let them soak for a few minutes.
The longer the flowers soak, the more vibrant the color will be. However, you should be careful not to leave them in the dye for too long, as this can cause the flowers to become overly saturated and lose their texture.
I like the dye packages available on Sola Wood Flowers, you have all the necessary supplies on hand to color the flowers. For this project I chose the dye pack legend of the fall.
Note that if you prefer ready-to-use flowers, you can also find dyed flower assortments.

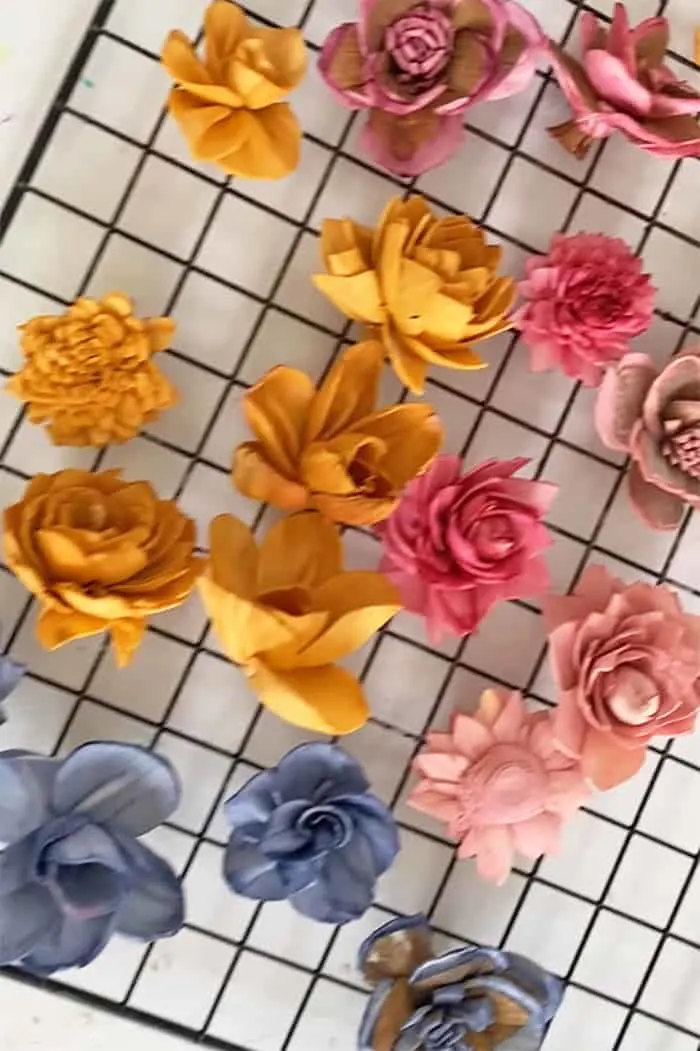
After the flowers have soaked for the desired amount of time, remove them from the dye and let them dry. You can use a paper towel or a drying rack to speed up the process. Once the flowers are dry, they are ready to be used in your floral arrangements.
Watch the video to make Floral letter with Sola Wood Flowers

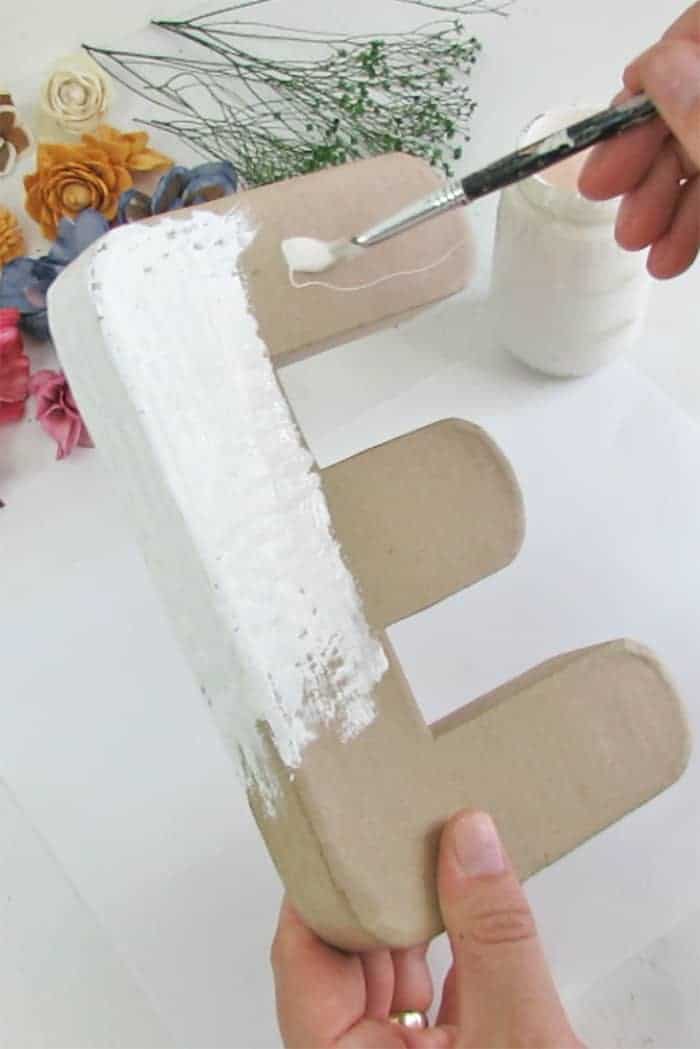
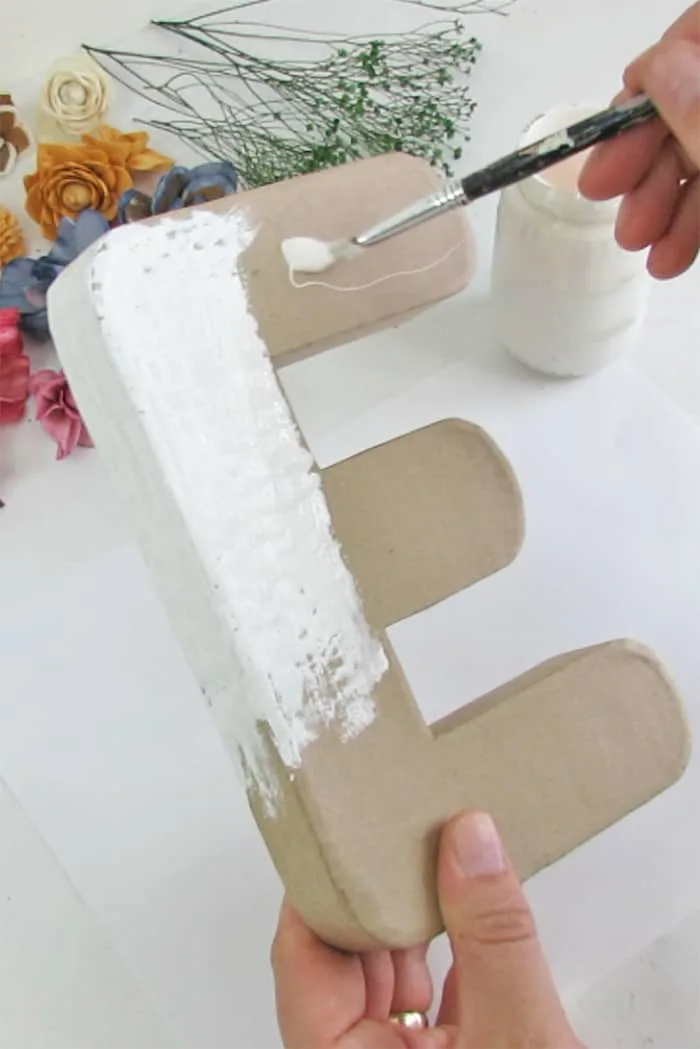
Time to pick the perfect base for your flower letter.
Pick the Perfect Letter Base
To truly make your flower monogram stand out, you’ll want to pick the perfect letter shape.
Consider using a styrofoam or cardboard base, as these materials are easy to work with and will hold your flowers securely in place. You can also use a wooden base letter if you prefer a more rustic or natural look.
When choosing your letter base or box, keep in mind the final size of your letter and the desired thickness. You may need to paint the base to fit the color scheme of your letter.
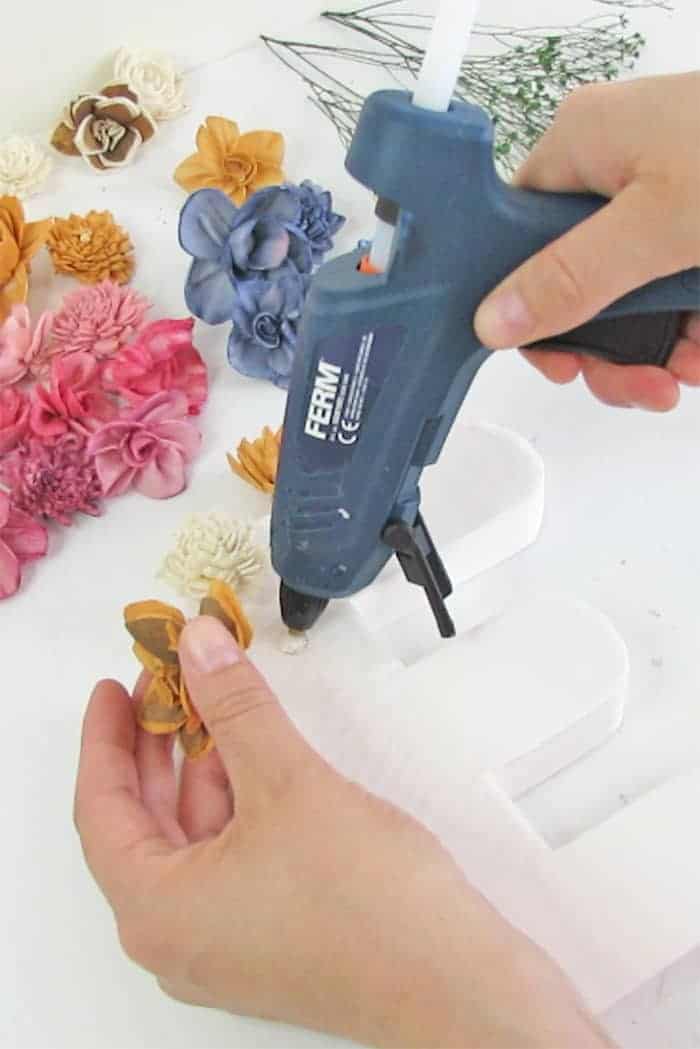
Arrange the Flowers
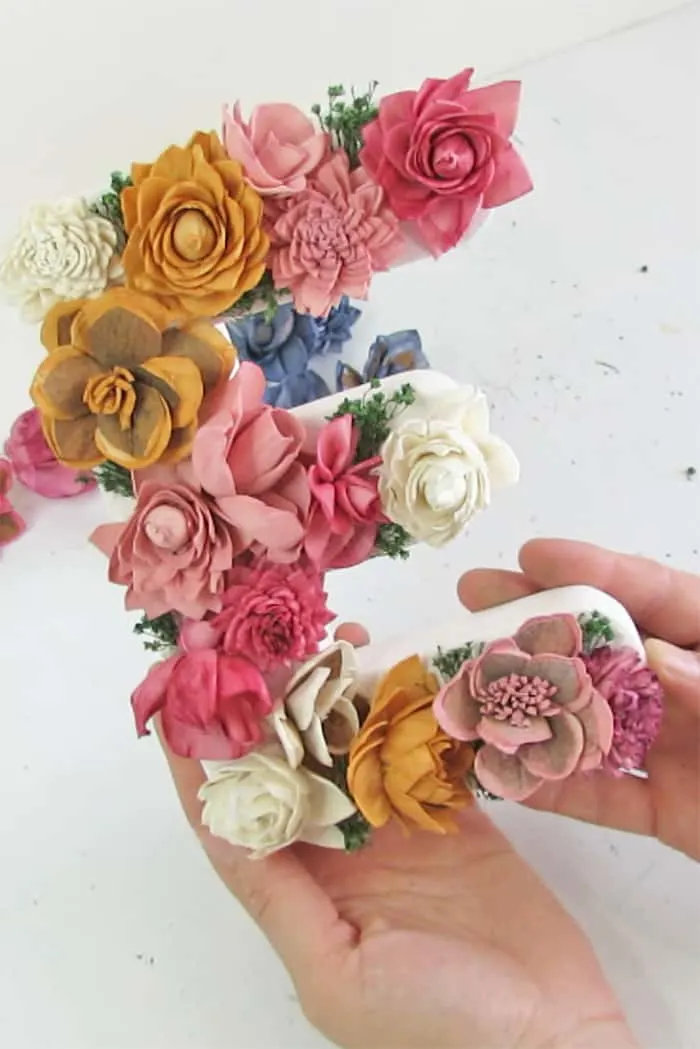
When creating a flower letter from Sola Wood Flowers, the arrangement is key to achieving a beautiful and cohesive design. Start by selecting the flowers you want to use, keeping in mind the color scheme and overall aesthetic you are going for. Then, begin arranging the flowers on your base, using hot glue.

For a more natural look, vary the size and placement of the flowers, allowing some to flow over the edges of the letter while others are clustered in the center. If you prefer a more structured design, arrange the flowers in a uniform pattern or create a gradient effect with different shades of the same color.
As you arrange the flowers, step back occasionally and evaluate the overall design from a distance. Make adjustments as necessary to achieve the desired look and feel.
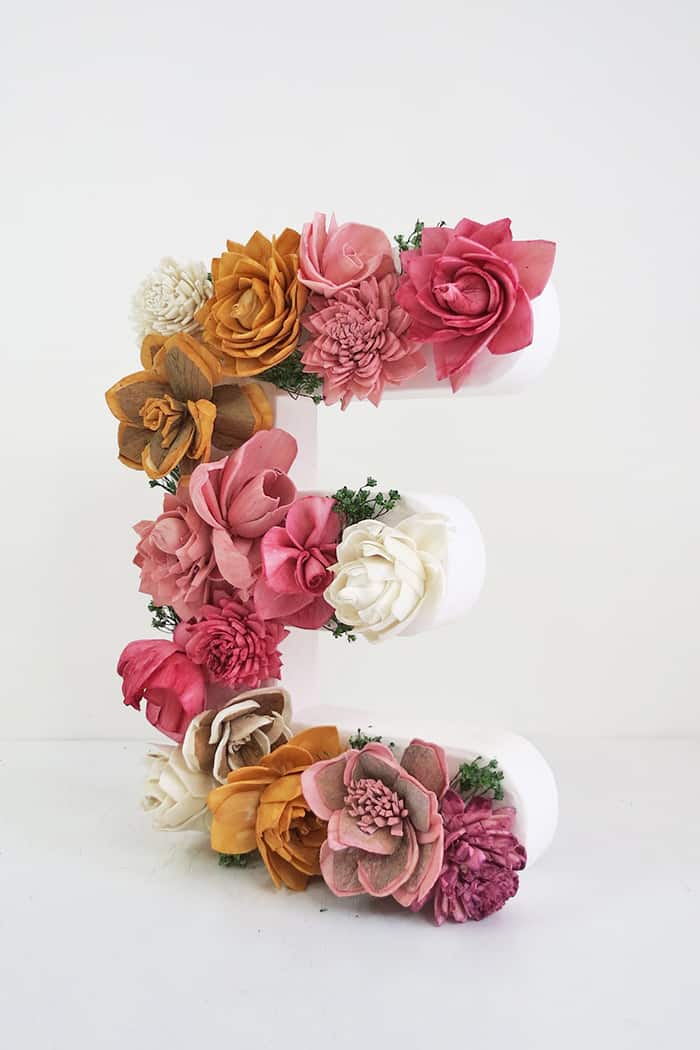
Adding Finishing Touches
The final step in creating your Flower letter is to add finishing touches that will enhance its beauty. Depending on the occasion and the look you want to achieve, you can add greenery, ribbons, or any other embellishments that capture your imagination.
Greenery complements the flowers and can add texture and color to your letter. You can use greenery, leaves or wheat that match the color of your flowers or contrast with them. The possibilities are endless, so let your creativity flow.
Once you have added the finishing touches, step back and evaluate your creation. Does it look balanced and harmonious? Is there anything you would like to change or add? If you are happy with your arrangement, move on to the next step.

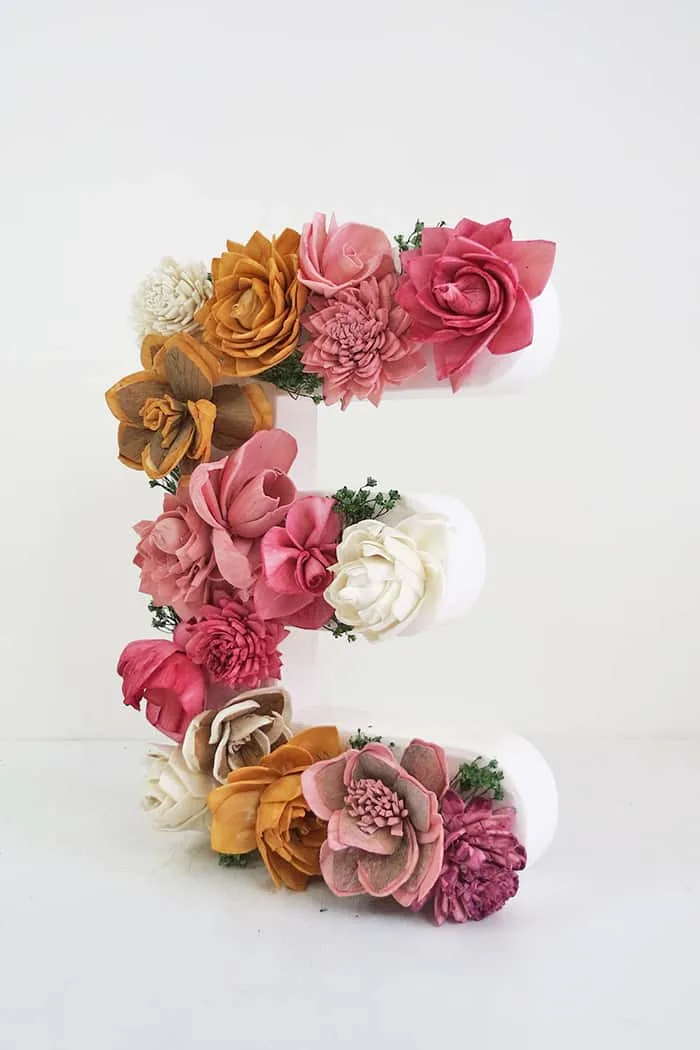
Hang or Display your floral letter
Now that you’ve created a beautiful Sola Wood Flower letter, it’s time to decide how you want to display it. There are a variety of options for hanging or showcasing your creation, depending on your personal style and the setting.
One option is to hang your letter with ribbon. You can create a loop with ribbon and attach it to the back of your letter with hot glue. This will allow you to hang your letter on a door, wall, or even a mirror.
You can display your letter on a tabletop or shelf. If your letter is too narrow to stand by it-self you can prop it up with a small wooden stand. This will give your letter a stable base and allow it to be easily viewed from all angles.
Another option is to attach your letter to a wreath or integrate it into a floral garland. This will create a cohesive display and allow your Sola Wood Flower letter to be a part of a larger decorative arrangement.
RELATED: Toilet paper roll flowers
RELATED: DIY concrete flower vase
Whether you’re making it as a gift or just as a stunning addition to your home decor, follow the steps and unleash your creativity. So, have fun making your floral letter masterpiece!
Want to remember it? Save this Flower letter made with Sola Wood flowers on your favorite Pinterest board.