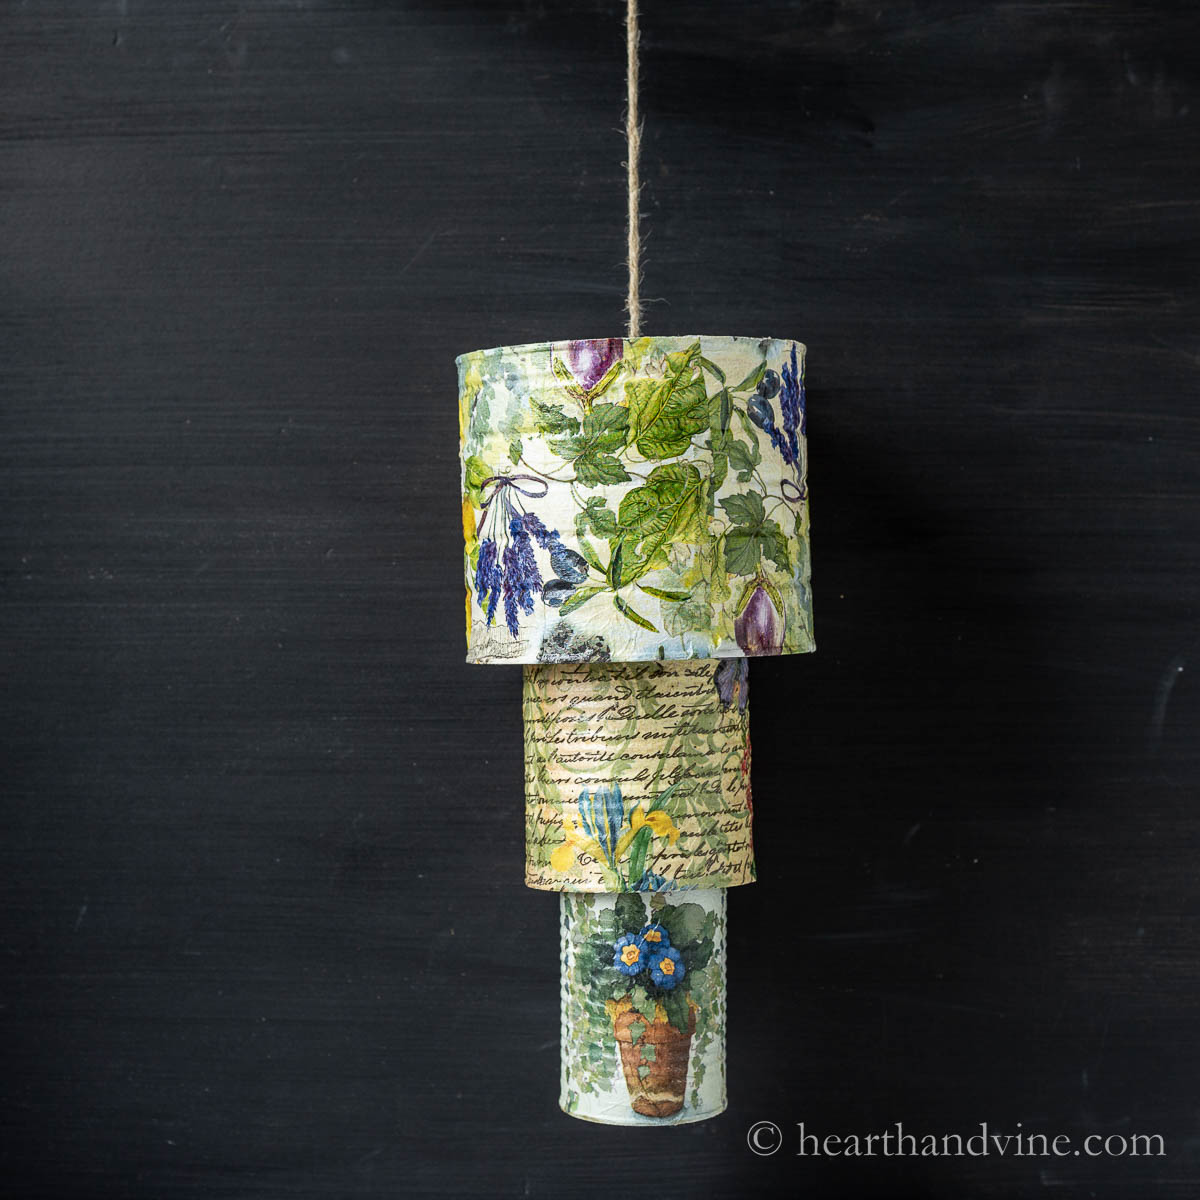
Learn how to make these pretty tin can wind chimes using recycled cans from coffee, and vegetables. It's an easy fun upcycle project you can enjoy creating.
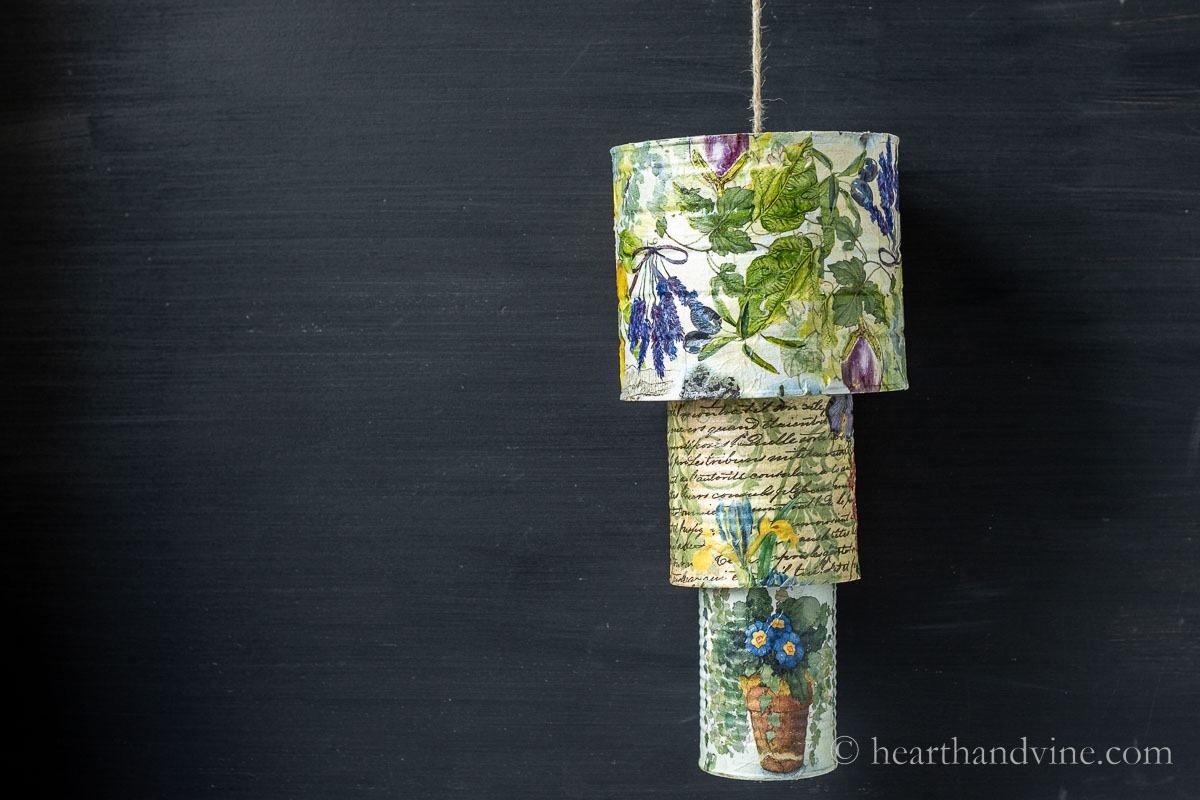
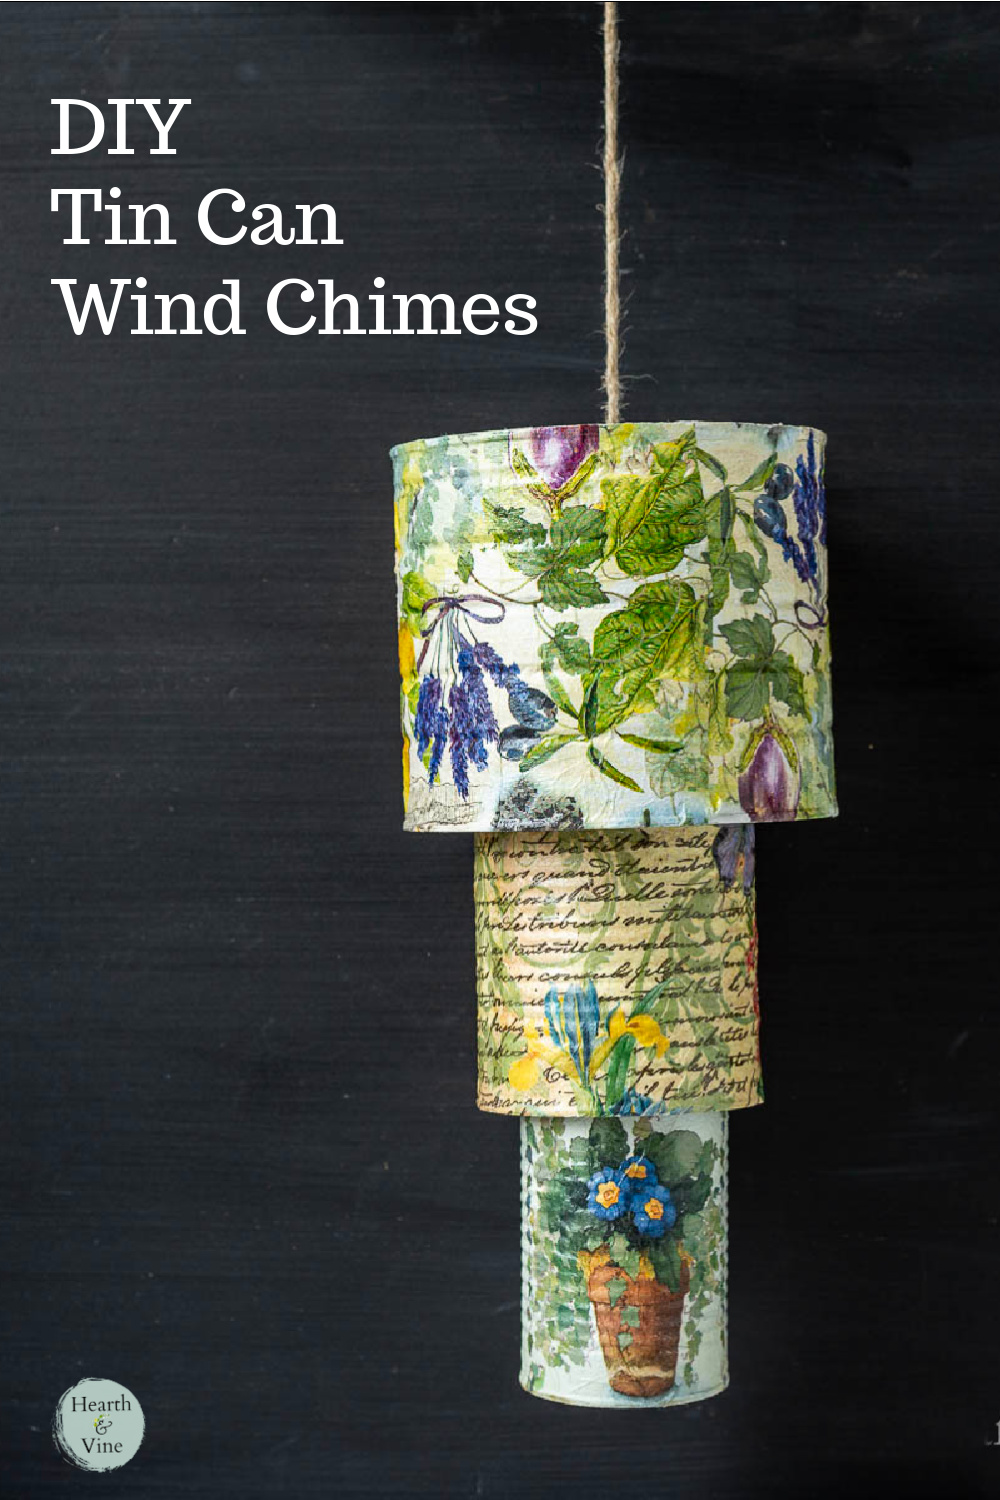
Upcycling with tin cans is a fun craft and a great way to recycle trash. Today I'm making this beautiful wind chime with three tin cans nested inside each other.
This post contains some affiliate links (that means if you make a purchase after clicking a link, there’s no additional cost to you, but I will earn a very small commission. ) i.e. as an Amazon Associate, I earn from qualifying purchases. Click here to read my full disclosure policy.
Join Our Newsletter List!
Be the first to receive new posts and get access to our Subscribers Only Page.
What You'll Need
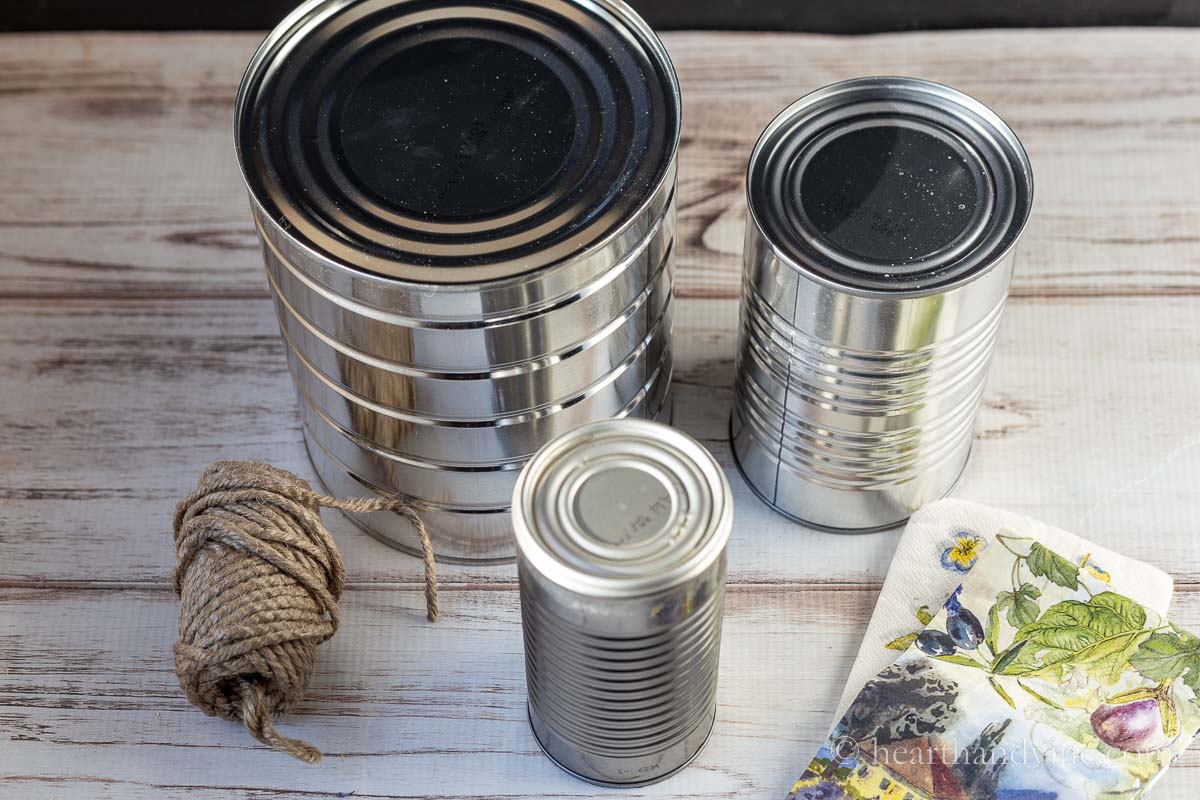
3 Aluminum cans in different sizes that will fit or nest together.
Pretty paper napkins
Mod podge or white glue
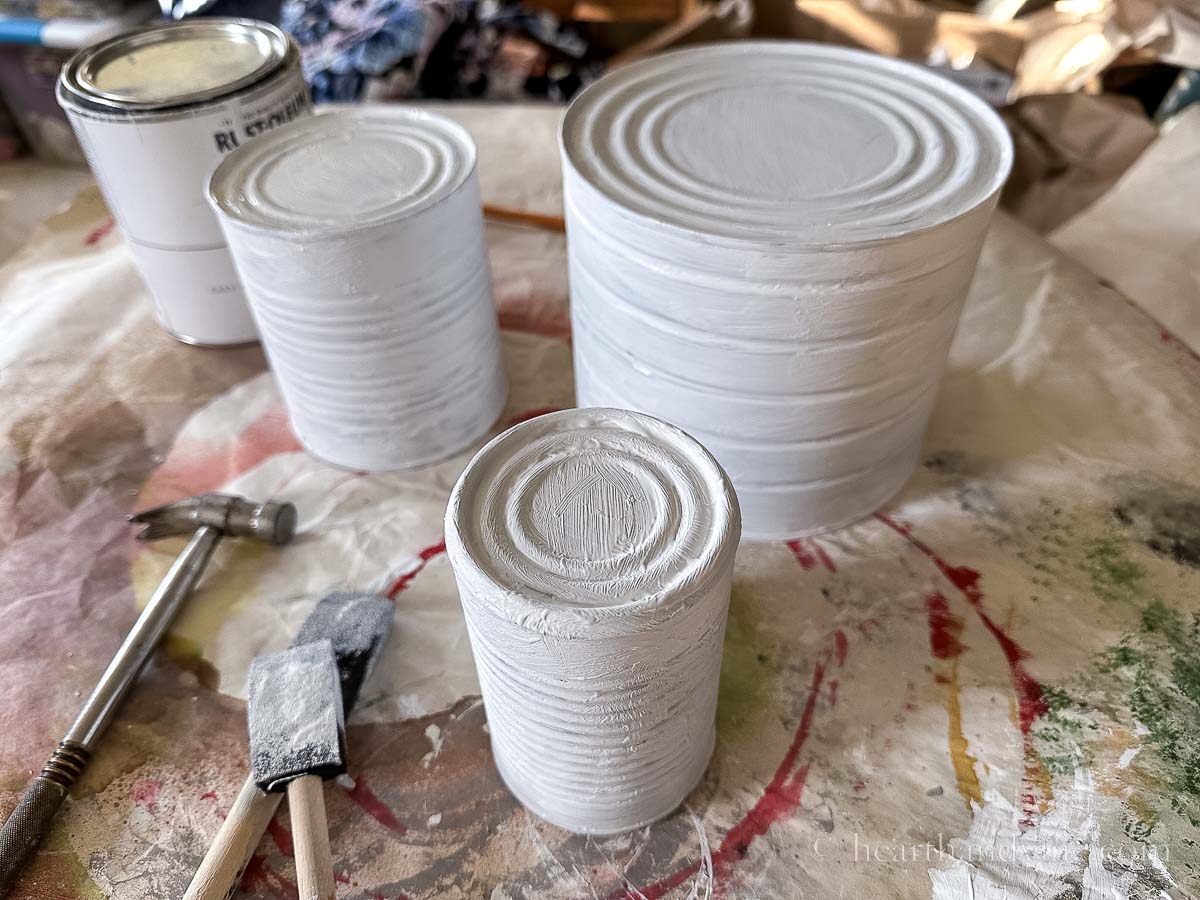
White craft or chalk or spray paint
Twine for outdoor use
A large nail and a hammer (or an electric drill)
Scissors
Nail file or sandpaper
How to Make Tin Can Wind Chimes
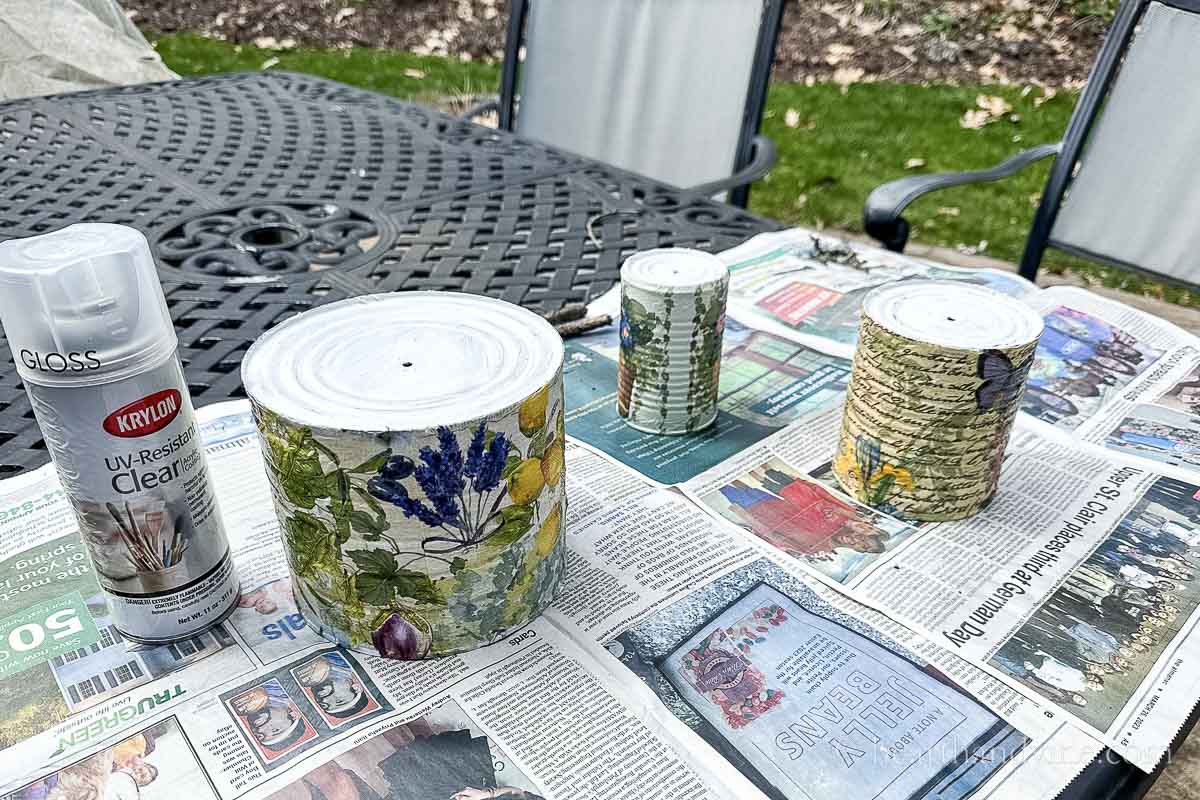
Paint your cans with white paint. I used chalk paint mainly because it dries quickly. Spray paint would be pretty quick too. The white paint will make a nice backing for the napkins.
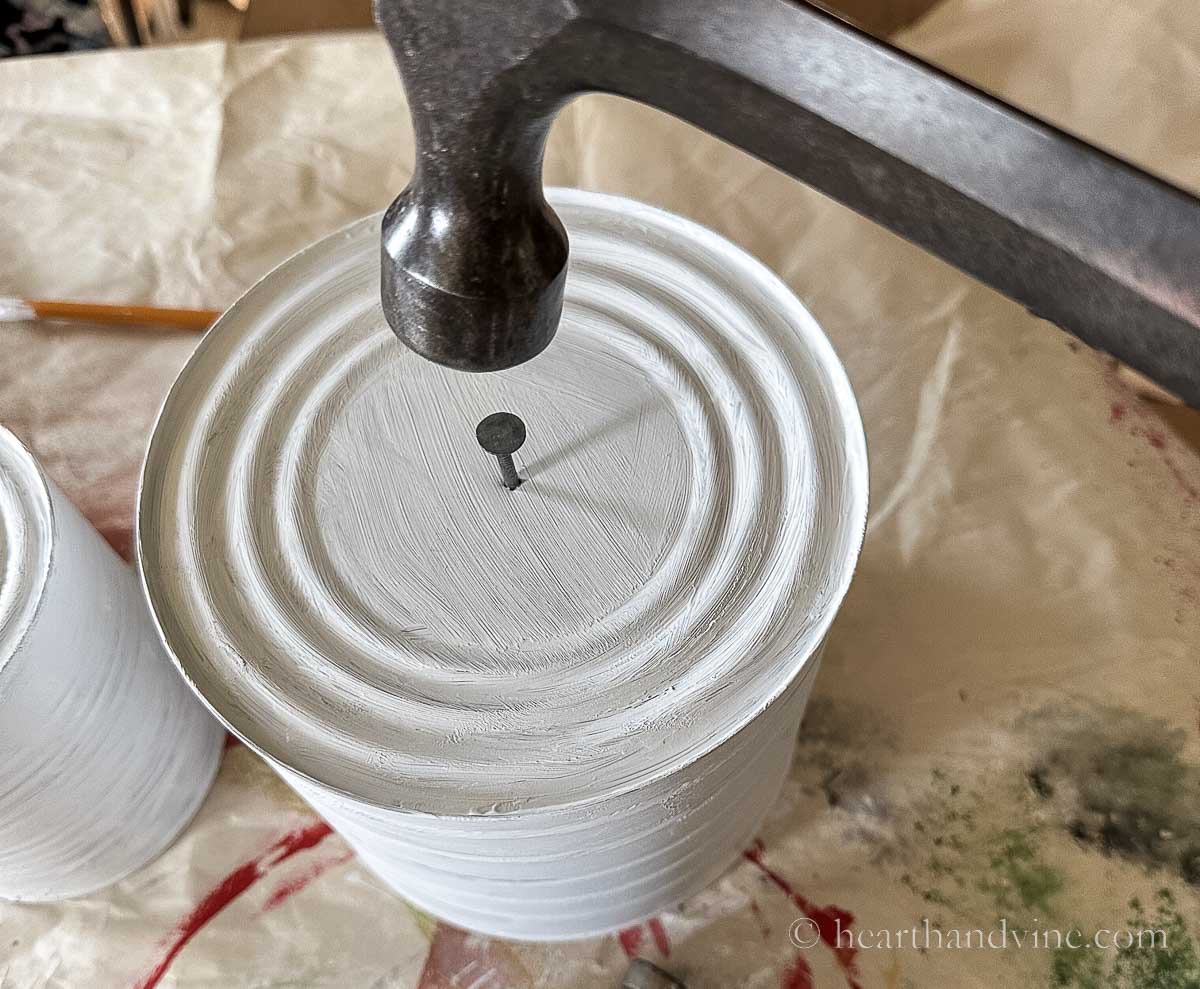
Punch a hole in the middle large enough to feed the twine through. Alternatively, you can use a drill for this part.
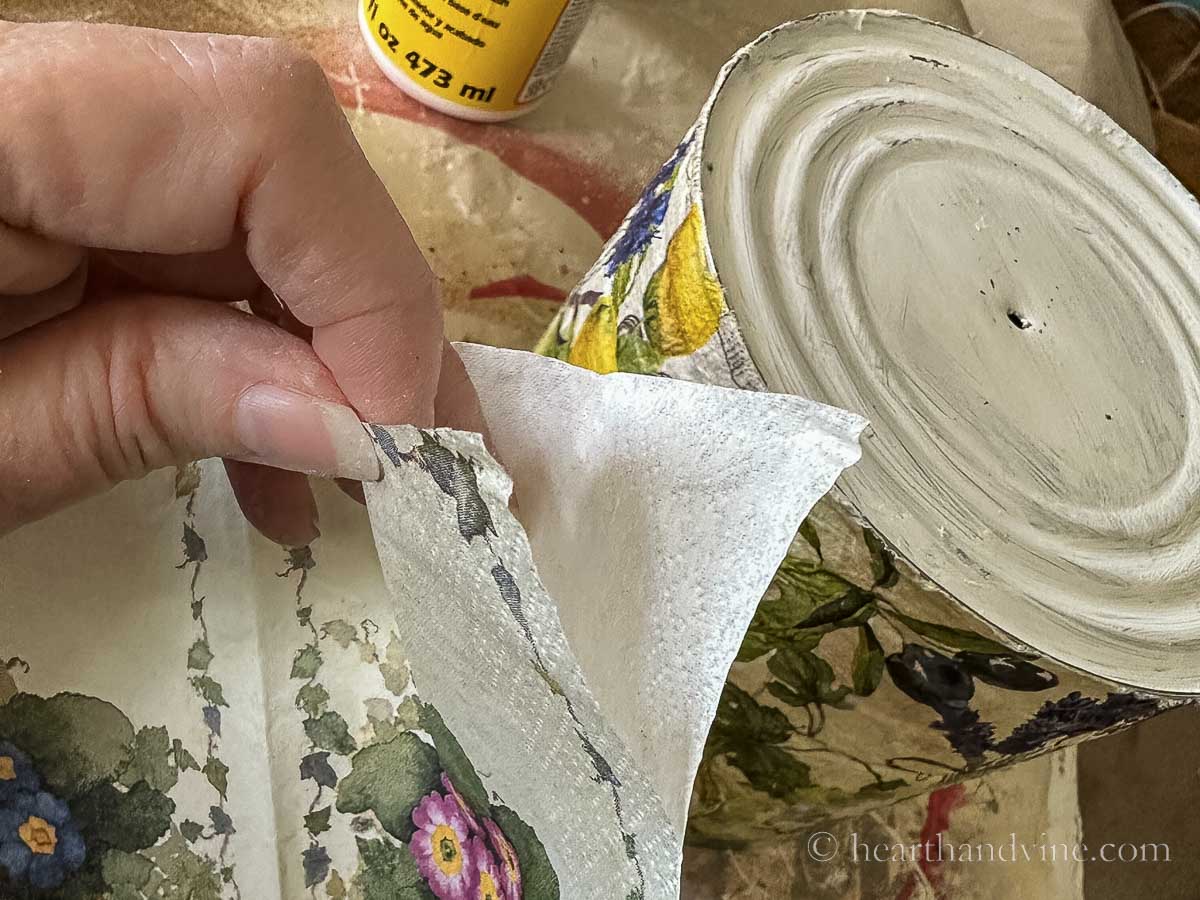
Separate the napkins removing the plain backing paper.
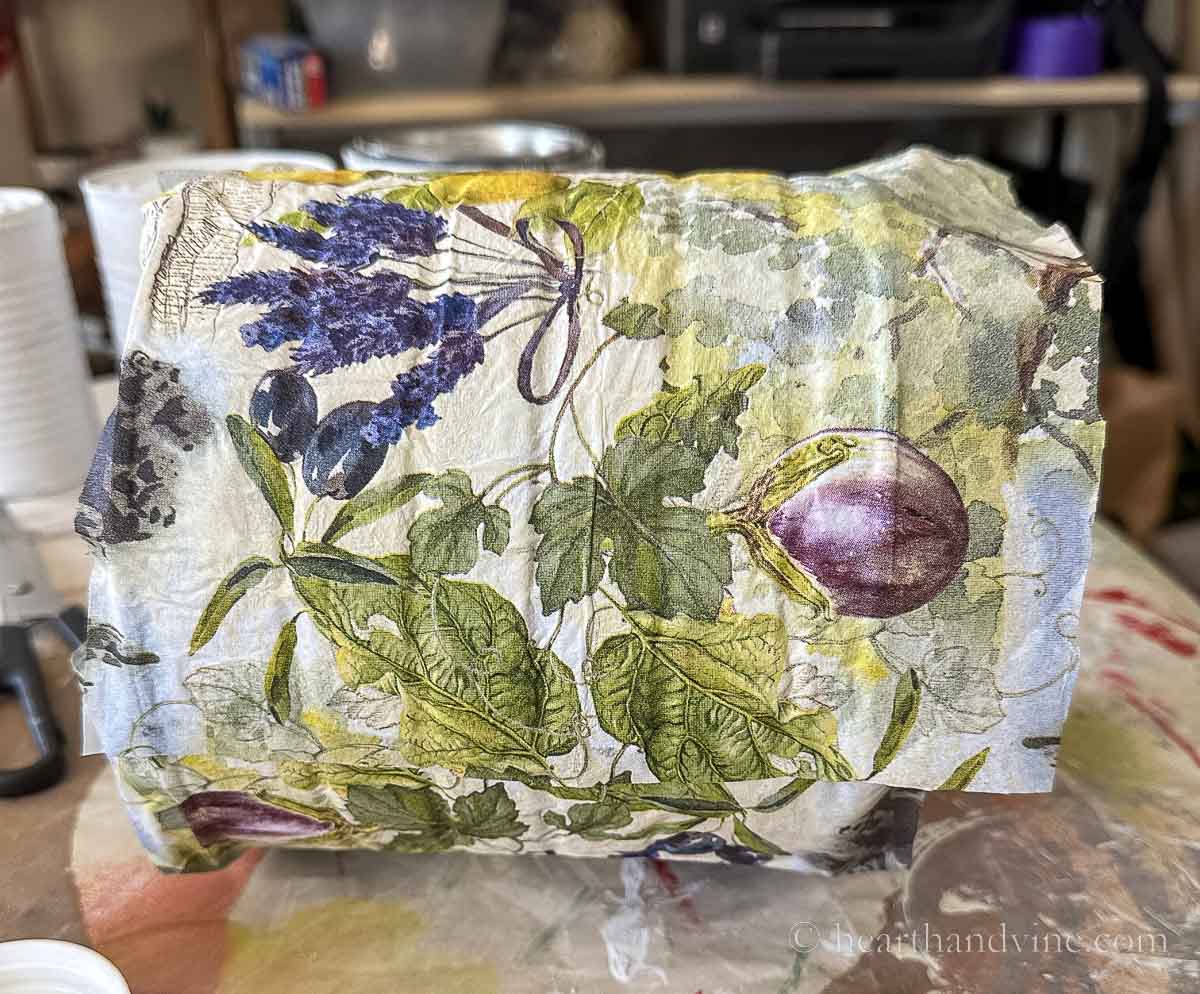
Cut the napkin to cover the can leaving a little bit of extra paper on top and bottom.
Apply mod podge or thinned white glue to the can and carefully place your napkin on top smoothing as you go.
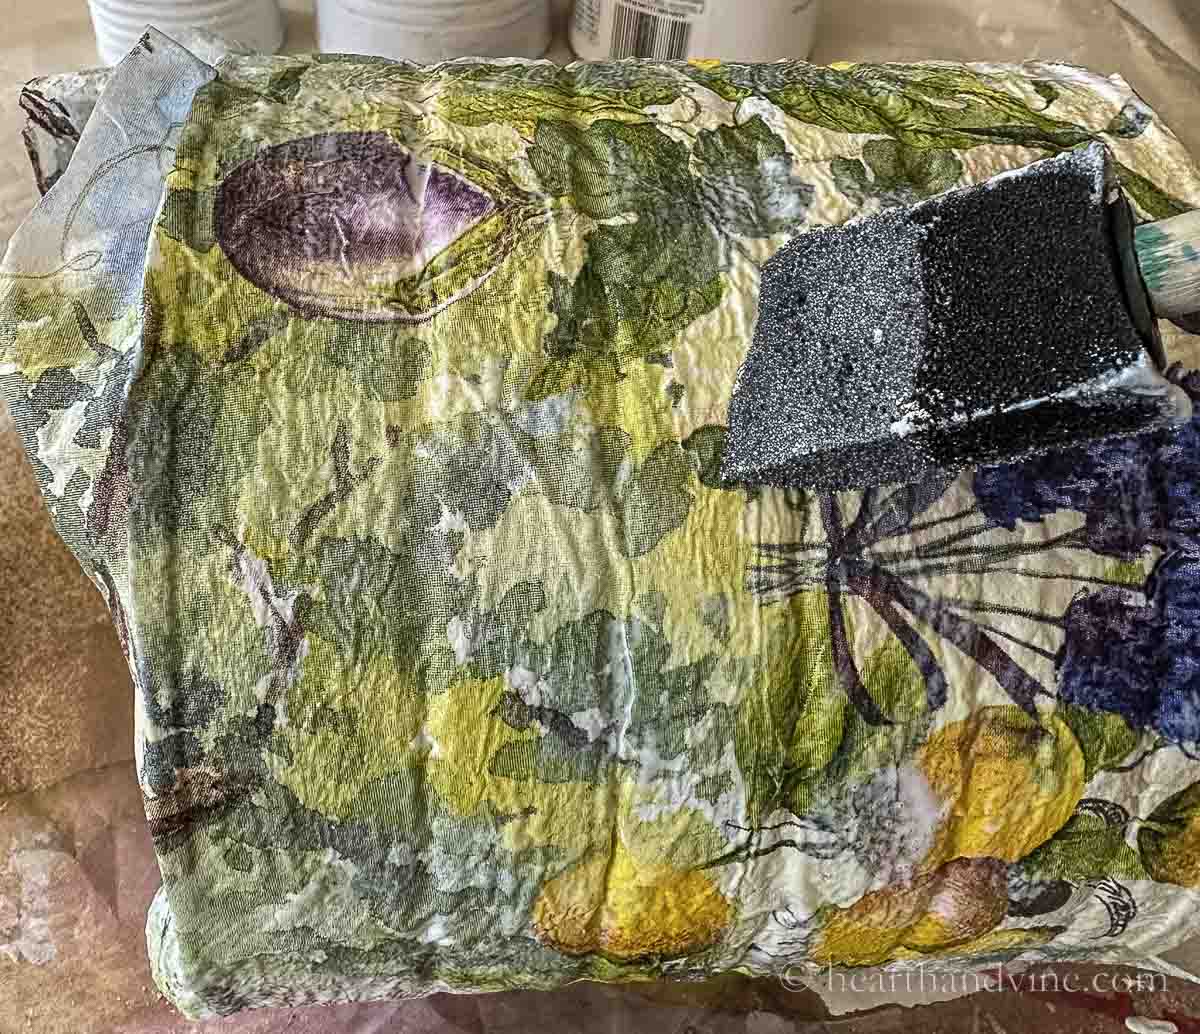
Then coat the top of the napkin with more glue.
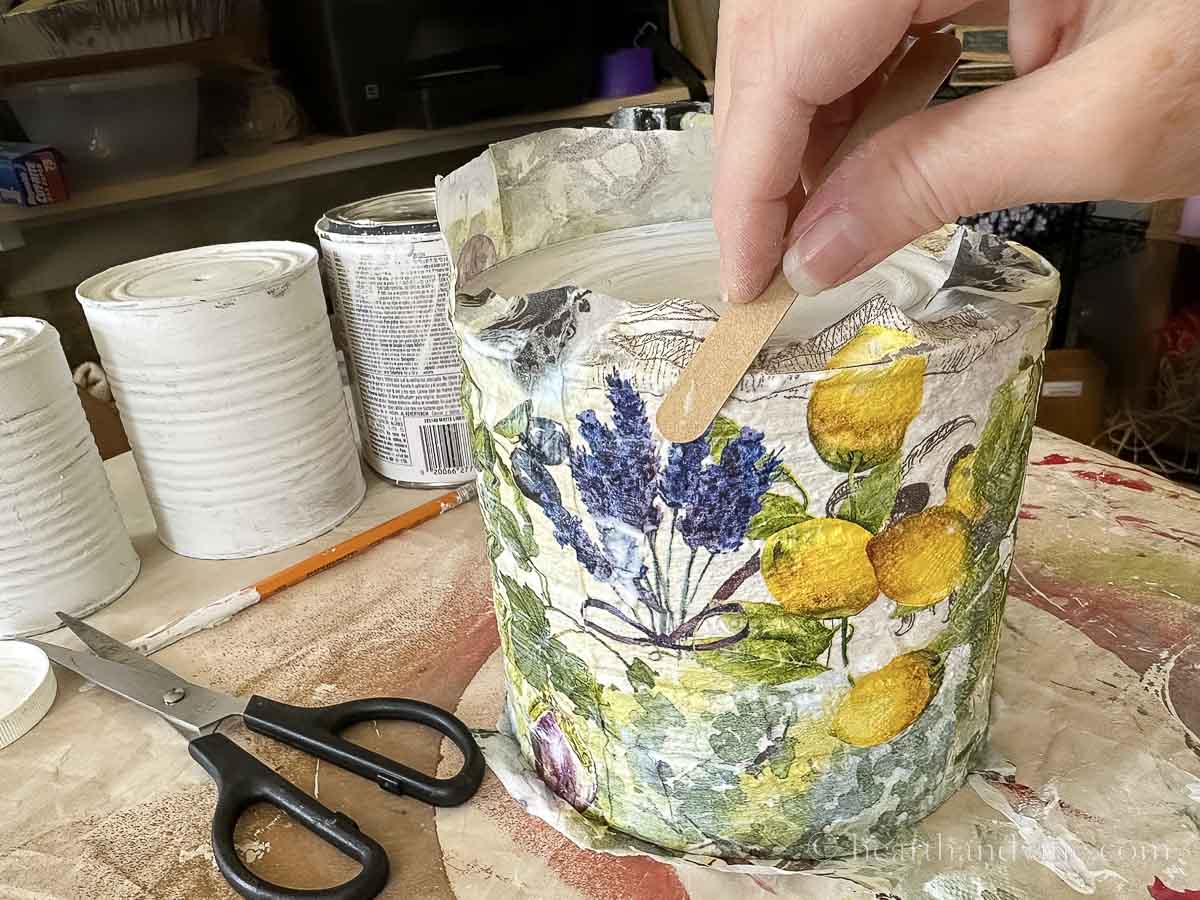
Next, use a nail file or a piece of sandpaper to file off the extra napkin paper on the top and bottom.
Use a couple of coats of polyurethane spray to protect the cans.
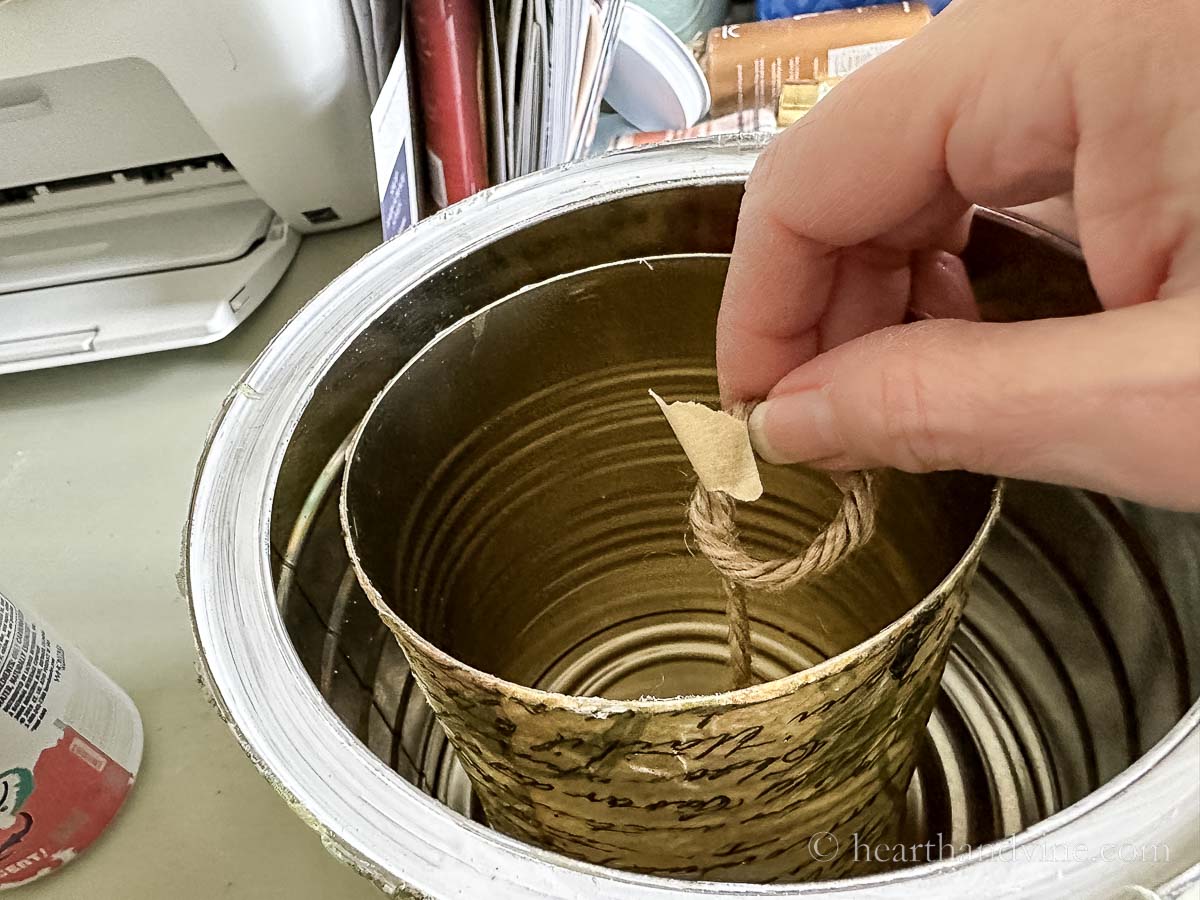
Thread the twine through the largest can first leaving enough twine to hang the wind chime and then tie a knot inside under the hole to hold it in place.
For the next can try using a piece of masking tape to mark where you want the knot so that the large can just overlaps. Then push the second can out of the way to tie the knot at that spot.
You can overlap the cans as much or as little as you like.
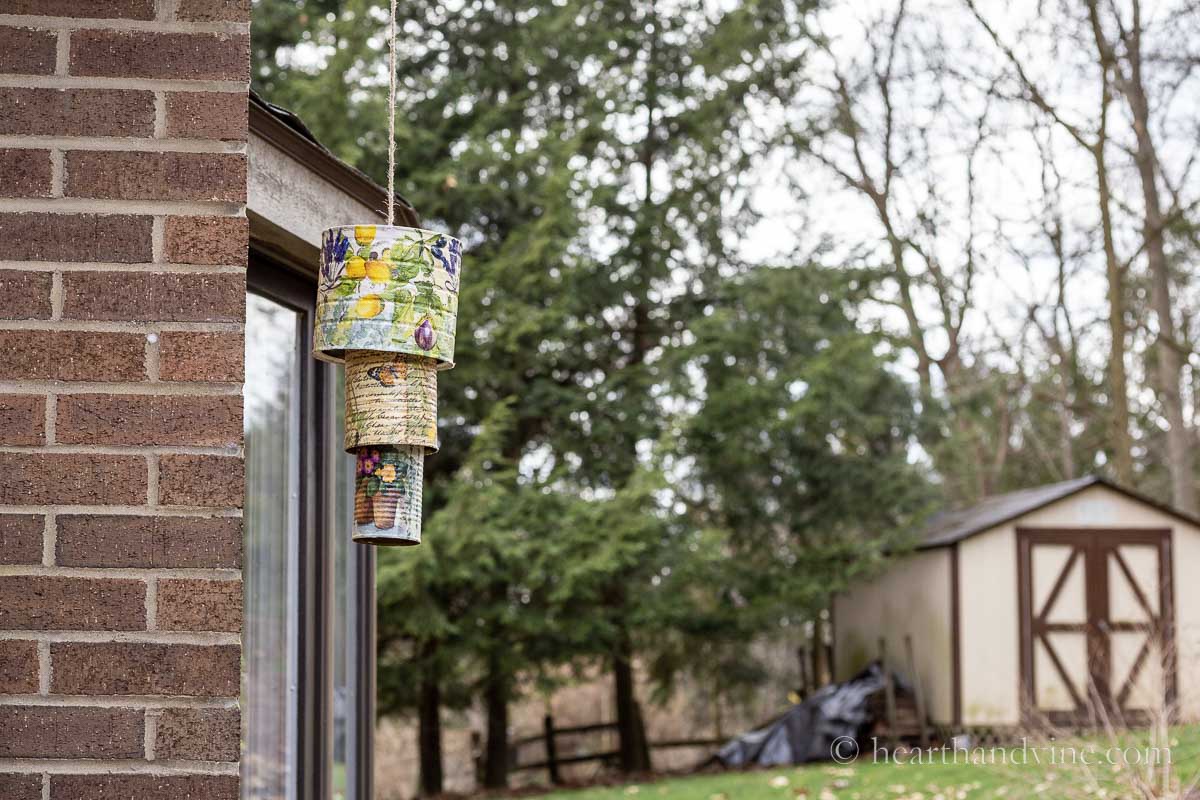
Hang them on your porch or patio for all to enjoy.
Note: These cans do make a noise but it's not the twinkling noise of a typical wind chime. However, you could add some bells or shells or anything you like at the bottom for extra musical sound.
Use a hammer and nail to make a hole in the center of the bottom of each can, large enough to thread your twine.
Separate your napkins into 1 ply.
Carefully glue the napkins onto the cans with mod podge or watered down white glue. Leave a little overhang on the top and bottom.
Coat the top of the napkins with more mod podge or glue.
Use a nail file or sandpaper to file off the extra napkin on the edges.
Spray each can with a couple of coats of polyurethane to protect them
Thread a long piece of twine through the largest can from the bottom.
Leave enough twine to hang the windchime from and then tie a knot underneath to hold the can in place.
Thread the next largest can under the first can.
See where you want it to hang and place a small piece of tape there. Then pull the thread back out to tie a knot where the tape is.
Thread the last can and this time you'll just have to work with the twine to make a third knot to hold it at the spot you like.
Trim off the excess twine under the 3rd can.
Tie a loop at the top and hang it where you like.
Notes
These cans knock around and make a sound but not like a typical windchime. Feel free to add some shells, bells, metal washers, or other things to the bottom for a more whimsical sound.Polyurethane will help with the elements. However, you should try to make sure it is hung in a place where there is some protection and bring it indoors during the winter.Though I used a basic hammer and a nail for the holes you could use a drill and the appropriate-sized drill bit for the holes.
Patti is the creator of Hearth and Vine, a home and garden blog filled with projects to inspire your creative side. She loves crafting, gardening, decorating and entertaining at her home in Pennsylvania. When she is not working on a project at home or searching for treasures at nurseries and thrift stores with her girlfriends, you’ll probably find her with family and friends, at a restaurant, or home party enjoying new and different food adventures.
Reader Interactions
Comments
Karen Salvador
I love these!! Will be s saving some cans for this project. Great job!!!


Karen Salvador
I love these!! Will be s saving some cans for this project. Great job!!!
Patti Estep
Glad you like the project Karen.
Frances Moody
Are they a video that explains how to put the string on the cans.
Patti Estep
Frances, I'm sorry I did not create a video for this post but hopefully, you should not have too much trouble.