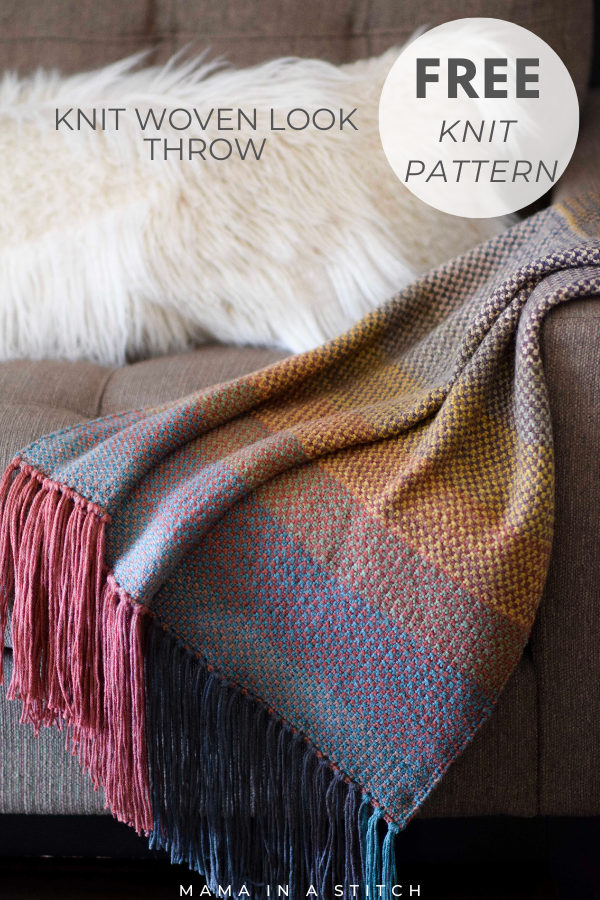
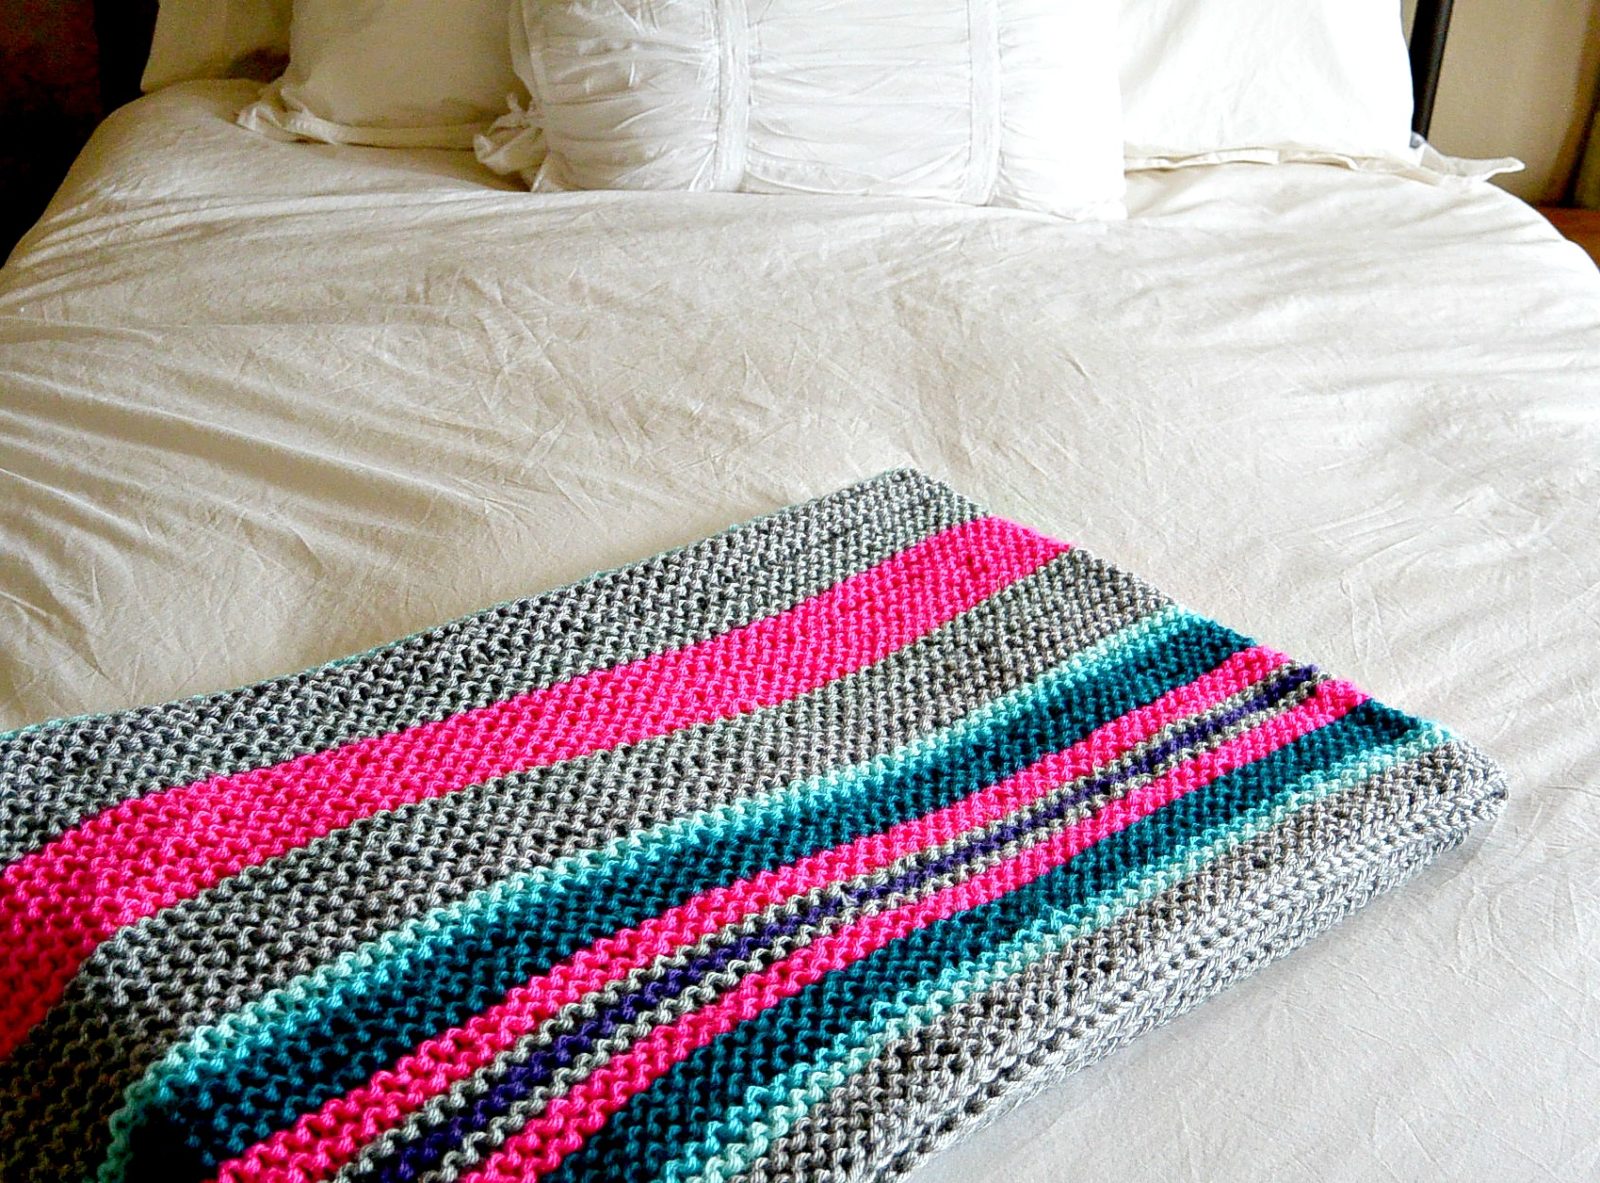
Woven Look Blanket Knitting Pattern
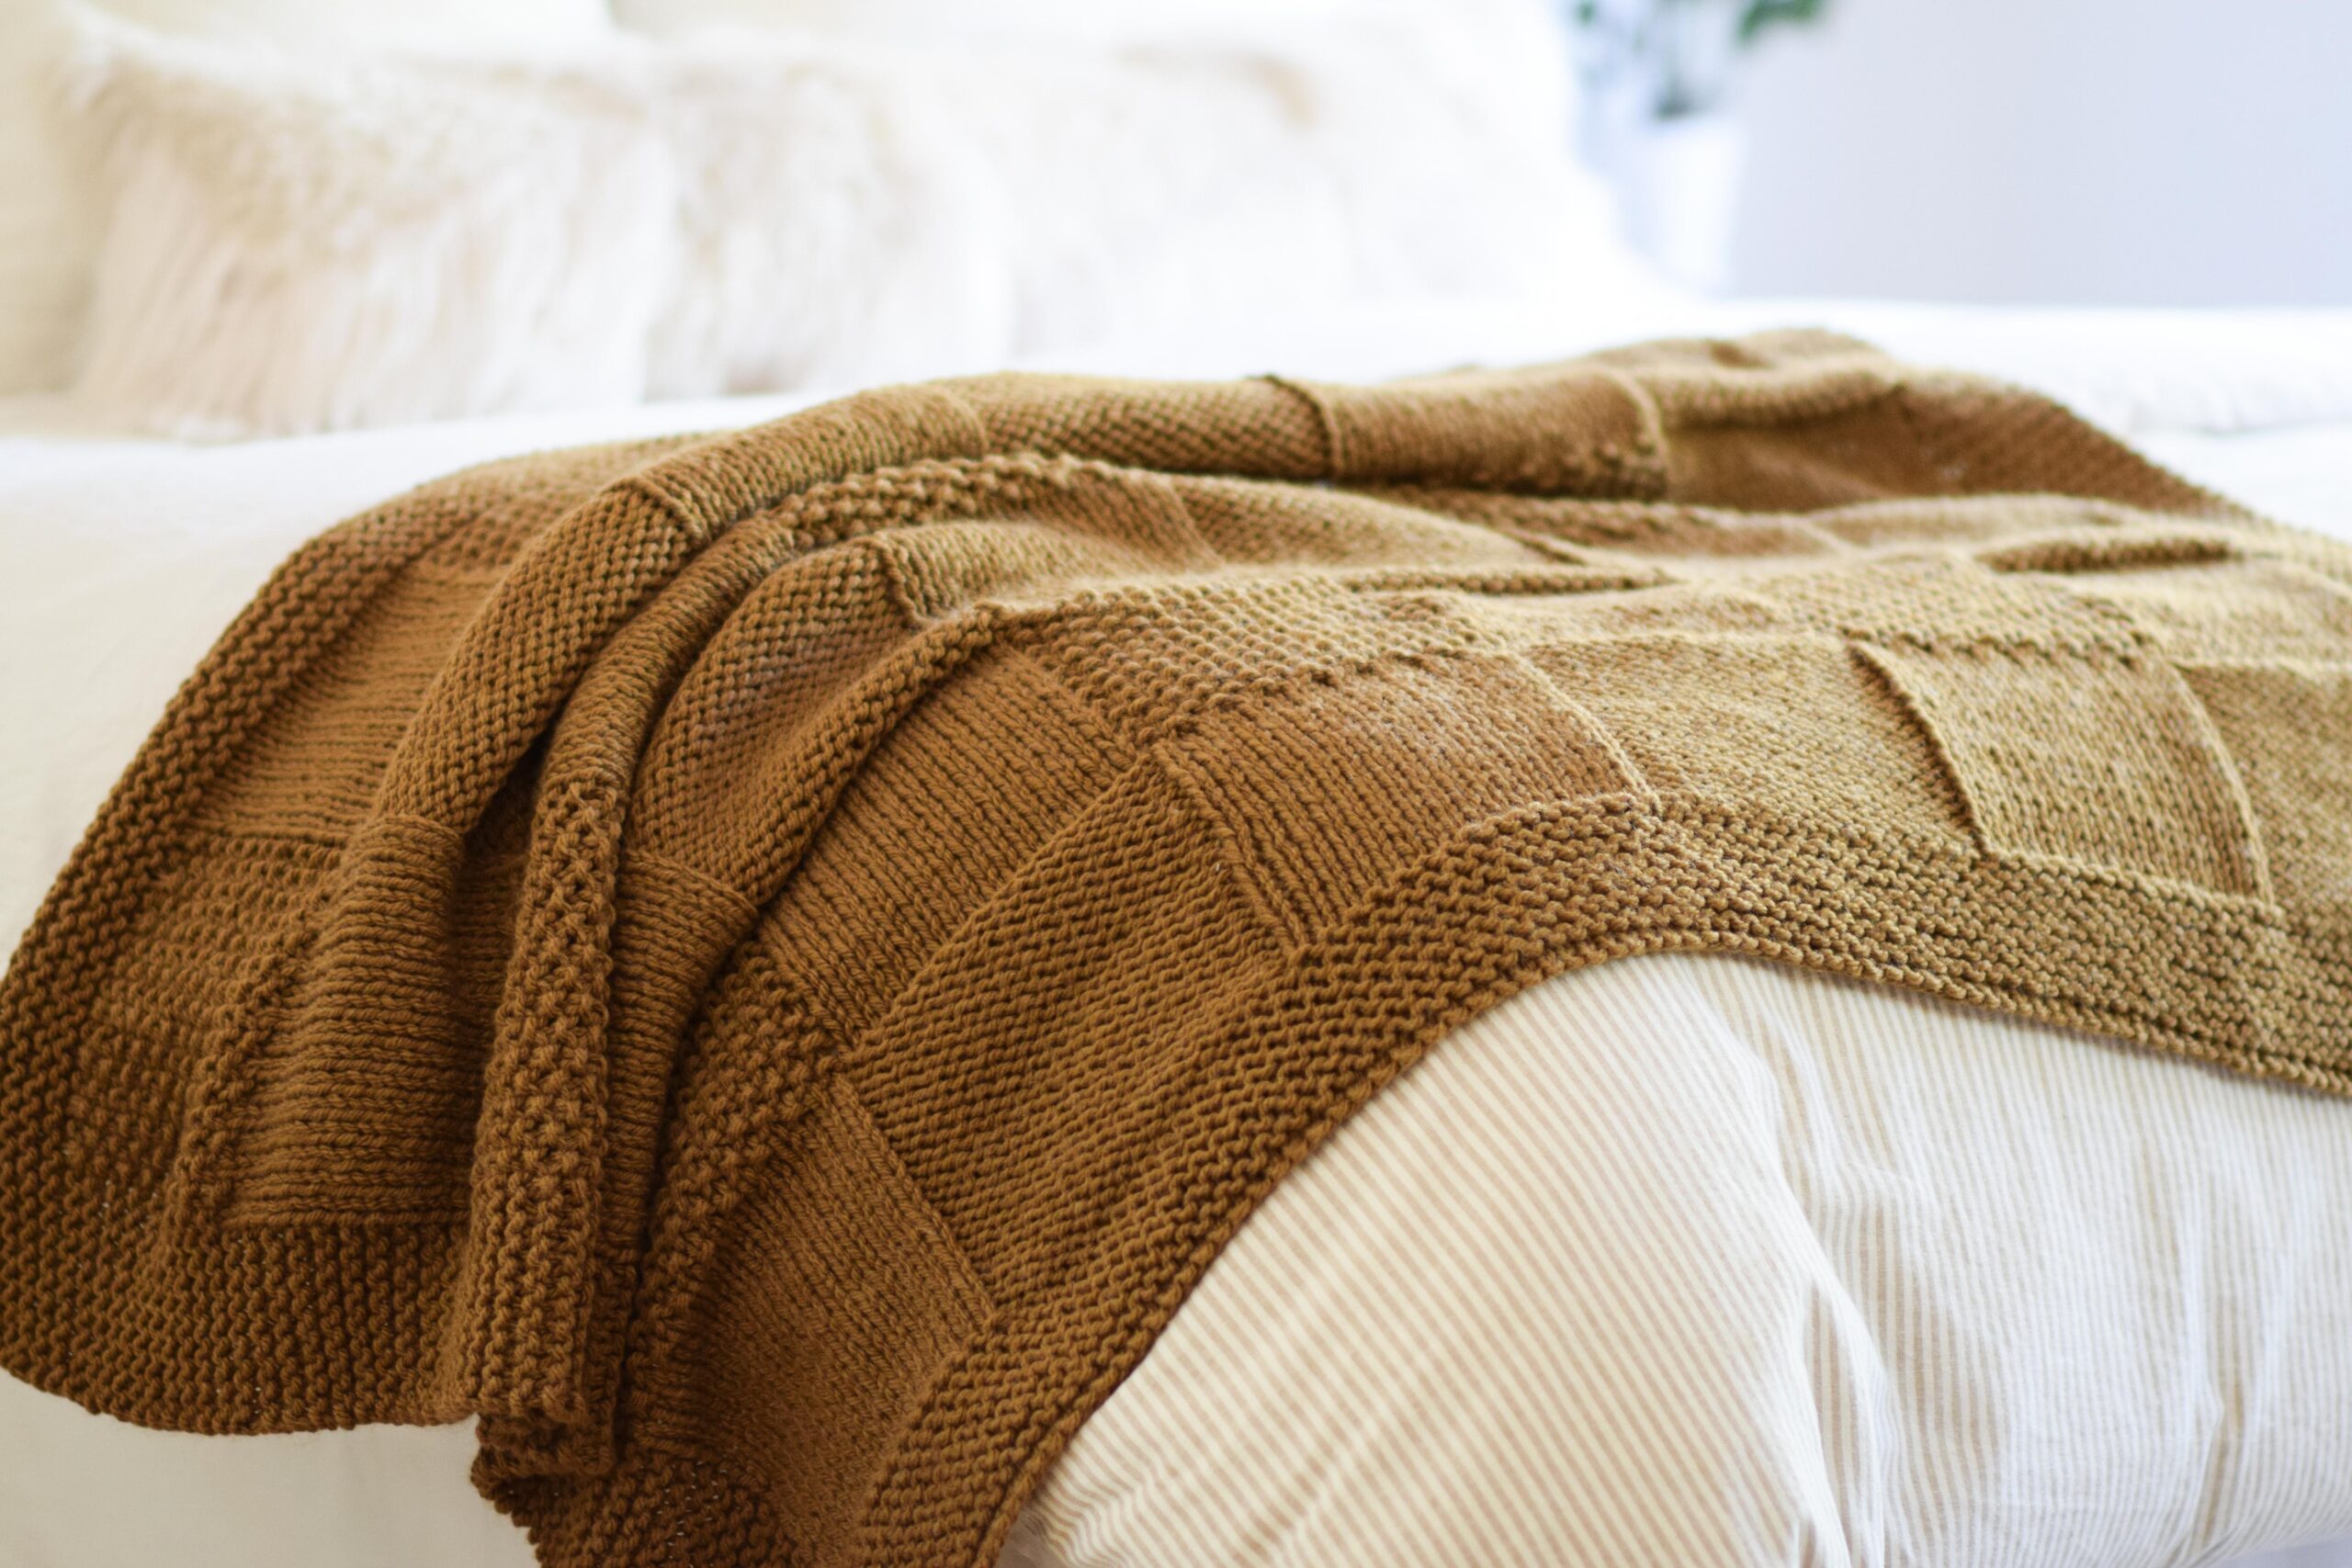
This colorful knit throw blanket features an easy, stunning stitch, along with gorgeous soft yarn to create an heirloom worthy project! And if you like solid color blankets, you can do that too. 🙂
I just love how it turned out, and it truly is simple enough for anyone who is comfortable with knitting and purling. It uses the super easy knit linen stitch. I don’t make difficult things. Haha! Read on…
See the full, free knitting pattern below, or you may find the printable, ad-free version available for purchase in my Etsy shop here. My kit design is also available on Lion Brand here.
After sharing a couple of crochet blankets that have featured playful colors and simple colorwork with striping, and self striping yarns, (remember the Rolling Hills Throw, Woodland Houndstooth Blanket) I’ve had many requests to make a similar colorful knit version. It’s finally done!
Isn’t this stitch the coolest? It really looks and feels so similiar to a woven baby blanket that I received as a gift years ago. The fabric is a nice, flat fabric, with beautiful definition. I’ve always loved the look of the linen stitch, but had originally hesitated trying it because it seemed time consuming and even a little difficult. I was SO wrong. It is truly a simple knit stitch that’s super easy to memorize, and it works up wonderfully.
This blanket does take more time than many of my other knit blankets simply because it uses a smaller yarn! I know a lot of you have waited for a worsted or lightweight blanket option because I tend to use the chunk chunk yarns. Ha!
What Yarn Do I Use To Knit This Woven Linen Stitch Blanket?
I love the way Mandala worked up for this project, and it was so easy to create the entire pattern without weaving in a bunch of ends. More on that later in the pattern, but also, aren’t the colors so lovely?
Definitely check out all of the color options because Mandala is suitable for all ages, even babies and children in my opinion. There are some colors that would work great for teens, babies, and kiddos, and of course earthy options for home decor. You can also sub with any light or worsted weight yarn that you like. While mine is colorful, it would look awesome in a solid color as well.
Okay! Are we ready to get to the pattern?
Onward!
Woven Wonder Easy Knit Throw Blanket Pattern
Description:
This stunning blanket has the look of an intricate heirloom woven throw but uses a super simple knitting pattern! There is no need to cut and weave in ends for color changes with this project. It features a light, soft fabric that’s great for the warmer months, and it works beautifully as an eye-catching accent throw. Available in several sizes, this blanket can be admired by anyone – from child to adult! NOTE: You do not need two different colorways to achieve a similar look if certain yarn colors are unavailable. You may use all Warlock or all
Centaur. Do check out all of the other beautiful color options you can choose from as well!
Materials:
1 (2,3) Lion Brand Yarn Mandala in Warlock (light #3 yarn 590 yards/skein and 150 g)
1 (2,3) Lion Brand Yarn Mandala in Centaur (light #3 yarn 590 yards/skein and 150 g)
Pattern uses approximately 300 g (600 g, 900 g) Kit Available HERE
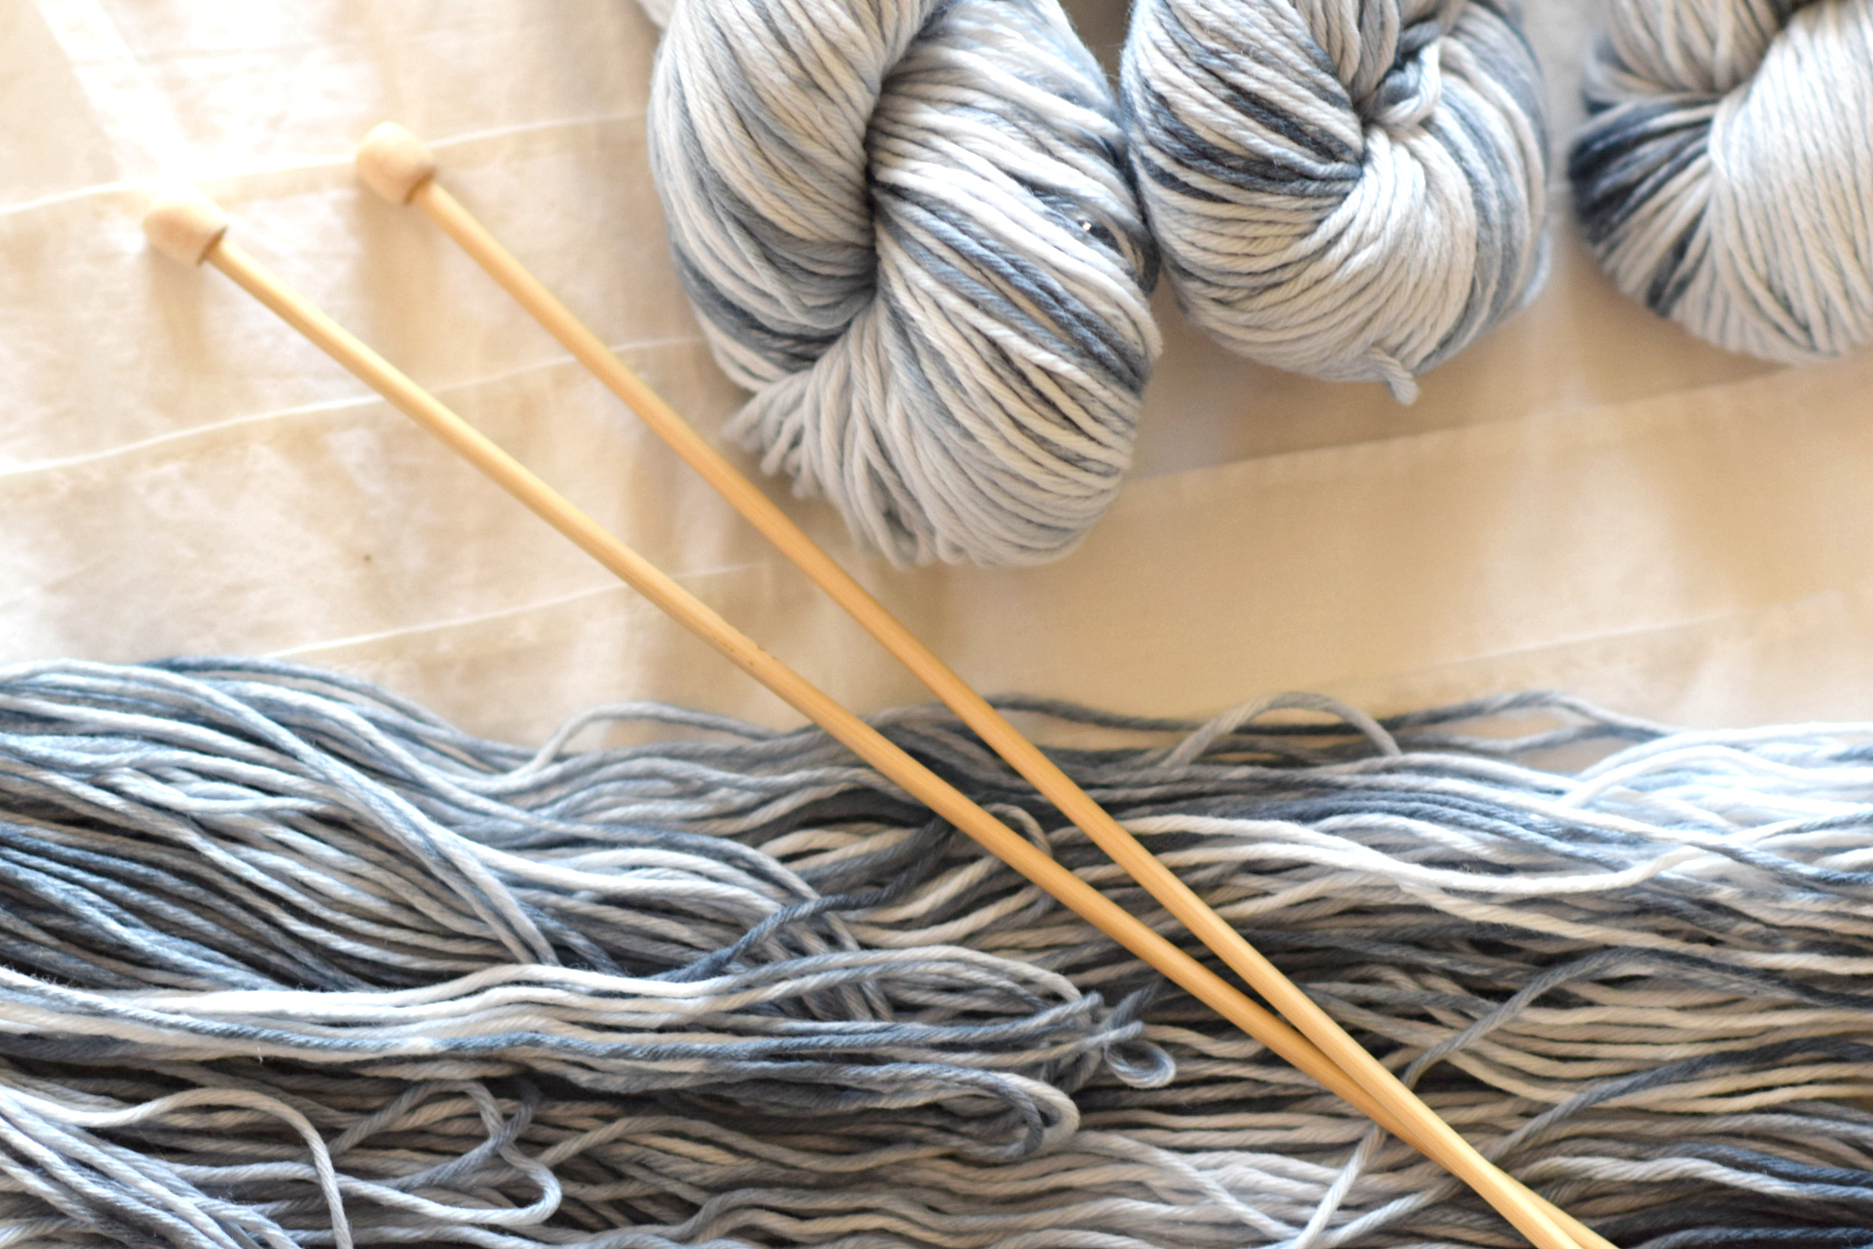
US Size 8, 5.0 mm 36” circular knitting needles
Scissors
Tapestry needle to weave in ends
Size (approximate):
Three Sizes Available
Small/Child: 27” X 40”
Medium Lapghan Throw: 36” X 48”
Large Standard Throw: 50” X 60”
Measurements are before blocking.
Follow the directions throughout the pattern for the size you are making. The Small/Child is listed first, followed by the Medium and Large.
Key: S (M,L)
Size can be adjusted – see “Pattern Notes” for more details.
Gauge:
Approximately 22 sts and 21 rows in 4” x 4” in linen stitch used in pattern
Pattern Notes:
This pattern uses the knit linen stitch. There are many tutorials that can be found online for this stitch by conducting a simple search. Feel free to practice this stitch on a small swatch before beginning the blanket by simply casting on an odd number of stitches and working the pattern.
The pattern calls for circular needles in order to comfortably hold all of the stitches on the needles, but keep in mind the blanket is knit flat.
Customizing the size: To adjust the length, simply follow the pattern until your blanket is the desired length. To adjust the width, simply cast on an odd multiple of stitches. Keep yarn needs in mind when adjusting the length and width of the blanket. Have fun!
Abbreviations (US) & Skills:
k – knit
p – purl
sl1P wyif – slip one purlwise with yarn in front
sl1P wyib – slip one purlwise with yarn in back
st – stitch
sts – stitches
Important – Read before beginning: Change colorways every two rows, carrying the yarn up the side of your work as to not cut the yarn. For example, knit two rows with the color Warlock, then knit two rows with the color Centaur. Work through the skeins of yarn, knitting with just one strand at a time, changing colors every two rows. Easy peasy! You could certainly cut the yarn and pick up the new color to make your color changes if you prefer, but you would have to weave in a lot of ends. ☺
Note: The two colorways used here have several of the same colors. The key for creating the pixelated color is to not use the same color in both skeins at the same time. Every two rows should contrast, so for example, start with the mustard from Warlock and the purple from Centaur when you make your first color change. Then simply work through the skeins of yarn following the pattern! You may cut the yarn if needed and wind it up to save for later if you need to get to a color in the skein that contrasts.
Cast on 149 (199, 275) stitches with any color.
Stitch count remains the same throughout the pattern.
Change colors every two rows.
Carry yarn up the side of your work as to not have to cut yarn when making a color change.
Row 1: *K1, sl1P wyif. Repeat from * across to last, k1.
Row 2: P2, *sl1P wyib, p1. Repeat from * across to last, p1.
Repeat rows 1 & 2 until you’ve reached your desired length. Cast off and weave in ends.
Block with desired method.
That’s all there is to this beauty!
Enjoy your gorgeous “woven” knit throw!
Optional:
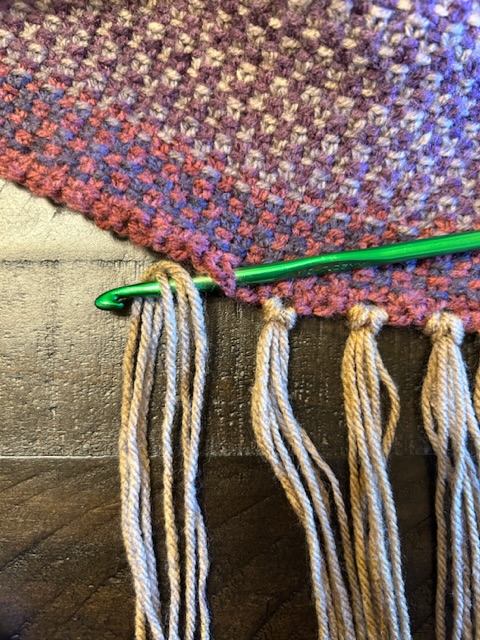
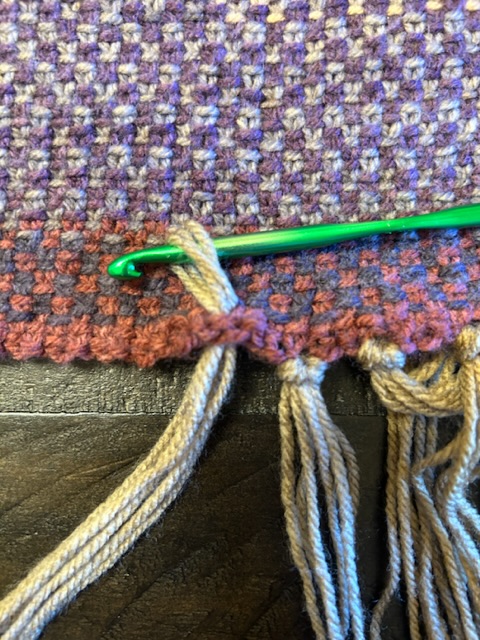
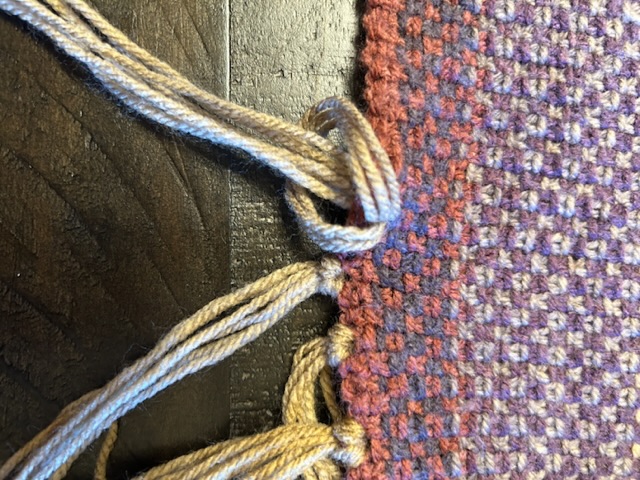
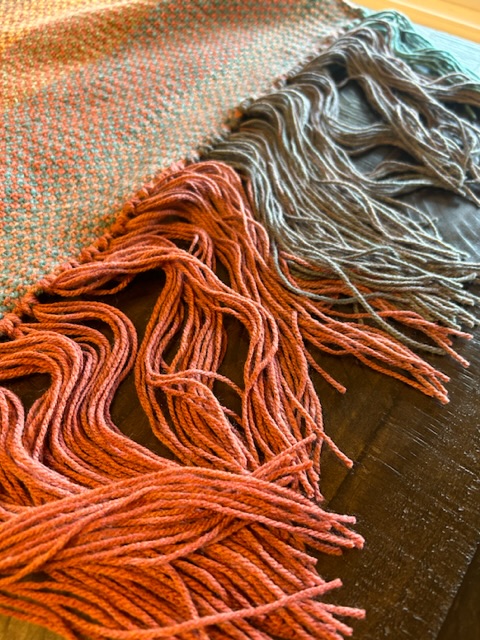
Add fringe along each end of the blanket. Simply cut three strands of yarn approximately 10” inches long. Hold the strands together and fold in half. With a crochet hook or preferred method, draw the folded end through the knit fabric. Next, pull the ends of the yarn through and tighten. Repeat this along each end, adding fringe every 1 1/2”
How To Add Fringe To Your Knit Blanket
Done, and done!
Here are some other beautiful knit blanket patterns:

And here’s another colorful blanket you might like! Painted Sky Blanket Knitting Pattern
Hope you enjoyed this unique blanket!!
XO,
Jessica
This post sponsored by Lion Brand Yarn. All opinions are 100% my own.
Love the look of this blanket. I’ve knit several of your patterns and this is going on the ‘to do’ list for sure!
Gorgeous!
Wow! I’m going to buy yarn for this blanket ASAP.
A very beautiful blanket. I love the colours. I have knit a couple of your blanket patterns previously. The patterns were very straight forward and they turned out great. I gave them as gifts and they were well received. This blanket reminds me of some woven blankets my grandmother use to weave.
Thank you for the pattern in knit. My crochet skills are not very good. I plan to knit one for myself!
June