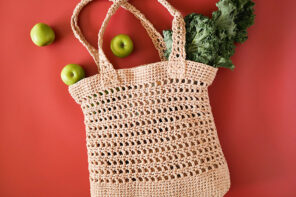
This retro-style round throw pillow with cute pom poms and fluffy fringe trim is sure to add some vintage charm to any room. The knitting pattern is super simple, so even if you’re a beginner knitter, you’ll be able to make this cozy pillow in no time!

This free knitting pattern is brought to you by American Yarns. This post contains affiliate links.
This knitted cushion cover is made with a new luxurious chenille yarn from American Yarns called Premier Parfait Chunky, which is oh so soft. The pom pom and fringe are made using Premier Bunny yarn.

The Parfait Chunky yarn is very popular for making crochet toys, but I wanted to try something a little bit different to show off this yarn’s versatility.
Chenille is such a throwback to the 50’s, with fringed chenille bedspreads being all the rage back then. Also popular at the time were round gathered velvet tufted pillows.
The cogs in my brain got to work, and this retro-style velvety round knit pillow was born!
I took inspiration for the design of this knitting pattern from sewing patterns of mid-century style round velvet pillows. Essentially a tube that gathers on each side of a round cushion insert fastened by a button.
This knitted cushion cover is assembled in exactly the same way – a large knitted tube gathered in the center. Super easy!

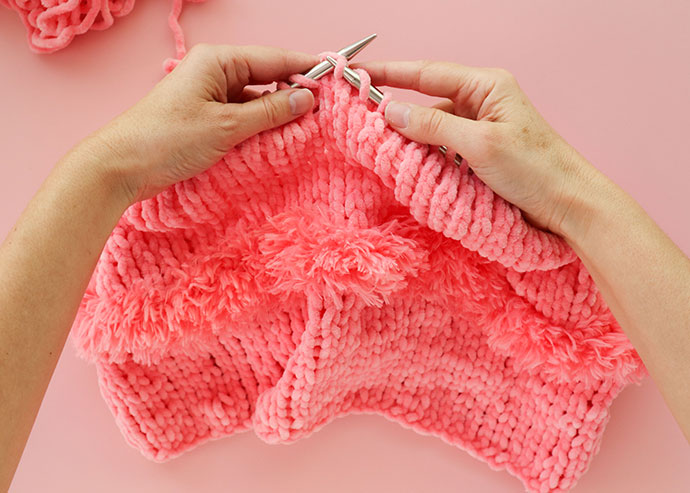
With circular needles you just knit, knit, knit in the round, adding some fluffy bunny yarn halfway up the tube to create a fringe trim.
The pattern works up quickly with nice big needles, and only requires one ball of Parfait Chunky to make a pillow.
A one ball wonder! Another reason to love this project!
The fringe style edging really adds to the vintage look. I’ve opted for a similar colour tone for the fringe accent, but for added impact, why not try a contrasting colour?
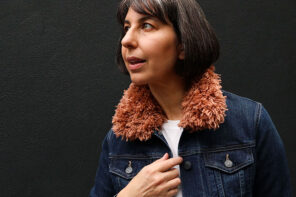
I’ve used Premier Bunny yarn before to make a fluffy crochet fur collar – you can read my full yarn review for Bunny yarn in that post.
About Premier Parfait Chunky Yarn
Premier Parfait comes in a whopping 53 colours, so you are sure to find a colour to suit any color scheme.

This is the first time I’ve used Parfait Chunky, and it reminded me a little bit of Bernat Velvet but with more ‘body’ and less shine.
It’s a 100% polyester yarn with a soft fuzzy texture that has a peach-skin like finish when made up, (as opposed to Bernat Velvet which is more of a crushed velvet look when it catches the light).
Just like Bernat Velvet, and all chenille style yarns, it has a tendency to ‘worm’, so unless you are an expert, stick to simpler knitting and crochet stitches.
Read about worming and how to avoid it.
I used the recommended needle size for this project, but for a garment I’d probably recommend a needle (or hook) size down to keep worming to a minimum.
Surprisingly, worming wasn’t a big issue with this knit. Maybe because it’s knit in the round, so keeping a consistent tension was easier. And also the gathering on this cover helps disguise any stray loops if they were to happen.
If you are looking for a chenille velvet style yarn, I think Parfait Chunky is a solid choice. The fact that it comes in 53 colours is a big bonus.
I’d recommend it for crochet where worming isn’t as much of an issue. But it’s quite good to knit with, as long as you pick your project accordingly.
Now let’s get to making! Time to knit a pillow cover.
Vintage Style Round Pillow Knitting Pattern

How cool would a sofa full of these round knitted cushions look in an array of colours! They would really brighten up a room.
Even if you are new to knitting in the round, this pattern is super easy because there are no increases or decreases.
If you can cast on, knit and purl, you can make this pillow cover.
This pattern will fit a 33-35cm round cushion insert which you can purchase online. But if you are DIY inclined like me, I’ve got a full tutorial for how to sew your own round pillow insert.
The homemade pillow insert I used was 33cm in diameter. To make the pattern, the radius was 17cm which included a 0.5cm seam allowance.

Finished size : 35cm diam
You will need:
- 35cm (14″) round pillow insert – or DIY pillow insert 33-35cm
- 1 ball Premier Parfait Chunky in any colour you prefer – I used coral
- 10m (estimated) Premier Bunny Yarn in matching or contrasting colour – I used coral
- 8.0 mm (US 11) circular needles with a short cable (I use this interchangeable set)
- Stitch marker
- Thin satin ribbon or smooth yarn
- Extra strong thread or thin cotton twine
- Medium size button
- Long sharp needle eg. doll needle
- Yarn needle
- Scissors
How to knit the cover
Gauge (approx) 10st x 9 rows in 10cm/4″ in stockinette stitch
With Parfait yarn Cast on 85st and join for circular knitting. Place marker.
Row 1-16 – knit all stitches (stockinette stitch), drop yarn but do not break off.
Row 17-18 – Change to Bunny yarn and purl all stitches for 2 rows around. Break off Bunny yarn
Tip: The fluff to create the fringe will be more prominent on the side where the yarn is held, so by purling, which holds yarn to the front, you will get maximum fringe fluff.
Row 19-34 – Pick up Parfait yarn, knit all stitches. Don’t cast off, but instead thread a ribbon or smooth piece of yarn through each stitch in preparation to gather.
Weave in any loose yarn ends.

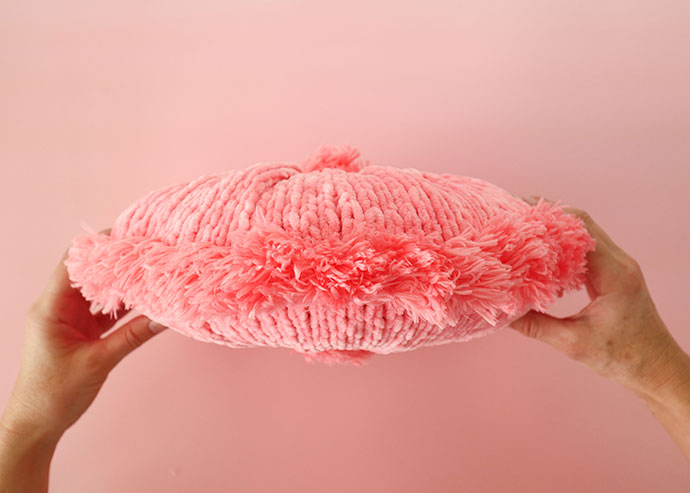
You should now have a very wide tube with fringe about half way up the side. It doesn’t look like a round shape yet but with a little bit of magic manipulation this rectangle will become a circle.

Gather the top and the bottom of the tube and lay it flat with the fluffy fringe on the outside and voilà! The circle pillow cover takes shape.
How to assemble round pillow cover over insert

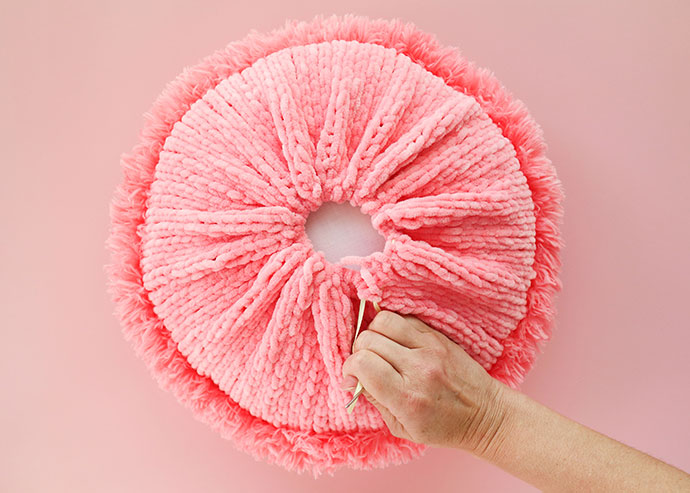
1. Thread a length of yarn or thin ribbon through a yarn needle and pass through each stitch to secure before removing the knitting needle. In this picture I used the Parfait yarn to thread through each stitch but it was too grippy to gather evenly so I swapped to a ribbon.


2. Gather stitches as tightly as possible and then tie off ribbon securely and trim ends.

3. Place pillow insert in cover.

4. Thread ribbon or smooth yarn through every stitch of cast on edge.

5. Gather stitches as tightly as possible and then tie off ribbon securely and trim ends. Tuck in ribbons ends on each side of pillow.
How to make and attach pom poms
Make 2 pom poms using the following technique.

6. Wrap Bunny yarn around your 3-4 fingers about 10-15 times to your desired level of fluffiness.

7. With around 30cm of really strong thread or yarn tie off the center of the bundle to secure, keeping about 15 cm of thread on each end of the knot.

8. Trim off any stray fluff to neaten, but do not cut into yarn loops or the fluff will shed everywhere.

9. To attach pom poms, thread the ends of the securing threads onto a long needle and poke it through the center of the pillow out to the other side.

10. On the reverse side, thread the tails of the strong thread through a button and pull firmly.

11. Pressing the button down really hard, tie a strong knot to secure.
12. Attach the remaining pom pom by tying the tread tail around button securely.
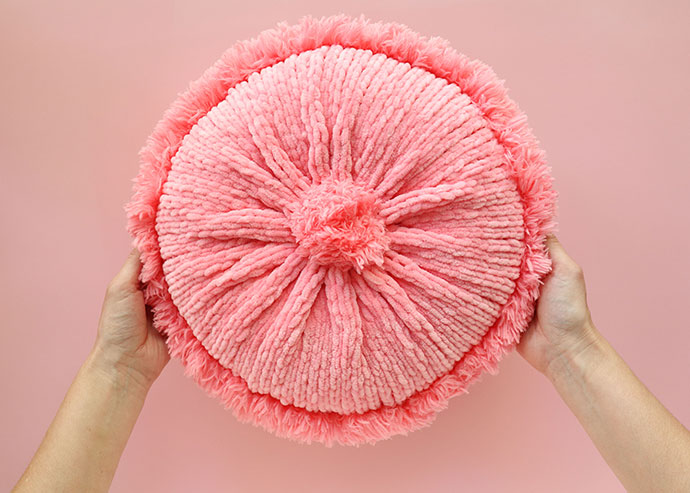
All done!
Now it’s time to admire your handiwork.

You can purchase the yarns featured from www.americanyarns.com.au