
In our family, the holidays bring not only good food, fun and family, but lots and lots of wine. There is usually at least one point an evening when someone will say “is this my glass?” And then followed by the disagreement over who gets to claim the more-full one. So why not make some wine charms to help ID our glasses (and own up to our volume of consumption).
I made a set of 10 I varied the colors of the tops as best I could. I had quite a few to chose from as Mr. Mug and I like our wine (you may have caught on to that already).

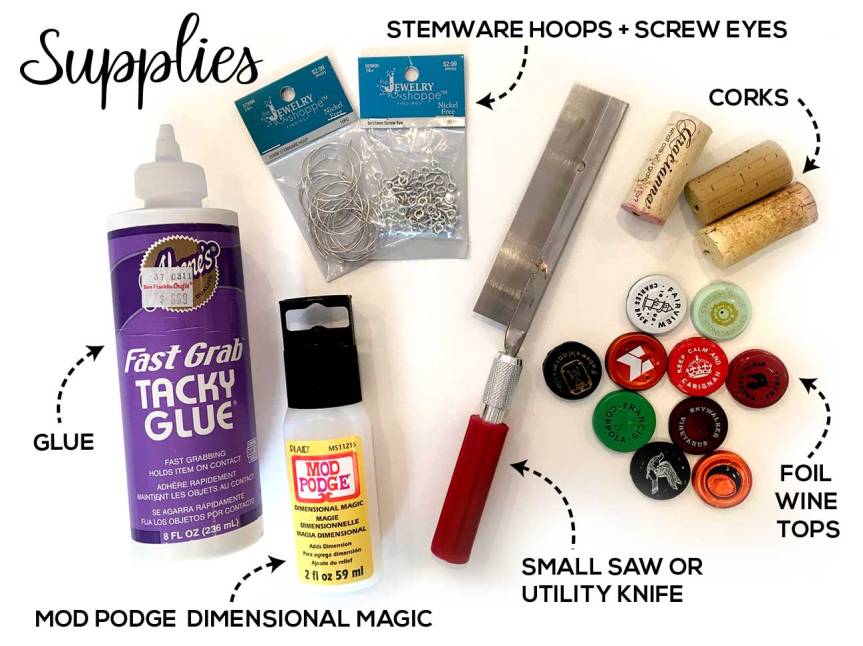
I used a foil cutter to neatly cut off the top of our wine before removing the cork. Ours lives atop our electric cork screw. If you don’t own one, it’s an inexpensive item that, if you are anything like our family, will pay for itself after the gathering.
Once you have how many foil tops you want to use, you’ll cut discs of cork to place into them. They should be about an eighth of an inch or so thick.

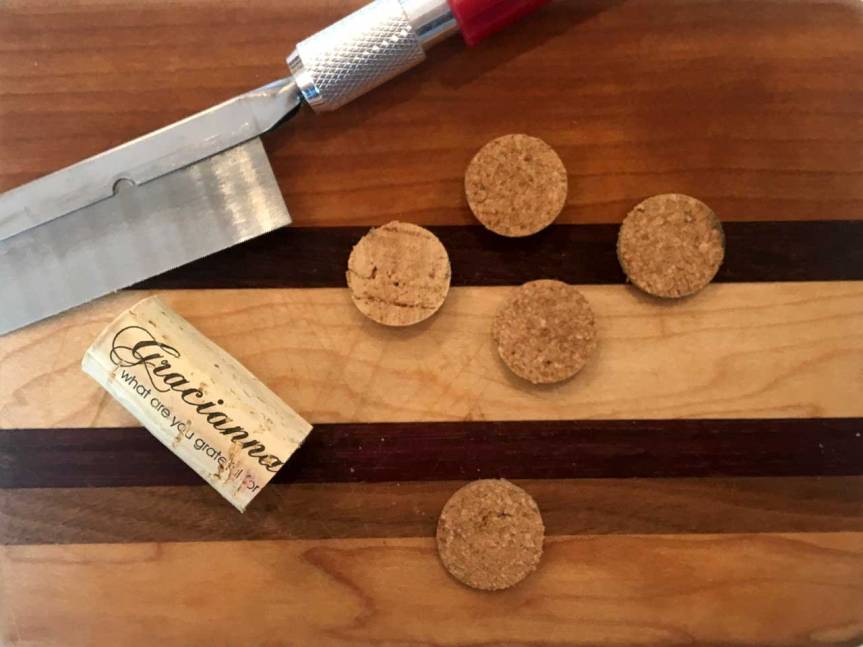
You’ll then want to glue them into your foil tops, centering them as best you can. Before you glue them, a good tip is to rub them gently to get rid of any cork dust that might be hanging on them. If they are dusty, it will rise to the top of the Mod Podge while drying. It’s not that noticeable once they are dry and the Mod Podge is clear, but it’s better to try to avoid if you can.

Once the glue is dry, you are ready to apply the Mod Podge Dimensional Magic. A good tip to remember is to NOT shake the container, as it will create bubbles that you don’t want. If you do get bubbles while applying, I’ll show you how to remove them in the next few steps. A little blow into the caps, to remove any last-minute cork dust is a good ideas as well.
Start by applying the Mod Podge into the space around the cork, basically creating an outline for the rest of the application. You’ll then fill in the center, and create a dome of the liquid. Move slowly as to not let it over flow.


After you have filled all your caps and set them on a level surface to dry, you should keep an eye on them for the first 30 minutes or so. Bubbles will form as the Mod Podge settles into the porous cork.

Take a lighter or a match and move it over the bubble and it will pop. Hold the flame far enough away from your piece so you don’t scorch the liquid and do not hold it in one spot for too long. When I did this, I was pretty close to the Mod Podge and it did not scorch, but better to take precaution, just in case.

It’s also important to do this within the first 20-30 minutes of the Mod Podge drying as it will thicken up and the bubbles won’t pop as easily.

After your tops have dried for 24 hours, you are ready to attached your eye screws and stemware charms.
I used a pushpin to help my screw go in easier.


Then attach the stemware hook, and you are done.


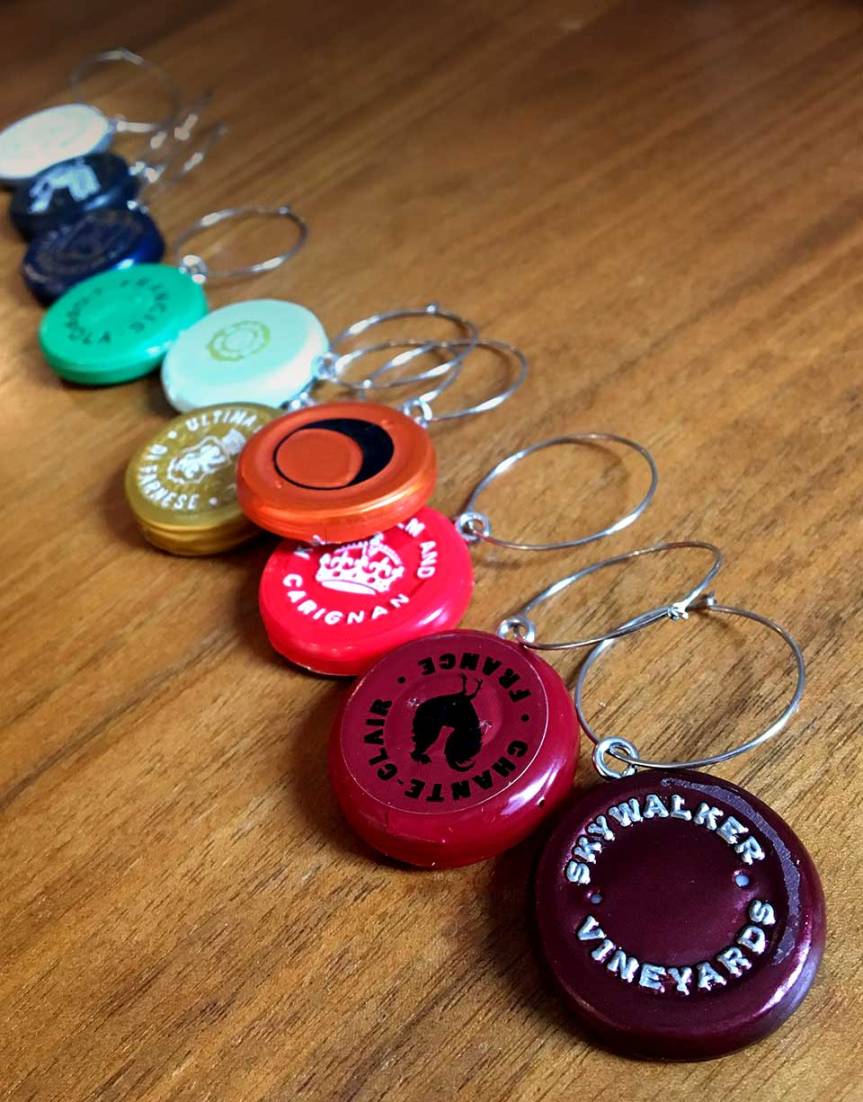

I think they will make a festive and colorul addition to our Thanksgiving dinner and help each of us to keeo track of our own holiday cheer!


Another clever and great-looking project!
LikeLike