
This Hector from Coco mask was created using a 3D Printing Pen called the 3Doodler Create+. It’s a unique sugar skull mask that we made at home for Halloween.
I was sent the 3Doodler Create+ to test out and I am currently loving it. (This post uses affiliate links.) It’s cool being able to fabricate my own designs with a 3D printing pen. They also have different types of plastic filaments that you can use from a hard PLA which is what the white on this mask is, to a flexy plastic that you can use to make things like a purse!
I did a time-lapse video so you can see the process of making the mask!

I used a white plastic mask that I found at Michael’s (which also sells 3Doodler supplies!) as the base and template for my design. I then sketched Hector’s skull markings with a black dry erase marker. Using that plastic mask as a bask helped to form the mask to fit my face properly. When the mask was completed it just popped right off and the inside was super smooth on my face. 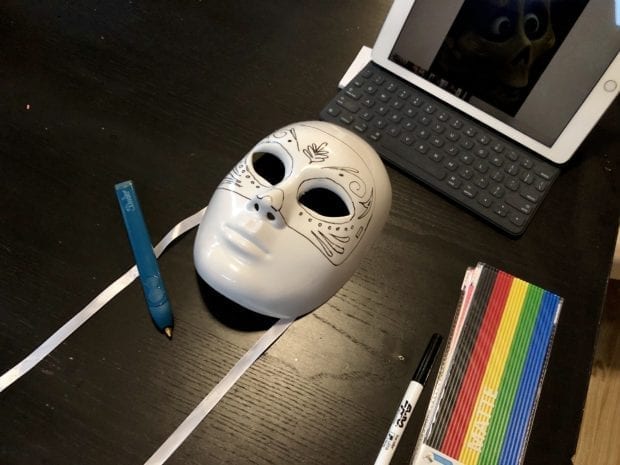
Make sure to leave a space for the ribbon to be tied, you won’t be punching through this plastic without destroying it! The Create+ comes with a bunch of filaments so that you can get to creating. I was a few strands shy on white so I did have to use some of the girl’s stash. 
The crafting fun is endless with the 3Doodler pen. I’m already cooking up over ideas of things to make. We also have the 3Doodler Start for kids and I love that it is wireless and the nozzle isn’t hot o the kids can create away!
This mask would go perfectly with a Paper Marigold Headpiece as well!

Hector from Coco Mask
Materials
- 3Doodler Create+
- 1 pack Snow White PLA
- Plastic Mask
- Dry erase marker
- Ribbon
Instructions
-
Sketch your design onto the plastic mask using the dry erase marker. Make sure to leave a space for the ribbon.

-
Start with the colored flourishes of the mask. It's ok if they don't stick to the plastic base, just put them aside for when you are ready to fill the white.
-
Start filling the white around the mask. Start on the outside edge and make sure to leave the nose section for black. Attach the flourishes as you go.

-
Fill in the nose and the eye sockets with black last.


Notes
PIN THIS POST!

