DIY Log Placemats + Rustic Bush Christmas Tablescape + Video
Guys can you believe Christmas is next weekend. Come on when did it pop around so quickly? I feel like I have had my head in the sand for the past two months and have only just popped back into real life to realise that Christmas is nearly upon us. A newborn baby will do that to you I guess. I have good news to share, well it's good news to me anyway our Ava girl slept through the night last night, and I was doing fist pumps this morning when I opened my eyes to sun streaming through the window and no baby crying. She probably has been technically sleeping through for about a week or so but was still waking around 5.30am for a feed before going back for a nap before I got her up at 7 am to start the day. However this morning the clock read 7:26 am and I had to wake her up to start the day. Hooray. Our littlest girl is 7 weeks old this week, and I am already mourning the loss of my newborn baby. She is starting to slowly grow out of her newborn clothes and nappies, and bigger sizes are sneaking into her cupboard. While the newborn stage isn't my favourite cos, it's so dang exhausting it is also special because they are just so little and cute and with this being our last baby I am trying to hold onto each stage as long as I can.
I had a Facebook memory come up the yesterday for two years ago when Little Miss H was only 6 weeks old around Christmas time, and it made me a little sad that she is so grown up now too. She was dressed in a little red Christmas outfit with a tutu with some cute saying on the front. I feel like I have blinked and she grew up under my nose. Do all parents with older kids feel like that?
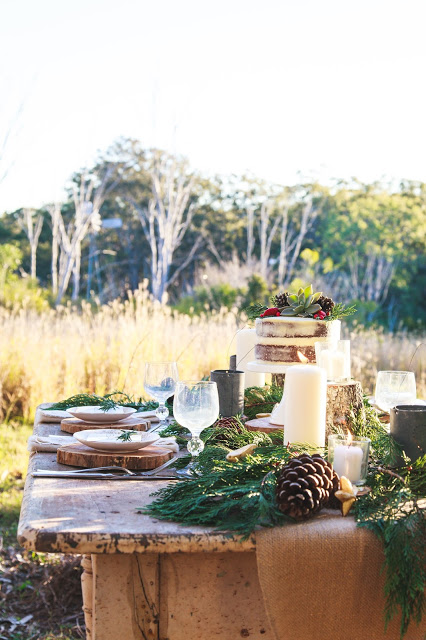
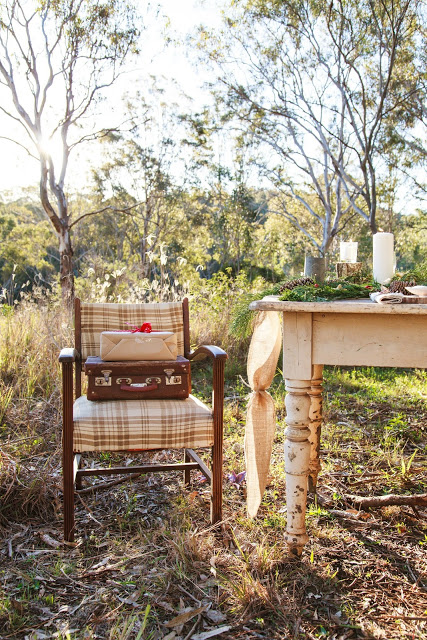
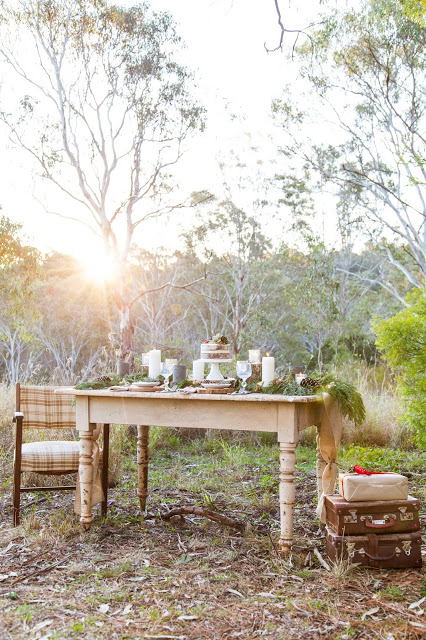
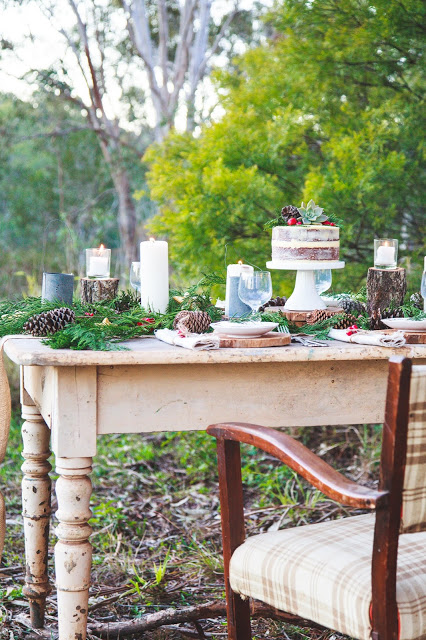
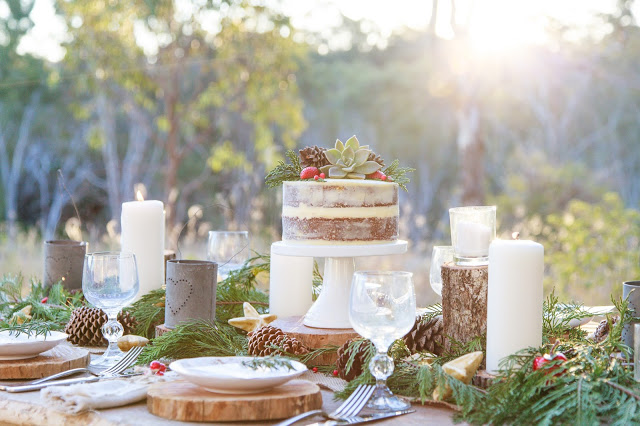
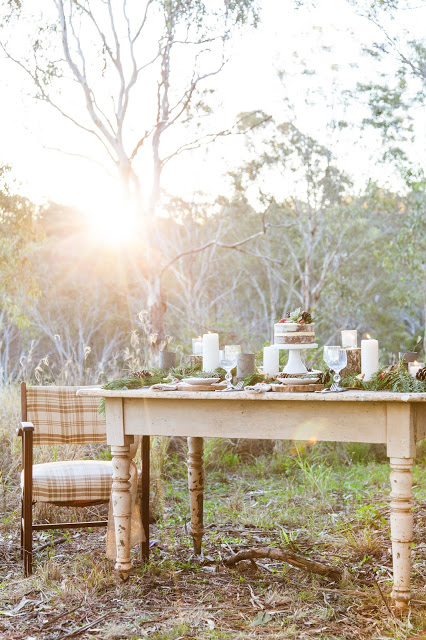
Anyway, let's talk about all things Christmas and laying out a beautiful Christmas table. Do you decorate your table for Christmas time? I had the opportunity to create this gorgeous tablescape for Handyman magazine for their Christmas special, and I couldn't wait to share it with you guys as well. I styled this table around these gorgeous rustic log placemats I created as part of that special, and it turned out beyond my expectations. I was 28 weeks pregnant (as you will see in the video at the end of this post) and was hauling things around our back paddock all afternoon to set it up in time before the sunset. Not my finest moment but I am glad I made the effort because the afternoon glow across this rustic tablescape looked pretty spectacular if I do say so myself. I think taking the time to set a beautiful table for Christmas is something everyone appreciates when they sit down but remember if it is stressing you out it's not worth doing. The key is to keep things simple, use what you have and remember it doesn't always have to be "Pinterest" worthy. It's about enjoying the process of putting it together.
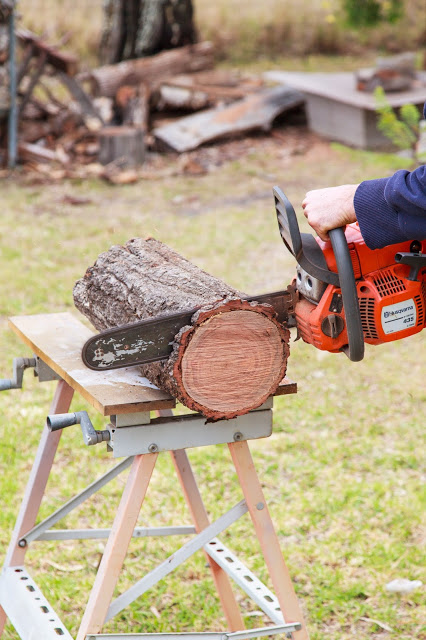
The log placemats are really easy to make, and all you need is to get yourself a man (or women) who is confident enough to cut slices of wood off an old log for you. If you can keep the bark on the wood than that is a plus, but the bark broke off mine as we were cutting it and I wasn't going to try and glue it back around the edges. I went with what I had, and they still looked great. So below is how to make the log placemats that feature in my rustic Christmas tablescape.
Materials:
- Chainsaw or drop saw
- Log or Branch the size of a small plate
- Orbital sander
- 80 grit sandpaper
- Sanding block
- 80 grit orbital sanding disk
- 120 grit orbital sanding disk
Instructions:
Note: When choosing the log to cut for your placemats make sure that it is well seasoned and by that I mean aged and old. You don't want a piece of wood that is still green and has not had enough time to dry out.

Step 1: Using a chainsaw or drop saw cut ½ inch thick pieces off the log or branch you have chosen. Cut the amount of placemats you require for your table setting. Don’t worry if the bark does not stay on the outer edge of the pieces of cut wood.
Step 2: Using the 80 grit sandpaper and sanding block give each piece of wood a light sand to remove any sharp edges. Repeat with all the log pieces.
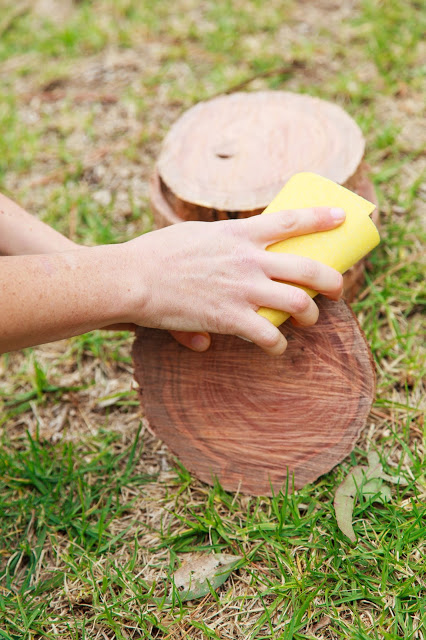
Step 3: Place the 80 grit sandpaper disk onto the orbital sander and give the face of each placemat a good sand and to smooth off any unwanted bumps on the face of the placemat.
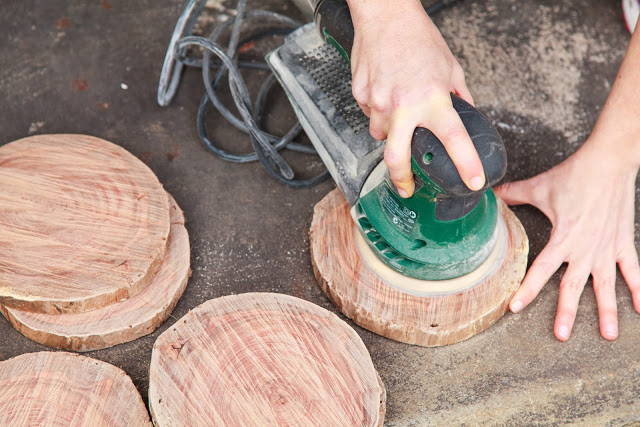
Step 3: Change the sandpaper disk to 120 grit and further sand the log disk until you are happy with the smoothness of the surface. Repeat with the other pieces of log placemat. If you have cut the pieces with a chainsaw it might be a little harder to obtain a completely smooth and flat surface but don’t worry as this adds charm to the placemat.
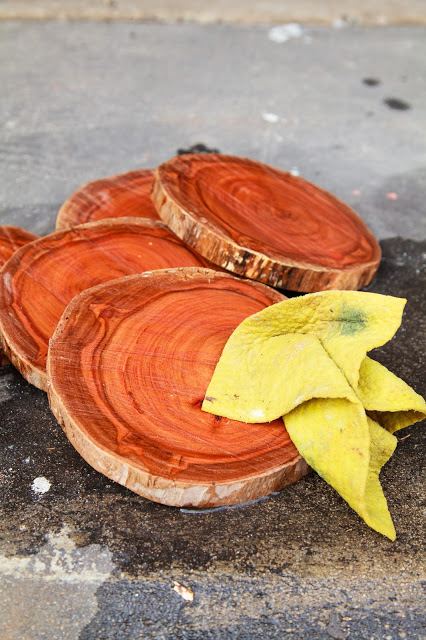
Step 4: Give each piece a light rinse to remove any built up sawdust and let them dry in the sun. You can leave the log placemats as is or if you want to you could give them a light coat with a matte varnish to seal and protect them. I opted to leave them raw.
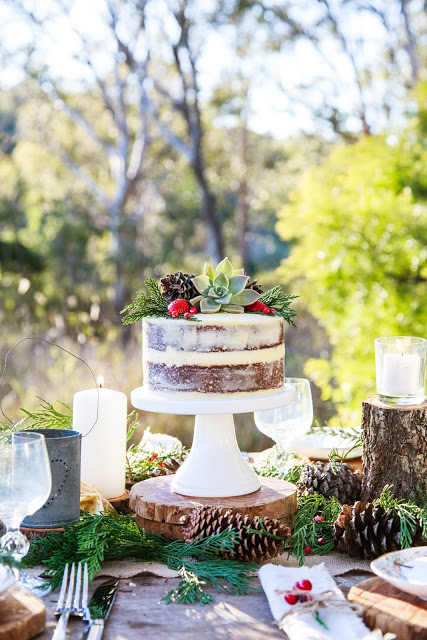
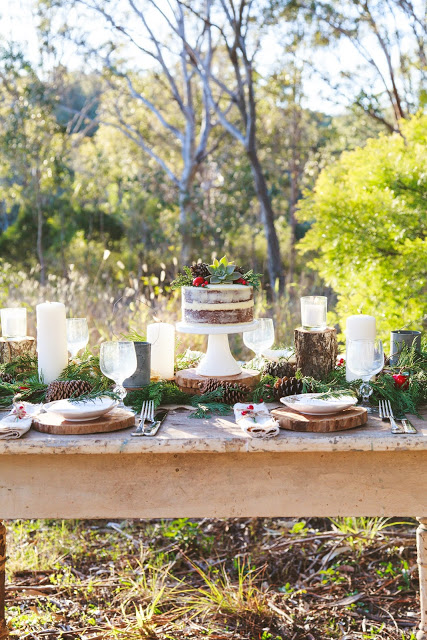
Step 5: Once the log placemats have dried it is time to set the table. Lay a rustic hessian runner along the centre of the table and overlay with small branches of pine tree leaves. Set out candles in varying heights along with tea lights in holders. Add in some pine cones and gold or red stars depending on your colour scheme. Add an eye-catching centrepiece in the middle of the table to draw the eye too. Maybe a stunning Christmas themed floral arrangement or a delicious Christmas cake. Set out the log placemats at each seat and top with a plate and name tag. Add a napkin, cutlery and glassware to finish off the table.

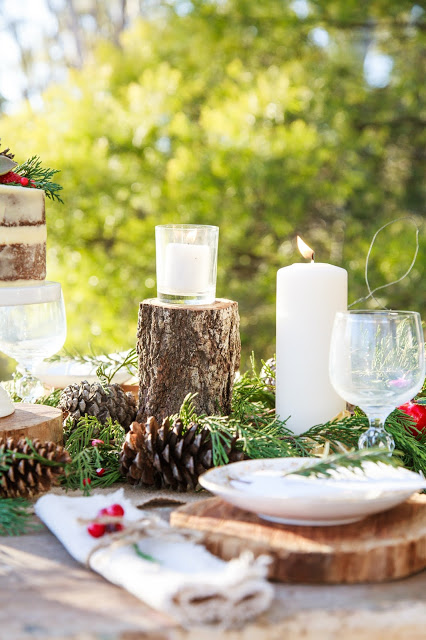
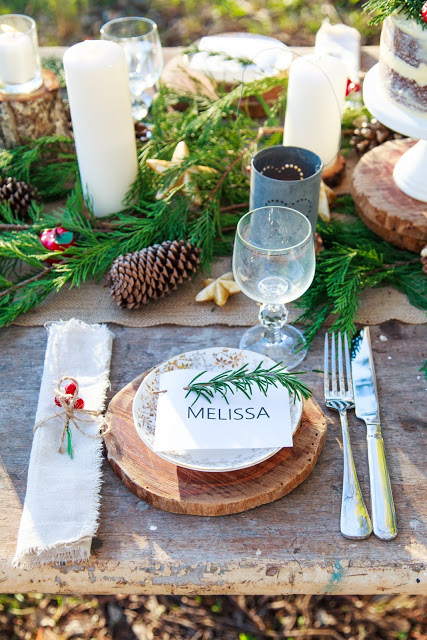
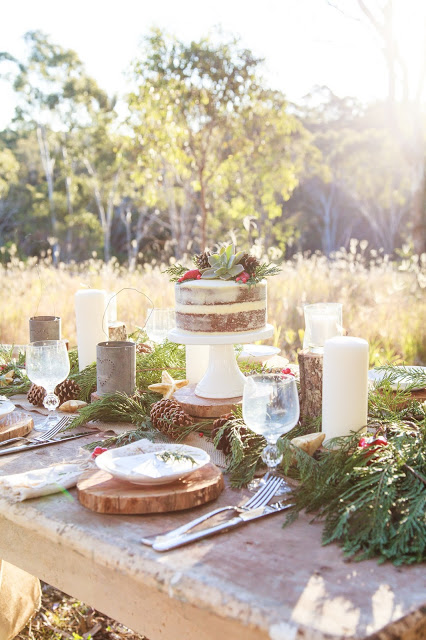
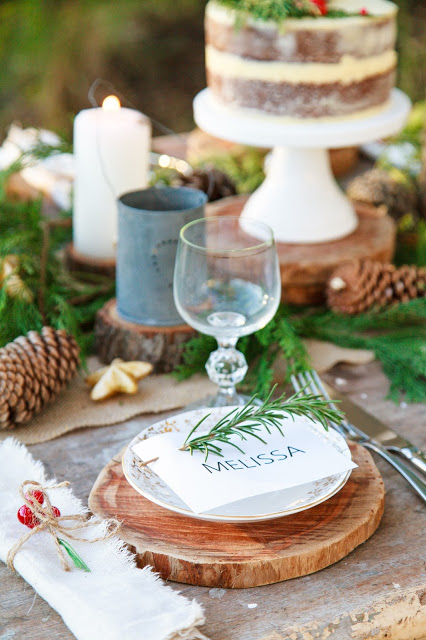
The vision for this table was to create a rustic Christmas table setting using natural objects that I had around me. I chose pinecones, pine tree foliage, and the log placemats as the basis of this tablescape all within reach from my back yard. I then paired it with natural finishes such as the jute table runner, rustic linen fabric for the napkins and the tin tea light holders to finish the look. My colour scheme was the traditional green and red with a pop of gold from stars scattered across the table and the gold edged plates. The warm gold colour was then echoed in the candlelight and the soft afternoon glow.

The ummed and ahhed over what I would use as a centrepiece for this table setting. I was thinking of a candelabra or a rustic Christmas tree but I adore the naked cake trend that is going around at the moment and wanted to take the opportunity to create my own version of one. I went against tradition and instead of using flowers to decorate the top I used some pine tree foliage, succulents, berries and pinecones to keep with the theme of the table. The cake itself is just a basic butter cake with lemon buttercream icing but tasted divine after a hard afternoon slog out in the paddock after styling this table. You could use a traditional fruit cake as the cake base and spread it with your favourite icing. Don't be afraid to experiment and create something that is uniquely you and make sure you play around with the decorations on top. Check out my video tutorial at the end of this post with a how-to guide on making the log placemats and I chat a little bit with you about the process I went through in styling the table. Let's just say I am not a natural in front of the camera and had to cut a LOT of um's and ah's out of the video. Something to work on for next time I am in front of the camera. Ha.