


Easy to Make Arctic Fox Pinata DIY and Party

Allie has developed a new obsession with Arctic Foxes. As a result, she wanted a Fox Piñata DIY and party for her 11th birthday. First, she promised she would help with “every little bit!” Next, she was full of creative ideas for how to pull it off. I simply couldn’t resist. I have a full photo tutorial for the Fox Pinata DIY below, along with how-tos on the rest of the party. Enjoy!
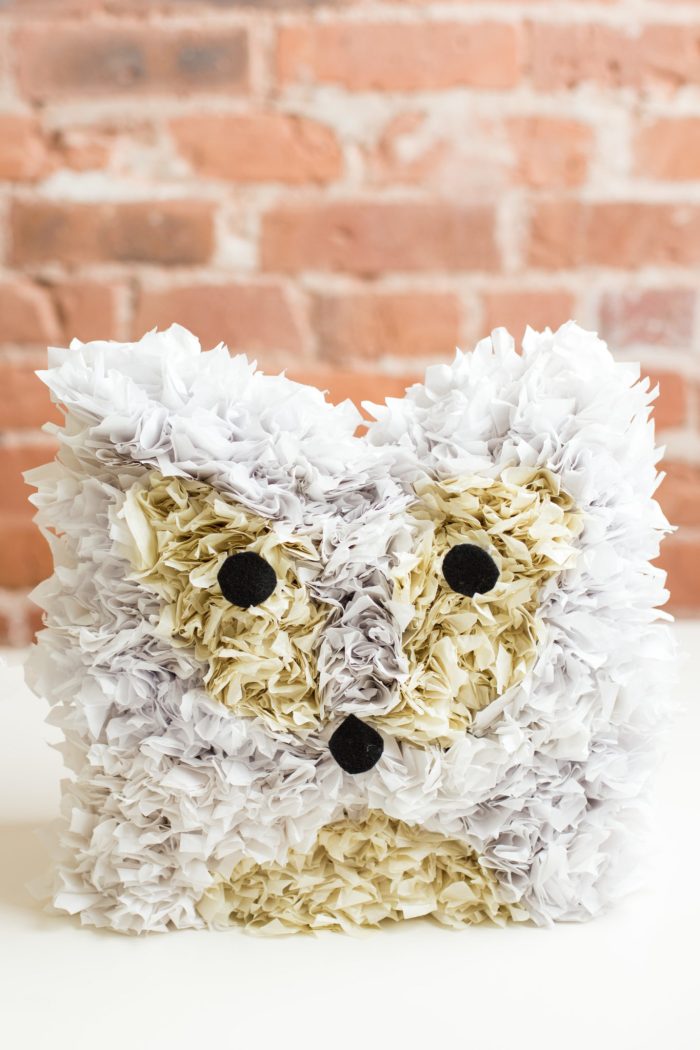
I was a bit daunted about making my own piñata. You see DIY Piñatas everywhere, but they always seemed like an awful lot of work to me. In the end, though it did take some time, Allie and I found it delightful to make together. First, we found the piñata’s very simple base, a square gift box, at Target. Obviously, if you used orange for the main color, it would be a little more clear what animal it is. But, she was pretty particular about Arctic Foxes, and how could I make her do otherwise. Her party meant her choices.

The party wouldn’t be complete without a cake, and Allie designed this entire cake all by herself. I even made her give all the directions to the cake designer. Doing this gives her good practice with communicating her ideas and being outspoken enough to say what she wants. Though shy, she warmed up after a while and enthusiastically described her vision. As a side, I have also found that designing cakes in our imaginations (on walk, bike ride, while we wait for something, etc) is a fabulous way to pass the time. She loves to describe every little detail!

We made these adorable gift bags with sharpies and a simple outline design on white bags. Find the how to for this fox gift bag below.

In addition to the Fox Piñata DIY, I also made art canvases for the girls to do as an activity at the party, which also served as a favor to take home. I simply drew a similar design to what is on the gift bags on to 8×10 art canvases with a pencil. Then, I put out a bunch of paint and brushes and let the girls go to town. They very sweetly stuck to arctic foxes, such loyalty for their pal!

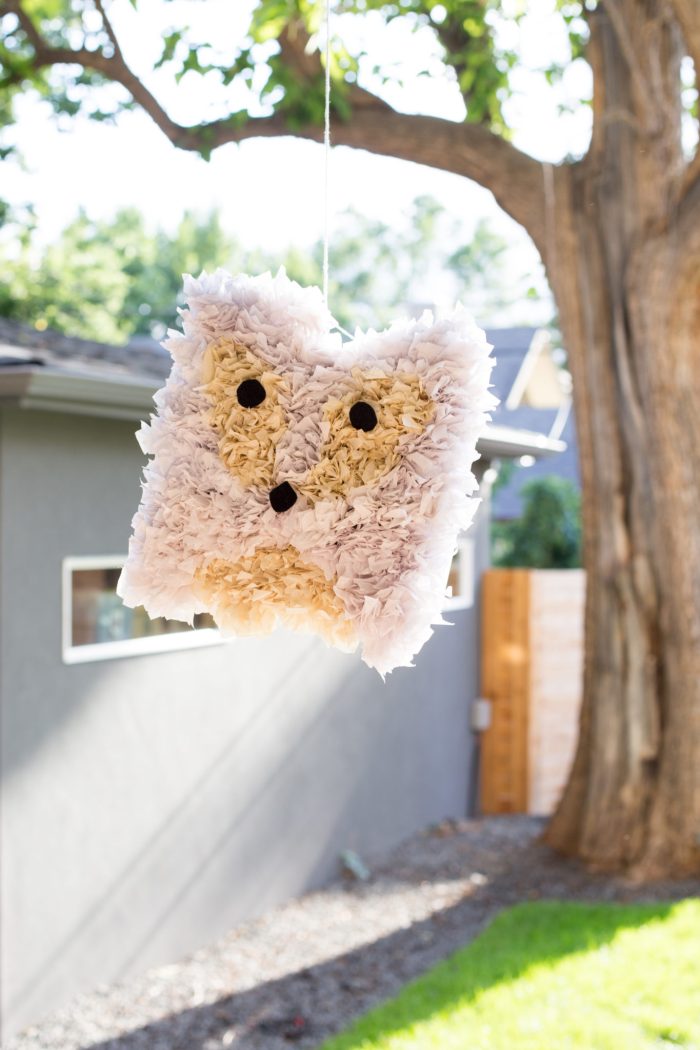
The piñata was simple to hang from the top of the box. The gift box was sturdy enough to hold a good bit of sweet treasure!

The girls were thrilled taking big wacks at it. The Fox Piñata DIY did last a little bit longer than a traditional store bought piñata, which was a good thing!

The design I provide below allows for good animal versatility, too. As a box, the simple shape means the face can transform easily.

I couldn’t help cutting out a pair of dog ears to show you how it could work. But back to the fox theme!
Fox Piñata DIY
Materials
:: Square gift box, I used this, but these would be better
:: Pencil and sharpie
:: Ruler
:: Box opener/Exacto knife
:: Packing tape
:: Tissue paper in desired color (3 sheets of secondary color, 5 sheets of main color)
:: Scotch tape
:: Scissors
:: Felt for eyes and nose
:: String or twine for hanging
:: Hole punch or awl

Fox Piñata DIY Part I
:: Orient the box with one side that will make the ears/top of the head. Draw pointy ear shapes by first, drawing a line two inches down from the top of the box directly in the center. Next, using a ruler, draw a diagonal line from the bottom of that center line to the top corner of the box. Do this on both sides of the box.
:: Next, draw a line across the center of the top side of the box.
:: Using the box cutter, cut along the center line you just drew at the top of the box. Also cut along both edges of the top of the box, so you will effectively be able to peel back the top of the head. On one side of the box, this will simply remove rectangle parts of the top of the lid. Once these cuts have been made, you can open the top of the head. Next, on what will be the face of the fox and the back of the head, cut down the 2" center line. Finally, score the diagonal lines from the center to the corner. DO NOT CUT these diagonal lines.
:: Cut pieces out of the top of the head flaps, allowing for a place to insert candy and toys. Fold the triangular scored flaps in towards the center. Next, fold in the tops of the head. Make sure the triangular pieces are under the top of head pieces.
:: Secure the new head shape with packing tape. Next, do the same to the lid all the way around the box.
:: Finally, draw on face of fox following the simple design above.
Now, I suggest poking holes in the top with a hole punch or awl and attaching the string to hang it. (I waited until the end to do this, which was doable, but which would have been easier at this stage.)

Fox Piñata DIY Part II
:: Wrap the box in tissue paper to hide the floral lid of the box, tracing the fox face design on the tissue paper to follow as you add the fluff.
:: The fox piñata DIY design is filled in by placing lengths of tape with multiple tissue paper florets in layers along the lines of the design. As you go, measure the tape against the design shapes before adding the florets as shown in photo.
:: Make tissue paper florets by cutting lots and lots of squares of tissue paper to approximately 3" square. I found this easiest to do by folding one piece of tissue paper back and forth in a three inch accordion fan. Then, I cut 3" squares of the accordion. After that, I slit the folded edges of tissue paper along the sides of the stack that needed cutting.
:: Place florets side by side along measured piece of tape. Place the taped strip of florets next in line along the block of color you’re filling in.
:: Cut out felt circles and nose for face. Attach with tape. Fill in any extra space with florets as needed. If you haven’t already, poke holes in the top of the piñata, and thread through string to hang.
DIY Fox Party Favor Gift Bags
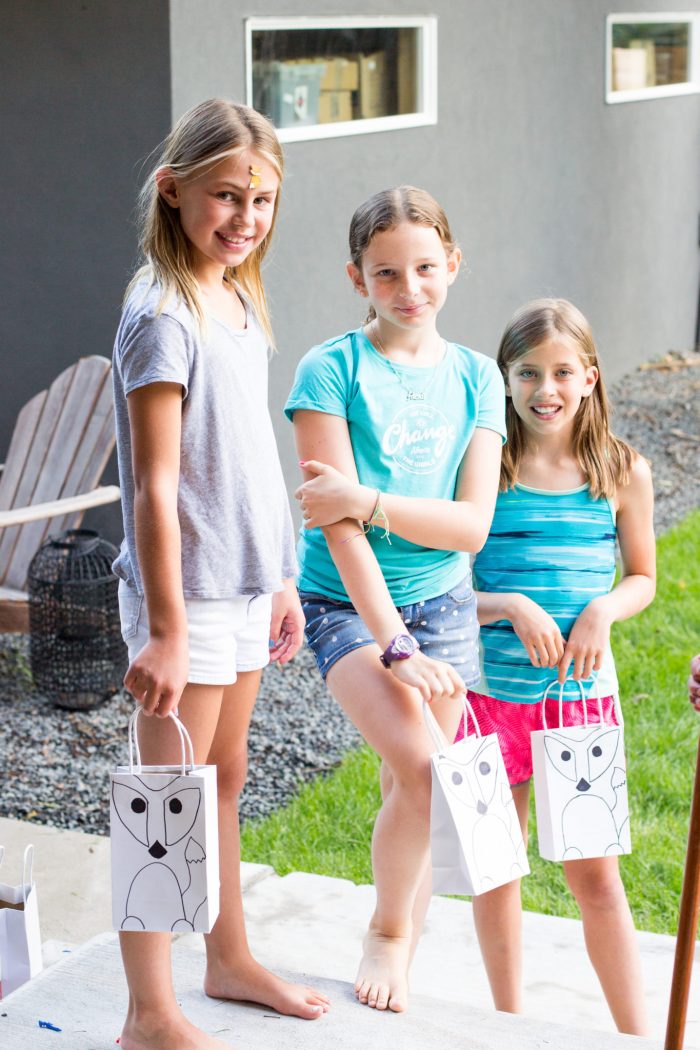

:: First, at the bottom of the bag, draw an elongated half circle for belly. Then, draw two semi-circles for feet.
:: Next, add a curvy tail that goes off to the side, draw in a jaggedy tip.
:: Following this, add a nose, which has a triangular top and arc for the bottom.
:: Next, draw two parallel lines up from the sides of the nose about 3/4 towards the top of the bag.
:: Next, draw two arcs towards the corners of the bag.
:: Following, draw two arcs to connect the corner of the eyes to the parallel lines. Finally, draw two circles inside the eye patches as shown on bags above. Use a sharpie to go over any lines.
Happy July to everyone! Hope you’re enjoying some lazy summer evenings!
Leave a comment
This site is protected by reCAPTCHA and the Google Privacy Policy and Terms of Service apply.