As part of the Microwave and Solar Dying Tutorial I made some red speckled strands. I was originally planning to use those strands in a braiding project, but I felt like the really cool uneven effect was being lost, so I switched things up to make these tassels instead. Learning how to make tassels gives you the option to add a little coordinated decoration to anything you make, and the method I’m using makes it easy to not end up with a pile of 4 inch long string tangle. I’m absolutely obsessed with microwave dying now, so I added in some other colors and included a how-to on dying ombre tassels as well.


- sharp scissors
- string/yarn/cord (I’m using #10 cotton crochet thread that I dyed using the Microwave Dying Tutorial)
- scrap string for temporary tying
- ruler
- masking tape
- fray check or clear fabric glue (optional, but highly recommended)
- something tassel height to wrap around – I’m using the 2 inch tall ruler, but a piece of cardboard or other handy rectangle would work, too
- small microwavable containers and dye if you’re trying the ombre (again, check out the Microwave Dying Tutorial for more information)

Set up 2 pieces of string that are each 12 inches | 30cm long. One will be the top tie string, the other will be a temporary lower tie for alignment. Tack them in place on your wrapping rectangle with a little masking tape.

Wrap your tassel strand around the rectangle and the tie cords, making neat rows. I used 5 yards | 4.5 meters of #10 cotton for each of the tassels in the pictures.
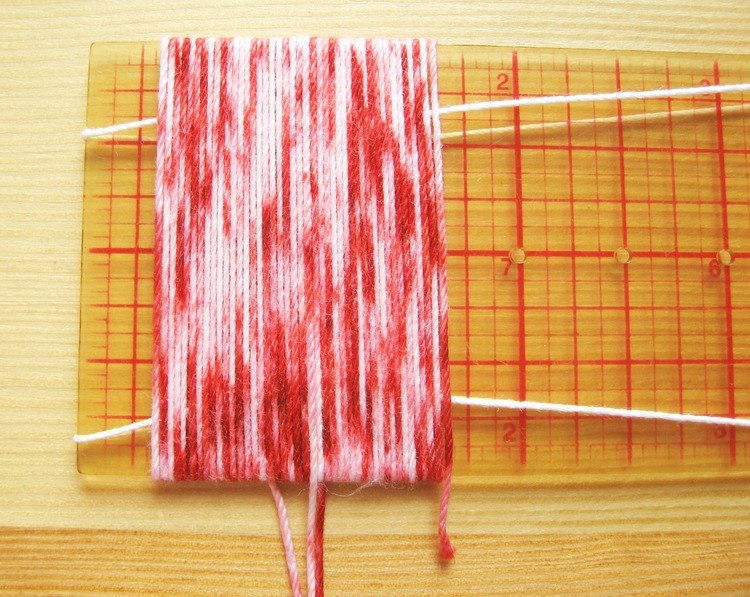
Make sure the start and end of the string are on the same side of the rectangle. (This tassel used two pieces of dyed cord that I cut for something else that I didn’t end up going with, that’s why I have extra tails.)

Gently pull one end of each tie string from the back, leaving it through the wrapped tassel cord only once.

Tie each strand at top and bottom in a bow or some other easy to untie knot.

Gently slide the wrap off of the rectangle.

Tighten and re-tie the two strands. Pull on both of them at the same time to help straighten and arrange your tassel. Take your time and even them up, this step is what makes your finished tassel look nice.

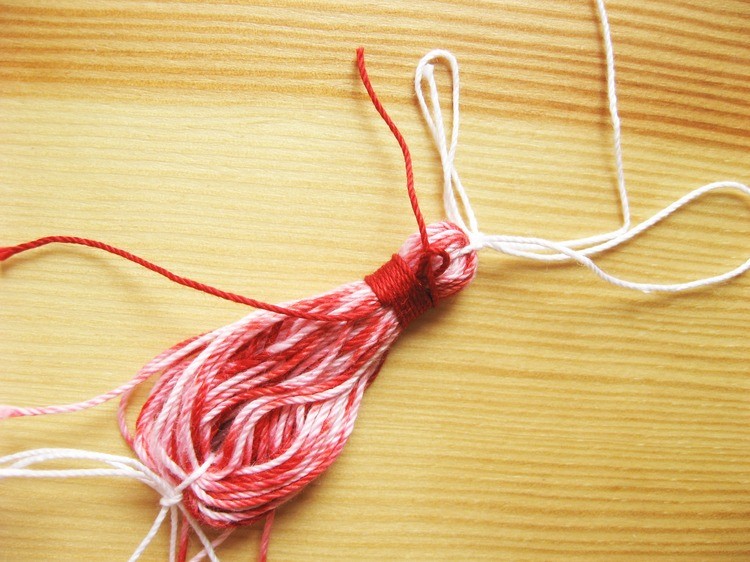
With a piece of matching or contrast cord, make the wrap near the top of the tassel. Start with a zig-zag like this to make a loop.

Lay that on top of your tassel, then wrap it around and around the tassel, moving toward the top of the tassel/the top loop formed by that zig-zag. I generally place my right thumb on the loop and hold the top of the tassel with my right hand, and use my left hand to wrap. Wrap it tight.

When you like how many wraps you have (I used 7 wraps) cut that strand and thread the end through the loop formed at the start.
Pull on the other end of the wrap strand. Keep the wrapping tight and gently pull that loop behind the wrap.
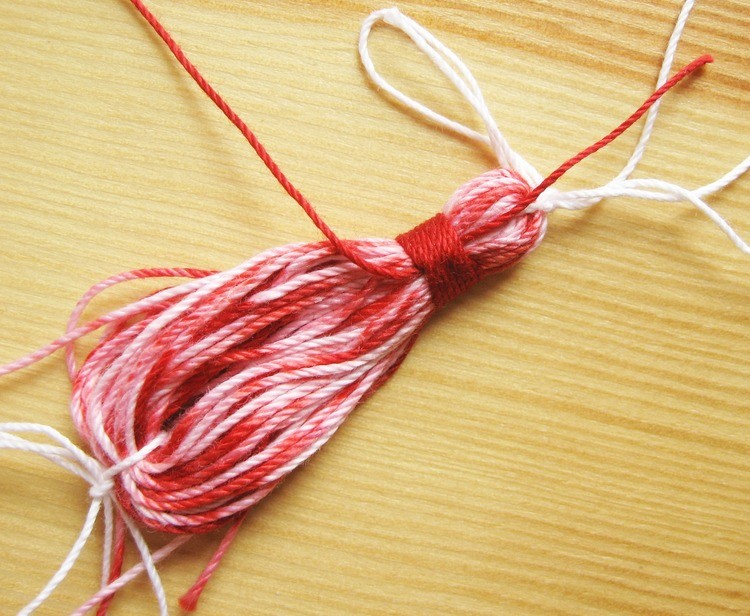
The ends should tuck behind like this. Pull on both ends of the wrap cord to tighten it. Add a drop of fray check or clear fabric glue at each of the tails (optional, but recommended) then trim the tails. If the wrap matches the tassel strands you don’t need to cut the lower tail.

Use that lower tie to help adjust anything that went wonky during the wrap, then remove the lower tie and cut the lower loops. Cut a few at a time to make sure you’re cutting at the center. (I’m aiming for perfect tassels, not quick tassels!)


Trim the lower edge until it’s nice and even. That’s all, the tassel is ready to go.

If you want an ombre tassel, make a plain colored tassel (ideally from cotton that has been soaked in washing soda, as in the Microwave Dying Tutorial). Make the tassel as usual, but instead of a finished wrap, just tie it temporarily near the top.

Cut the lower loops and trim off an really long strands. Cutting before dying encourages a nice ombre because it’s easy for the dye to soak in evenly.

Set the tassels into the small cup so that they just touch the bottom. Tape the ties on the outside to keep them from falling over. This cup was a cleaned out yogurt container destined for the recycling bin.

Add a small amount of water, then a couple drops of dye. If the dye doesn’t soak up high enough you can mist the tassels with a little water to encourage it. Cover the top with a square of cling wrap and piece of paper towel, then microwave in 15 second increments for a total of 2 minutes. Rinse with lots of cool water from the top down so that dye doesn’t move up into the un-dyed area, and leave to dry.


Temporarily tie around the tassel lower down and remove the tie from near the top.

Wrap it the same ways as before. Use a light hand – it’s not as sturdy as the tassels that are still looped at the bottom.

Trim off the bottom to make it even.

All that’s left now is to hang tassels on everything!

