I've been loving the geometric trend, whether inspired by the Aztecs or something a little more modern... marry that with a love of colour and you pretty much get pretty coloured diamonds in a harlequin kind of style..
Having seen a few different examples on line, I thought why do double crochet, when I could get a more solid / flat look from tunisian crochet.
Feeling a little inspired by the look at the wonderful Wood & Wool Stool I have made a rectangular cushion - the proportions work well with the harlequin pattern.
I'm really pleased with the result - just what I'd envisaged!
And I'm loving it with our lovely bright new floor rug:
My final cushion is approximately 40cm wide by 28 high.
Now for the how to.....
What you need:
3 ply cotton yarn in colours of your choice
3mm crochet hook (suitable for tunisian crochet)
I've used 6 colours that I have on hand for a bright, bold look, but this could easily be adapted to 3 or 4 colours, tonal or complementary.
All we are doing here is making triangles and joining them together (or joining as we go - more on that later...). So have a little think about the approximate placement of your different colours for your design before you get started.
Or, if you're happy with your colours, do as I did and go completely freestyle, choosing your next colour one triangle to the next... feeling it out as you go... Just make sure you have enough yarn of each colour up front!
This pattern uses 45 triangles and 6 half triangles (to square off each row) for each side.
You could do this on both sides, or if you want to mix it up as I have, use double crochet stripes for the back.
For the front I've used:
Pink - 8 triangles, 2 half triangles
White - 8 triangle, 2 half triangles
Pale Blue - 8 triangles
Navy - 6 triangles, 1 half triangle
Yellow - 7 triangles
Red - 8 triangles, 1 half triangle
So getting started...
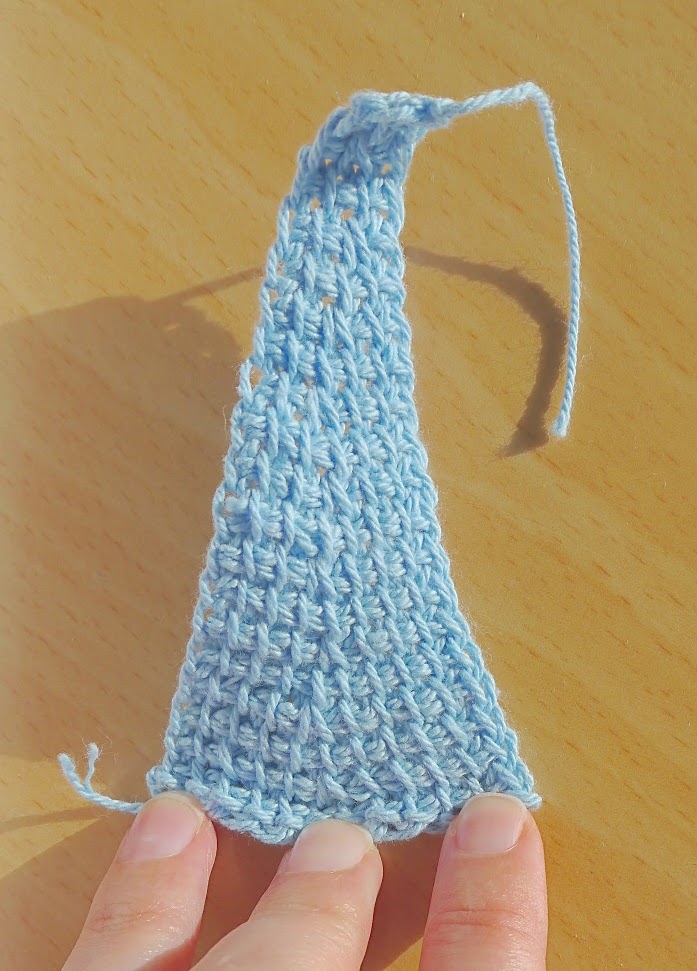
Chain 13 in any colour of your choice... This is going to be the base of your triangle (i.e. the edge where my fingers are below).
Tunisian crochet your first 2 rows (that means back and forth x 2).
On your next row decrease one stitch by crocheting 2 posts together... that is: when you're picking up your stitches to add onto your hook, hook through 2 posts and pull your thread through - you've just decreased - nice work! I've decreased in the centre, to keep my pattern nice and symmetrical, so for this first decrease I've picked ups posts 6 & 7 for my decrease. You can see this in the pattern below, just above my middle finger - the 2 posts together form a little triangle.

Keep crocheting back and forth, decreasing one stitch on every other row. Keep your decrease stitches in the centre to keep the pattern nice and even.
When you're down to 3 stitches on your hook, pull your yarn through all 3 to cast off.
1 down... just 44 to go!
From here, you have 2 options as mentioned. You can keep going with your individual pieces:
Or you can joint as you go...
To do this.... when starting your next triangle, make your first chain through the point of your first completed triangle. Continue your chain stitches, so you have 13, just like previous. Then continue with the first part of your tunisian crochet, picking up your stitches. When you come to the end of this first row, you'll meet with your previous, completed triangle, so pick up your last stitch through the end / last stitch of that triangle, so that the 2 become attached... then complete your row, dropping off your stitches as normal. Simply keep attaching in this way as you go. As you can see above, this gives a nice rolled looking edge at the join.
You're also going to need 6 half triangles to complete to give a straight edge at both ends of each row. To do this, start with 7 chain on alternate rows. This time, I've decreased on one edge, so that one edge becomes angled, the other stays straight:
When you attach the half triangle to a full triangle, you will have a nice straight edge, like this:
From there, it's repeat repeat repeat....
Until you have completed one side of your cushion...
From there, you can either continue in the same way for your second side, or, for stripes go on as follows...
Double crochet (that's English DC) along one long edge of your front cover and tie it off. You can see above, that I've done this in Navy - this will become the top edge of your cushion. This really is just neaten this edge up and make it easier to join your two edges together later, to close up your cushion. I've used Navy above.
Then, DC along your top edge... you can either keep going from here, or tie off and treat this make this back side of your cushion completely separately - its up to you.
I've continued on in one piece for mine. DC into the back loop of the previous row only (as opposed to through the complete chain), to give a nice horizontal ridged effect.
DC 6 rows in total, to give the effect of 3 ridged rows, in each colour... as below. Then switch to your next colour and repeat...
I've chosed to use just five of my colours for this (omitting white... honestly I am using up what I have and wasn't going to have enough of the white to complete this job without running out!)
Keep going until you have 14 bands of colour, which should give you the same size as your front pieces...
Now the sides are a little loose for joining together tiredly, so I've gone around the sides with another row of DC. I've "eased" the edges in a bit to tighten these up, so that I'm DC 4 stitches to each band of colour - this will give a neater finish on the completed cushion.
If you don't have a cushion to fit... now would be a good time to make one. I've made this with some old acetate lining and some cushion filler. 40 x 28, bag it out and hand finish...
A little bit lumpy, but I'm sure I can beat the lumps out of it before long!
Now to close up / join your sides together. DC 3 sides together, leaving one short end open, to insert your cushion. Because I continued my front and back sides in one piece, I also DC'd along the join line between the 2, to give it a consistent finished edge...
Insert your cushion and DC along the final edge... tie off... leave yourself a long tail and pull it though to the other side - then it's easy enough to unpick this last short edge should want to take the cover off to wash - it will only take a few minutes to close again afterwards and it will give a neater finish than inserting a zip etc...
And you're done!
Let me know what you think...
Labels: Colour, cushion, DIY, geometric cushion, harlequin cushion, pattern, Tunisian crochet, Tunisian crochet cushion, tutorial