
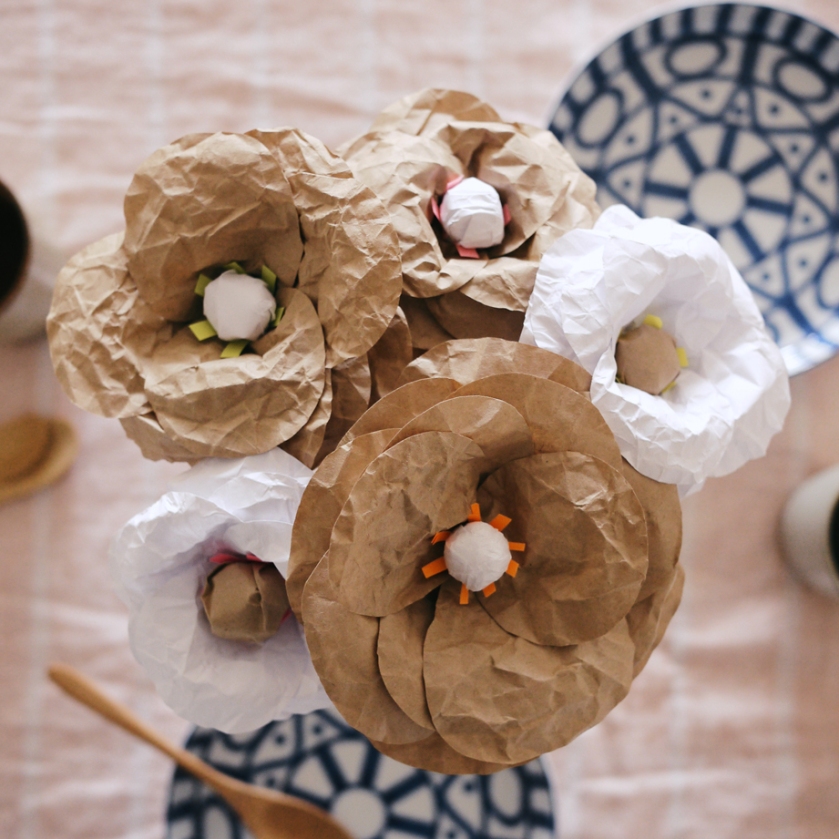
I really like all the paper flowers that have been popping up on the blogs lately. Here is my version with a tutorial, using natural tones and a little splash of neon (because neon, right?!).
To make these flowers you will need:
– brown paper
– white paper
– small pieces of neon paper, scraps from a previous project will do
– wooden sticks, I found mine in the art shop, a big hardware store would probably have something similar
– sticky tape
– black washi tape
– pencil
– scissors
– tweezers
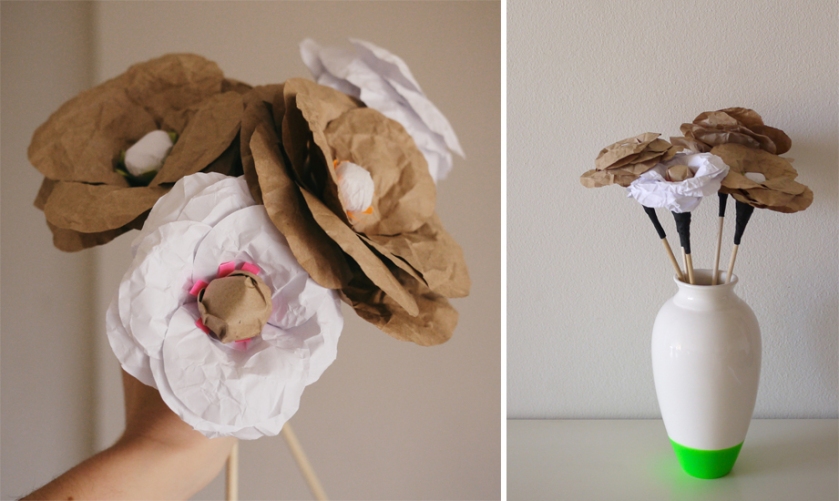
This tutorial will show you how to make the brown flowers – just reverse it for the white ones.
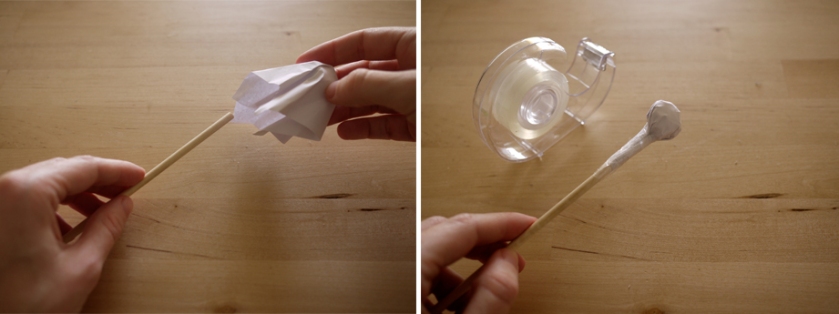
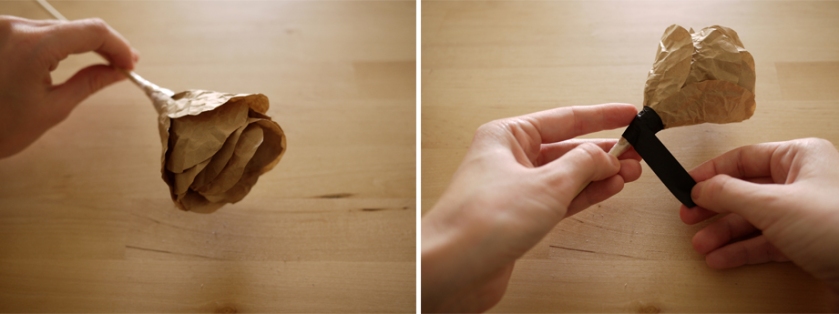
To make the centre of the flower, cut two squares of white paper, less than a quarter of a sheet will do. Scrunch up one square into a ball, and cover with the second square. It should look like a little ghost (!). Place this on top of the wooden stick, and use sticky tape to secure it. Be sure to wrap the tape tightly and tape all the way down to the actual stick, otherwise it will slide off.
Next step is to add the neon trim. Cut your neon paper into five or six small strips. Use sellotape to fix these one by one around the bud, the tweezers will help you slot each piece in as you wrap the tape around. I like to add one more layer of tight tape at this point, just to keep everything secure.
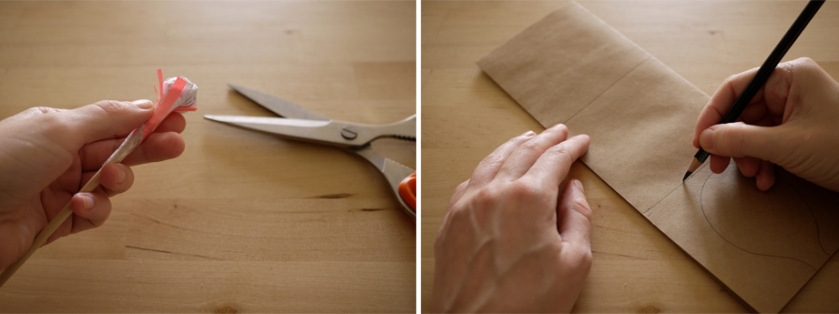
Now you are ready to make the petals. Each flower uses twelve petals. To create twelve, take two sheets of A4 kraft paper, and fold them in half together, long ways. Lightly mark off three sections, and draw a petal shape in each section. I was not very precise with my shapes, as once they are on you can’t tell. They should be balloon-shaped, it is easier to fix them to the stick with the little tail on the end. Hold all four layers together and cut through all of your pencil lines. Cut slightly inside the lines so that you don’t end up with any visible pencil marks. You’ll now have twelve petals. Scrunch each petal into a ball.
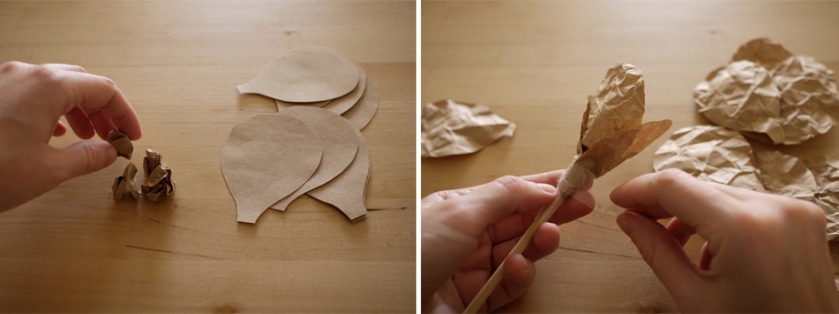
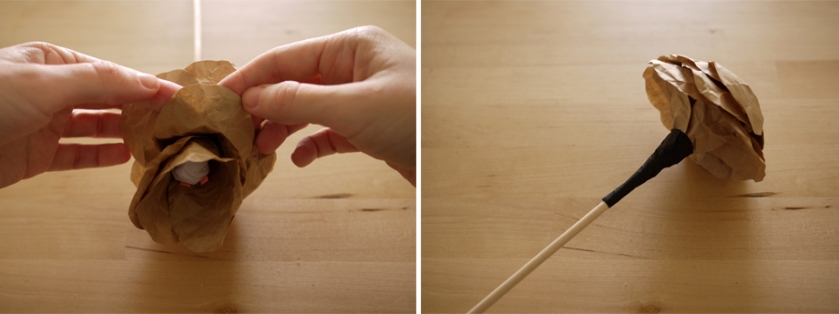
To fix the petals to the stick, uncurl them and tuck the tail end around the stick just under the centre bud. I prefer to add them one at a time, it is less fiddly and easier to secure them. Use a strip of sticky tape to tightly secure them to the stick. It is a good idea to have some lengths of tape pre-cut, so you can just grab them. Continue to add the petals working around the flower, checking for the best placement each time. At this point all of the petals will be facing upwards, and the flower will look a little closed – you will curl them out later.
Once you have all your petals added, use the black washi tape to cover the sticky tape. Wind it tightly, and continue down until you reach the stick. Next, you can shape the flower. Starting from the outermost petals, gently bend each one back against your finger until it curves outwards. The crumple of the paper should help the petals take shape easily.
Pop them in a vase or jar, and you are done!
For more South by North diy fun, click here.

Pingback: 20 Pretty Flower Crafts | Little Red WindowLittle Red Window
Pingback: DIY: Flores de papel para el verano | Decoración 2.0
Pingback: DIY: Flores de papel para el verano | AutoBlog
Pingback: DIY: Hacer flores de papel craft | Tutoriales para manualidades
Pingback: Decorar con flores y plantas: naturales, artificiales o cultivadas
Pingback: Decorar con flores y plantas: naturales, artificiales o cultivadas - zona-inmobiliaria.com.vezona-inmobiliaria.com.ve