
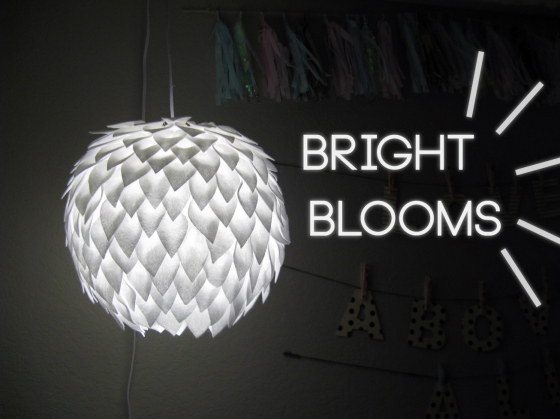
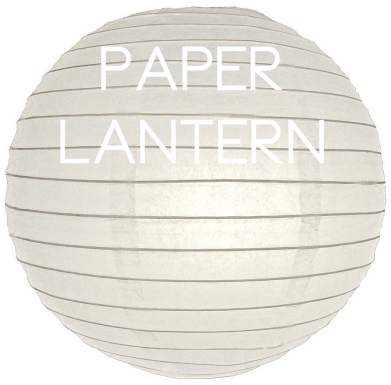
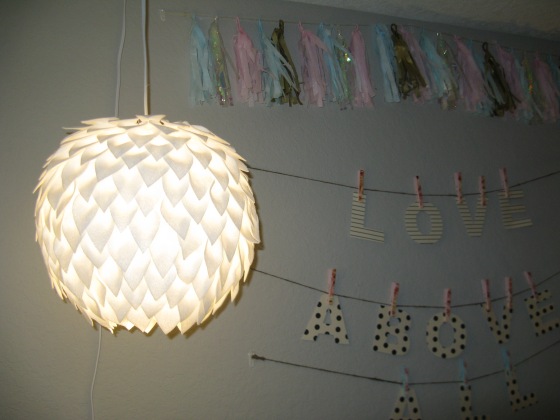
Pretty up an average white paper lantern with soft, playful petals.


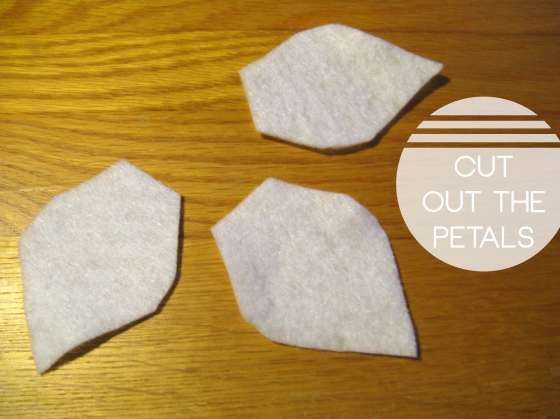
And this Petal template to help you cut precisely if you’re a perfectionist like me.
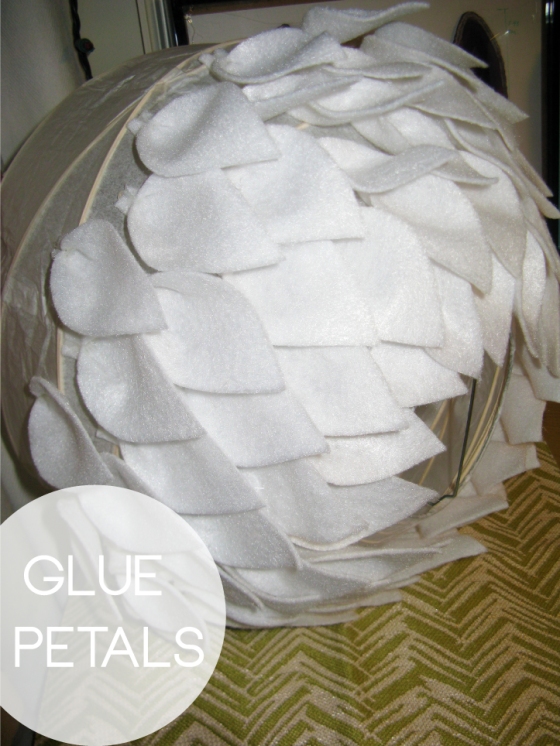
*(Specifics: To cover my 8″ diameter paper lantern — about $10 including the hanging cord — , I used about 12 sheets of wool felt, which I found at my craft store for 25 cents a piece. Cheap, right?)
Step 1. Print out the template and cut out the petals. Be sure to use extra sharp scissors or else the felt will fray. I used fabric scissors and they worked wonderfully. Plus, sharper scissors allow you to cut multiple pieces of felt at once, making the whole process go muchhh faster (trust me, you’ll regret it if you go one by one).
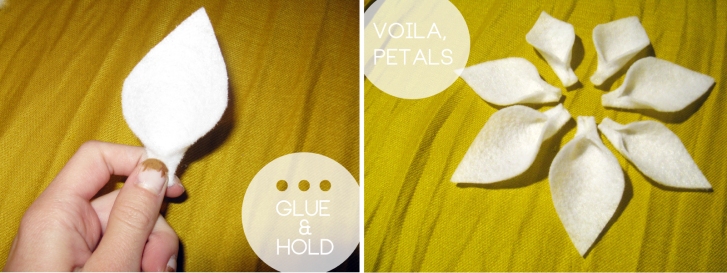
Step 2. Using a hot glue gun, dab a small bit of glue onto the center of the wide end of the petal. Wait a few seconds and then fold the corners inward, squishing the petal in between your thumb and pointer finger together to ensure a tight bond. Hold it for a few seconds or else the corners will slowly unfurl. Caution: do not squeeze your fingers directly on the glue. That glue is hot. Like super hot. If you’ve never been burnt by hot glue before, you want to keep it that way!
Step 3. Starting at the bottom opening of the paper lantern, begin attaching the petals in a circle side by side with hot glue. The tighter the space between the petals, the more full and beautiful your lamp will turn out. In the next layer, overlap the petals about halfway over the first, as shown in the picture. This part takes a while but its fun to watch your lamp gradually come to life!
And that’s it! Hot glue dries pretty quickly so your lamp will be ready to hang almost as soon as you’ve finished glueing the last layer of petals. Since the paper is so thin, be sure to use a cool, low-energy lightbulb to prevent catching on fire. (They’re a tad more expensive than average lightbulbs, but it’s worth staying fire-free).
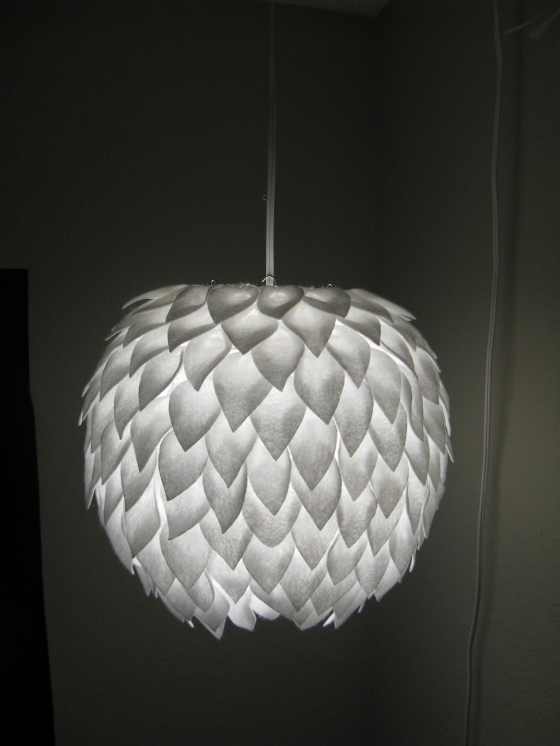
The petals create fun shadow play and a nice, soft glow.
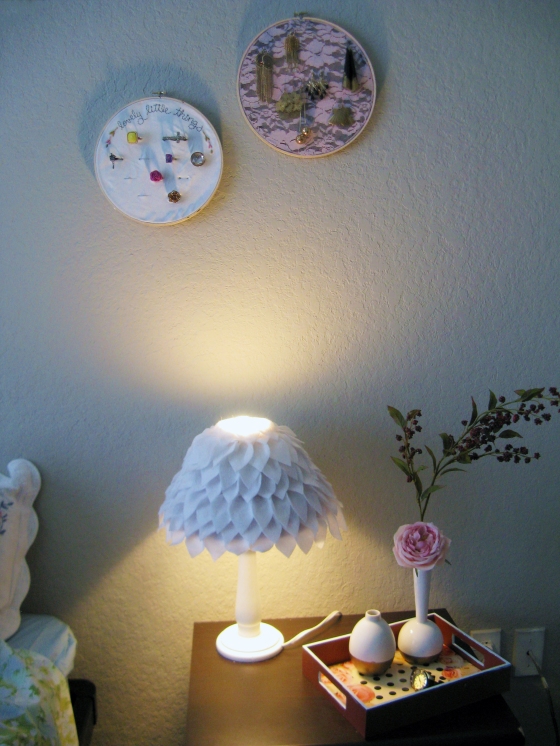
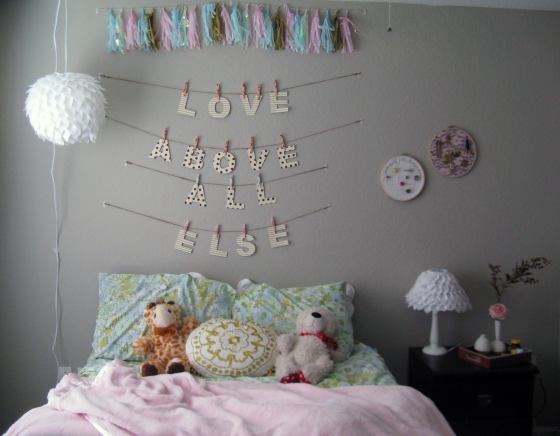
I loved my paper lantern so much that I made a second variation for the opposite side of my bed. I used all the same steps, just on a flared lampshade.

Love this!
thank you!
Amazingly creative!!
you are so nice, thank you!
love it so much. i wanna make this someday.
thank you! definitely let me know if you try it!
I’ve got all the supplies sitting in front of me and I’m about to start making this! I’ll pot a pic (with link back obviously!) on my blog when I finish! I can’ wait.
that’s so awesome! i can’t wait to see how it turns out!! thanks so much for reading! ❤
Do you think this would work fine with other kinds of fabric?
Hm I’m not sure. Felt works exceptionally well because it has a stiffness to it, but maybe if you used a thick fabric or used starch to stiffen it?
This is gorgeous!
Thanks so much!
Pingback: 2013 firsts: a book and a craft « Cookies and Crafts
Just came back to tell you I made this and I love it!! Yours looks much better, but I didn’t fold the petals over. I’m kind of lazy like that.
Pingback: DIY Petal Lamp | What Else Michelle
Hi! I am so in love with your lamp, I couldn’t resist posting it on my blog. Thanks for the inspiration. 🙂 Here’s the link: http://www.whatelsemichelle.com/i-am-in-love-with-a-lantern/
thanks so much! i LOVE your blog!
Pingback: Crafties | Pearltrees
How much felt did you use xx I love it am on my way to pick up a glue gun now!
hey jodie! for the lantern I think I used about 12 sheets of 9″ x 12″ and a bit fewer for the lampshade! have fun crafting!
This is awesome! Can you tell me where you got your lantern?? And is it made to be an actual light or is it a decorating lantern?? I’m having trouble finding a plain round lantern that is actually designed to be a light. Thank you!
hey stephanie! yea I bought my lantern kit from World Market, it came with the plain lantern and a cord. I think it was just meant to be a plain light. I would also try a party supply store for some cheap ones!
BOA TARDE,NÃO TENHO LUSTRE,COMO FAÇO PARA COLOCAR AS PÉTALAS,O QUE POSSO USAR.
hi simone! i’m sorry, i don’t speak any portuguese, but from what google translate told me you don’t have a lamp. i found a pretty plain one on amazon.com that you could use! http://www.amazon.com/Weddingstar-Round-Paper-Lantern-Medium/dp/B005HOLQ0C/ref=sr_1_1?ie=UTF8&qid=1359483474&sr=8-1&keywords=paper+lantern
Pingback: Wi Fi Horizon, use copoun inside
Pingback: Lámpara de papel decorada - Guía de MANUALIDADES
Bellissima idea ….ciao dall’Italia
Excuse me but paper lantern can you build it?
This is absolutely beautiful. I was shopping for a ceiling fixture for my kitchen on the weekend and the lighting place I went to had this (of course it was made of porcelain petals) but I just loved it. I of course didn’t buy for my kitchen but was fascinated by its beauty. Good for you!
Pingback: DIY Petal Lamp | Home and Heart DIY
love thec= DIY!
PS please follow and visit my blog for cute DIY Ideas as well!